
Smart Water Timer Setup for Balcony Container Vegetable Gardens
Set up a smart hose timer and drip irrigation for balcony vegetables without overwatering pots, wasting water, or creating runoff problems for neighbors below.
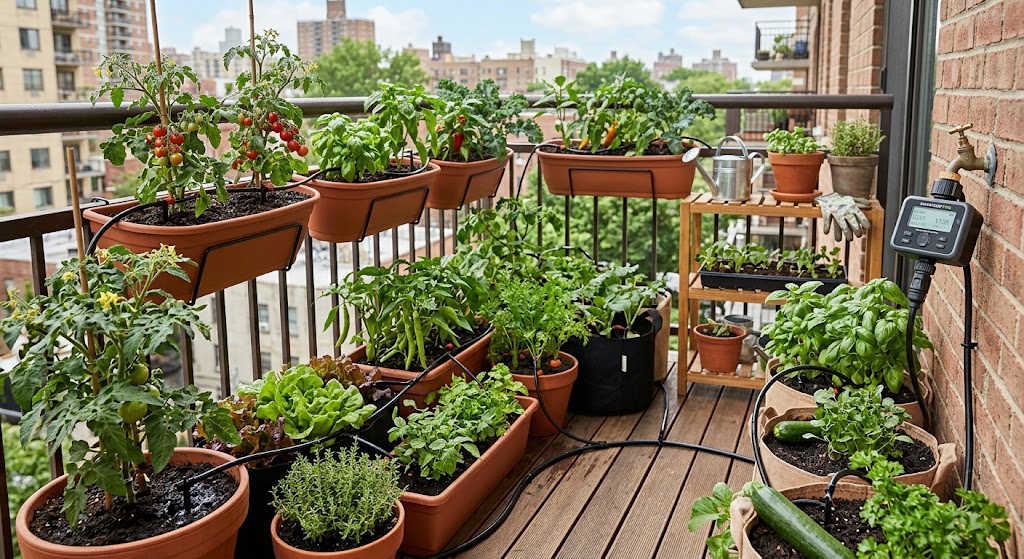
Quick answer
A smart water timer works well for balcony container vegetables when it controls a low-flow drip system rather than an open hose. Start with short scheduled runs, confirm that every pot becomes evenly moist and drains properly, then adjust duration and frequency for container size, crop type, sun, wind, and weather instead of relying on one fixed schedule all season.
Table of contents
- Why balcony containers need a different watering strategy
- The variables that matter most
- Start with drip irrigation, not an open hose
- A practical balcony layout
- Check whether your balcony can support a timer at all
- You need a suitable water source
- Check the lease and balcony rules
- Confirm drainage before automation
- Build the irrigation system before programming the app
- Step 1: Group pots by similar water demand
- Step 2: Choose emitter flow deliberately
- Step 3: Secure every connection
- Step 4: Run a manual leak test
- Calibrate runtime with the pots, not the timer’s defaults
- Use a manual calibration cycle
- Measure emitter output if the system is inconsistent
- Set frequency from actual drying behavior
- Start conservative and observe
- Split watering can help fast-draining containers
- Use weather automation carefully on covered balconies
- Treat rain skip as an assist, not an authority
- Account for heat and wind without chasing the forecast every hour
- During a heatwave
- During cooler weather
- During windy periods
- Configure the smart features that actually matter
- Scheduling
- Manual watering
- Rain or weather delay
- Battery alerts
- Flow or fault notifications
- Prevent the most common balcony automation failures
- Emitter falls out of the pot
- Hose or fitting leaks upstream of the emitters
- Drainage tray overflows
- Wi-Fi or hub goes offline
- Battery dies
- Plant grows but the schedule does not
- A useful starting configuration for a small balcony
- Test the system before relying on it while traveling
- Apartment safety matters more than perfect automation
- Conclusion
Key takeaways
- Calibrate runtime by observing your actual pots and emitters instead of copying a generic number of minutes.
- Container size, material, sun exposure, wind, crop type, and drainage can change watering frequency dramatically even on the same balcony.
- Weather automation is helpful only when local rain and temperature data reflect what the containers actually experience.
- For apartments, preventing leaks and runoff is as important as keeping vegetables watered.
Editorial transparency
Who worked on this article and how it was handled.
- Written by
- Maya Chen
- Creation method
- Editorial research
AI assistance: AI assisted with research organization and drafting. Sources, factual claims, and the final article should be reviewed by a human editor before publication.
A balcony vegetable garden can go from healthy to wilted surprisingly fast. Containers hold less soil than in-ground beds, wind accelerates evaporation, and a sunny wall or railing can create a hotter microclimate than the weather app suggests.
A smart water timer can solve the consistency problem, but only if the irrigation system is calibrated to the containers. Automating the wrong amount of water simply makes under-watering or overwatering happen on schedule.
The best setup combines a smart hose timer, low-flow drip emitters, good drainage, and a schedule based on what the pots actually need. This guide explains how to build that system for a balcony vegetable garden while minimizing runoff, leaks, and unnecessary water use.
Why balcony containers need a different watering strategy
Container vegetables do not behave like vegetables planted in the ground.
Illinois Extension notes that containers can dry quickly and may require frequent watering. The exact frequency changes with season, location, container material, plant type, and how long the pot has been planted. Wind and reflected heat can accelerate drying even further on balconies.
That variation is why a fixed rule such as “water every morning for 10 minutes” is a poor starting point. Two containers beside each other can have very different needs if one holds a mature tomato and the other holds herbs, or if one is a large glazed pot and the other is a small fabric grow bag.
The variables that matter most
| Variable | What usually happens |
|---|---|
| Smaller container | Dries faster |
| Larger container | Holds moisture longer |
| Fabric or porous clay pot | Loses water faster |
| Glazed or plastic pot | Usually retains moisture longer |
| Full afternoon sun | Increases demand |
| Windy balcony | Increases evaporation |
| Large fruiting vegetable | Usually needs more water than a small herb |
| Dense mature root system | Can empty a pot’s available water quickly |
The timer should adapt to those differences rather than forcing every container into one identical schedule.
Start with drip irrigation, not an open hose
For balcony vegetables, low-flow drip irrigation is usually the most controllable way to automate watering.
University of Georgia Cooperative Extension notes that drip irrigation places water near the root zone while keeping foliage drier than overhead irrigation. A basic drip system commonly includes a filter, pressure reducer, supply tubing, connectors, and emitters. A timer can then automate the water source.
That architecture fits balconies well because it limits overspray and lets you target individual pots.
A practical balcony layout
A typical setup looks like this:
faucet or approved water outlet → smart timer → pressure regulator → filter → main tubing → individual drip lines → emitters in each pot
Depending on the kit, the filter and pressure regulator may be combined or arranged in a different order. Follow the irrigation-kit and timer manufacturer’s instructions rather than improvising connector sequences.
The important design principle is that the timer controls a predictable low-flow system, not a hose nozzle spraying across the balcony.
Check whether your balcony can support a timer at all
Before buying hardware, confirm the physical and building constraints.
You need a suitable water source
Smart hose timers are generally designed around threaded outdoor-style water connections. Connection standards vary by region, and operating-pressure requirements vary by product.
For example, Eve lists a specific threaded connection and an operating pressure range for Eve Aqua. Other timers have their own requirements. A kitchen faucet adapter, indoor plumbing modification, or improvised connection should not be assumed safe or compatible merely because the threads appear to fit.
If the apartment has no approved balcony faucet, ask the landlord or building management before modifying plumbing.
Check the lease and balcony rules
Some buildings restrict:
- attaching equipment to exterior plumbing;
- leaving hoses permanently connected;
- water discharge over balcony edges;
- planters that drain onto lower units;
- heavy containers or water reservoirs;
- objects attached to railings.
These rules matter because an irrigation failure in a multi-family building can affect someone else’s property.
Confirm drainage before automation
Every vegetable container needs drainage. Illinois Extension advises watering deeply enough for water to reach the bottom of the container, but apartment growers also have to control where that drainage goes.
Use saucers, trays, risers, or other building-appropriate drainage management where needed, but do not leave vegetable roots sitting permanently in standing water.
Build the irrigation system before programming the app
The smartest timer cannot compensate for uneven emitters or leaking tubing.
Assemble the physical system first and test it manually.
Step 1: Group pots by similar water demand
If your timer has only one outlet, try to put plants with similar watering behavior on the same irrigation line.
For example:
- mature tomatoes and cucumbers may form one high-demand group;
- peppers and eggplants may form another moderate-demand group;
- Mediterranean herbs such as rosemary may need a much drier regime.
Do not automatically give every container the same emitter count.
Step 2: Choose emitter flow deliberately
A large tomato container may need more water per cycle than a small basil pot. You can balance the system using different emitter flow rates, multiple emitters in a large container, or separate zones if the timer supports them.
The goal is not identical flow everywhere. The goal is appropriate water delivery to each root volume.
Step 3: Secure every connection
Balcony irrigation tubing is exposed to movement from wind, furniture, pets, cleaning, and people walking nearby.
Secure tubing so an emitter cannot easily fall out of a pot and dump the entire scheduled watering cycle onto the floor. Leave enough slack that moving a pot slightly does not pull apart a fitting.
Step 4: Run a manual leak test
Turn the system on while you are present and inspect:
- the faucet-to-timer connection;
- timer outlet;
- regulator and filter fittings;
- main tubing;
- every branch connection;
- emitters;
- drainage from each pot.
Do not leave the balcony until you have watched at least one complete watering cycle.
Calibrate runtime with the pots, not the timer’s defaults
This is the most important setup step.
A timer measures time, not whether the tomato root zone is actually wet. Ten minutes with a 0.5-gallon-per-hour emitter is very different from ten minutes with multiple higher-flow emitters.
Use a manual calibration cycle
Start with the potting mix at a normal pre-watering condition, then:
- Run the timer manually for a short period.
- Check how evenly the surface and root zone become moist.
- Observe whether water begins to drain from the bottom.
- Stop before runoff becomes excessive.
- Record the runtime.
- Repeat on the driest and wettest containers in the zone.
Illinois Extension recommends watering containers thoroughly enough that water reaches the bottom and drains through the holes. For automation, that does not mean every cycle must produce a large puddle. It means you should verify that irrigation is reaching the full root zone rather than merely wetting the top inch.
Measure emitter output if the system is inconsistent
If one pot remains dry while another floods, catch the output from individual emitters in measuring cups for a fixed time. Large differences can reveal clogged emitters, pressure problems, or mismatched flow rates.
Fix the hardware before trying to solve uneven watering with longer schedules.
Set frequency from actual drying behavior
Once runtime is calibrated, determine how frequently the pots need that amount of water.
For the first week, check moisture manually every day. A finger check, pot weight, or suitable moisture sensor can help establish the pattern.
Illinois Extension recommends frequent checks because container moisture can change quickly. The aim is to avoid both extremes: allowing the potting mix to dry out completely and keeping it continuously waterlogged.
Start conservative and observe
A practical schedule might begin with one early-morning cycle on the days your pots normally need water. Then adjust based on what happens before the next scheduled run.
If the vegetables wilt and the root zone is dry well before the next cycle, increase frequency or volume. If the mix remains saturated and drainage trays stay wet, reduce watering.
Do not change runtime and frequency simultaneously if you can avoid it. Changing one variable at a time makes the system easier to understand.
Split watering can help fast-draining containers
Some potting mixes shed water when they become very dry, allowing water to run down the gap between the root ball and container instead of rewetting the media evenly.
In that situation, two shorter cycles separated by a pause can sometimes rehydrate the pot more effectively than one long run. The first cycle starts rewetting the mix; the second has a better chance to soak in.
This is similar in principle to cycle-and-soak irrigation, but the correct timing has to be verified with your specific containers.
Do not use split cycles merely because the timer supports multiple start times. Use them when observation shows that the pots absorb water better that way.
Use weather automation carefully on covered balconies
Smart timers from systems such as Orbit B-hyve and Rachio can use weather information to delay or skip watering. That can prevent obvious waste, but balcony gardens create an important edge case.
Forecast rain does not mean your pots received rain.
A balcony under another floor, awning, roof, or deep overhang may receive almost no precipitation even during a heavy storm. If the timer skips watering because a nearby weather station recorded rain, the vegetables can still dry out.
Treat rain skip as an assist, not an authority
After every weather-based skip during the first few weeks, check the containers manually.
If the pots routinely remain dry after forecast rain, disable automatic rain skip for that schedule or use a system that lets you control the threshold more precisely.
Conversely, an uncovered balcony may receive enough direct rain that the skip feature is genuinely useful.
Account for heat and wind without chasing the forecast every hour
Balcony microclimates can differ sharply from official weather data.
A south- or west-facing balcony can become much hotter than the reported air temperature because concrete, brick, glass, and metal absorb and re-radiate heat. Wind can also pull moisture from containers quickly.
That does not mean you should constantly edit the schedule based on forecast temperature. A better approach is to create a reliable baseline and then adjust during sustained weather changes.
During a heatwave
Check the containers earlier than usual. If the mix is drying too quickly, increase frequency modestly or add a supplemental cycle rather than immediately doubling every runtime.
During cooler weather
As temperatures fall and plants grow more slowly, the same summer schedule can leave pots waterlogged. Gradually reduce frequency based on actual moisture.
During windy periods
Pay extra attention to small, hanging, fabric, and unglazed containers. Illinois Extension notes that wind and reflected heat increase drying, particularly for exposed containers.
Configure the smart features that actually matter
Connected watering products offer many app features, but only a few materially improve balcony vegetable care.
Scheduling
The core feature is still a repeatable start time and duration. Rachio and Orbit both provide configurable schedules, and Eve Aqua supports autonomous watering schedules within its ecosystem.
Schedule early enough that you can notice problems before leaving for the day when possible.
Manual watering
Manual control is useful after transplanting, fertilizing according to plant-care instructions, or during an unusual hot day. Orbit and other timer ecosystems allow temporary manual watering without permanently rewriting the schedule.
Rain or weather delay
Useful for uncovered balconies, but validate it against actual rainfall at the pots.
Battery alerts
A battery timer should not silently fail while you are away. Rachio documents low-battery notifications on its Smart Hose Timer, and other products expose battery status in their apps.
Replace batteries before a trip rather than waiting for the last warning.
Flow or fault notifications
Some smart watering systems provide flow-related notifications or monitoring. These can add useful awareness, but they should not be treated as a guaranteed leak-prevention system unless the manufacturer explicitly documents that capability for your setup.
Prevent the most common balcony automation failures
Most irrigation failures are mundane rather than sophisticated.
Emitter falls out of the pot
Secure drip stakes or tubing so the scheduled water cannot discharge onto the balcony floor.
Hose or fitting leaks upstream of the emitters
Inspect pressurized connections while the system is running. A small leak at the timer can waste far more water than a single drip emitter.
Drainage tray overflows
Watch a complete cycle and confirm that each tray can handle normal drainage. If water accumulates for long periods, reduce volume or improve drainage management.
Wi-Fi or hub goes offline
Some devices store schedules locally while others depend more heavily on a hub or connectivity for remote features. Rachio documents that many scheduled run events can remain stored on the timer valve even when Wi-Fi is interrupted. Verify offline behavior for your own timer before relying on it during travel.
Battery dies
Check battery status routinely and before vacations.
Plant grows but the schedule does not
A tomato in May and the same tomato in August do not have the same root mass, leaf area, fruit load, or water demand. Recalibrate as plants mature.
A useful starting configuration for a small balcony
For a balcony with six to ten vegetable containers, a sensible architecture is:
| Component | Practical role |
|---|---|
| Smart hose timer | Opens and closes the water source on schedule |
| Pressure regulator | Keeps drip components within their intended pressure range |
| Filter | Helps reduce emitter clogging |
| Main tubing | Carries water along the container group |
| Individual drip lines | Direct water into each pot |
| One or more emitters per pot | Match delivery to container and crop demand |
| Drainage trays or controlled drainage | Prevent uncontrolled runoff where appropriate |
Start with one zone only if the plants have similar watering needs. If the balcony mixes large tomatoes, tiny herb pots, hanging baskets, and drought-tolerant plants, separate irrigation groups are easier to manage than forcing everything onto one schedule.
Test the system before relying on it while traveling
Do not install automatic irrigation the night before a vacation and assume it is ready.
Run it for at least several normal cycles while you are home. Verify:
- every emitter flows;
- no connection leaks;
- each pot reaches adequate moisture;
- trays do not overflow;
- weather skips behave appropriately;
- the timer still runs its schedule if connectivity is interrupted, if the manufacturer supports offline scheduling;
- app notifications reach your phone;
- battery level is healthy.
If someone will be checking the apartment while you are away, show them the manual shutoff and explain how to stop the timer without changing the entire program.
Apartment safety matters more than perfect automation
Balcony irrigation involves water, shared building surfaces, and sometimes neighbors directly below.
Do not use unapproved plumbing modifications or leave a questionable faucet adapter pressurized continuously. Follow the timer’s pressure and temperature limits, use components intended for irrigation, and comply with lease and building rules.
Also consider the total weight of large wet containers. Illinois Extension specifically advises consulting appropriate building expertise about weight limitations for balcony or rooftop container gardens. Potting mix, ceramic planters, water reservoirs, and mature plants can become surprisingly heavy when combined.
If you are uncertain about plumbing, drainage, balcony loading, or building restrictions, get approval from the landlord or property manager before automating the setup.
Conclusion
A smart water timer can make balcony vegetable gardening far easier, but the timer should automate a system you have already proven manually. Build a low-flow drip layout, verify drainage and leak safety, calibrate each watering cycle against real containers, and only then turn the schedule loose.
Start conservatively, inspect soil moisture for the first week, and adjust as plants grow and weather changes. Use rain skips and app automation as helpful inputs rather than substitutes for observation. Once the physical irrigation is balanced, the smart timer becomes what it should be: a reliable way to keep vegetables consistently watered without turning your balcony into a runoff problem.
Common questions
Questions this guide answers
How often should a smart water timer water balcony vegetable containers?
There is no universal interval because containers dry at different rates. Check the potting mix daily at first, then program the timer around the actual drying pattern. Hot, windy, exposed balconies and small or porous containers can require much more frequent watering than large containers in partial shade.
Is drip irrigation better than a sprinkler for balcony vegetables?
Usually yes. Drip emitters apply water near the root zone, reduce wet foliage and overspray, and are easier to direct into individual containers. They also help prevent water from spraying railings, walls, furniture, or balconies below.
How long should a smart water timer run for container vegetables?
Runtime should be calibrated to the emitter flow rate and each container rather than copied from a generic schedule. Run the system manually, time how long it takes to wet the full root zone and produce slight drainage from the pot, then use that measured runtime as the starting point for the schedule.
Should a balcony irrigation timer use rain skip?
Rain skip can be useful only when rain actually reaches the containers. Pots under an overhang may stay dry during a storm, so weather-based automation should be verified against real soil moisture rather than trusted blindly.
Can a smart hose timer cause apartment water damage?
Yes, if a fitting leaks, tubing disconnects, a pot cannot drain, or runoff reaches the unit below. Use secure fittings, drainage trays where appropriate, low-flow emitters, and a leak test before leaving the system unattended, and follow lease or building rules for balcony water use.
Evidence & further reading
Sources & references
Primary and authoritative references used to support or contextualize this article. Links open the original source.
- 1Watering
Illinois Extension · Accessed Aug 27, 2026
Supports frequent monitoring of container moisture, watering until water reaches the bottom, drainage requirements, and drip irrigation for grouped containers.
- 26 tips for watering container gardens
Illinois Extension · Accessed Aug 27, 2026
Supports daily container checks, the effect of container material on drying, thorough watering, and automatic drip irrigation.
- 3Container Material Choices
Illinois Extension · Accessed Aug 27, 2026
Supports the effect of wind, reflected heat, and container type on watering needs and balcony runoff considerations.
- 4Drip Irrigation in the Home Vegetable Garden
University of Georgia Cooperative Extension · Accessed Aug 27, 2026
Supports root-zone drip irrigation, dry foliage benefits, pressure-reducing components, filtration, and use of battery-operated timers.
- 5Rachio Smart Hose Timer Quick Start Guide
Rachio Support · Accessed Aug 27, 2026
Supports configurable schedule timing and duration, rain skip, local schedule storage, and low-battery or flow notifications on compatible hardware.
- 6B-hyve App Guide
Orbit Support · Accessed Aug 27, 2026
Supports manual watering, rain delay, weather delay, and smart-watering controls available in the B-hyve ecosystem.
- 7Eve Aqua – All FAQs
Eve · Accessed Aug 27, 2026
Supports smart water-controller operating pressure and temperature limits, hose connection requirements, Thread connectivity, and battery-powered operation.

About the author
Maya Chen
Maya covers residential energy, HVAC controls, and practical home automation, translating technical systems into useful decisions for homeowners and renters.
More from Maya →Make your home smarter without buying every gadget.
One useful idea, one product worth knowing, and one energy-saving action—delivered weekly.
No spam. Unsubscribe anytime.
Semantic recommendations
Related reading
Selected from topic cluster, entities, tags, search intent, and editorial relationships.
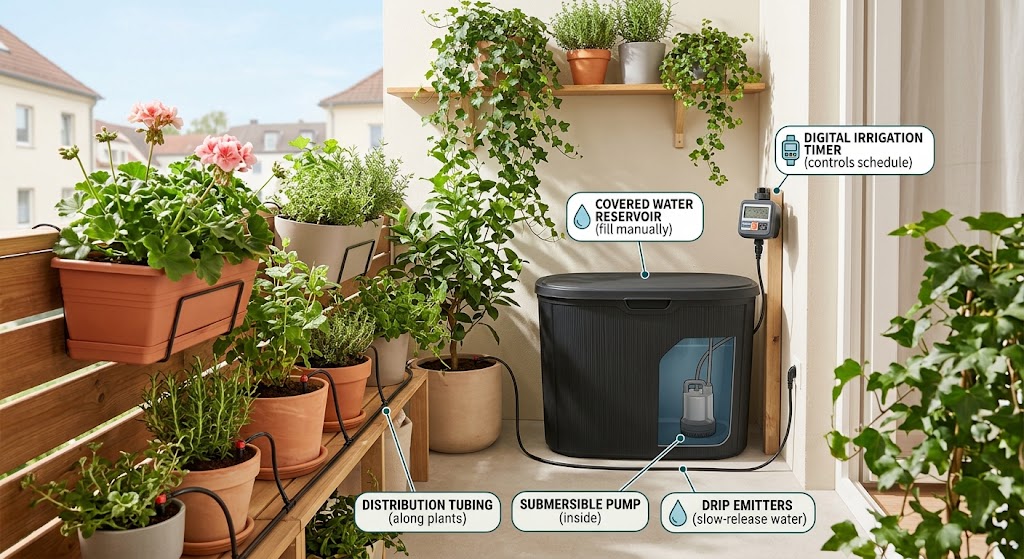
How to Set Up an Automatic Balcony Irrigation System Without a Hose Hookup
No outdoor faucet? Build a renter-friendly automatic balcony watering system with a covered reservoir, small pump, timer, tubing, and drip emitters.
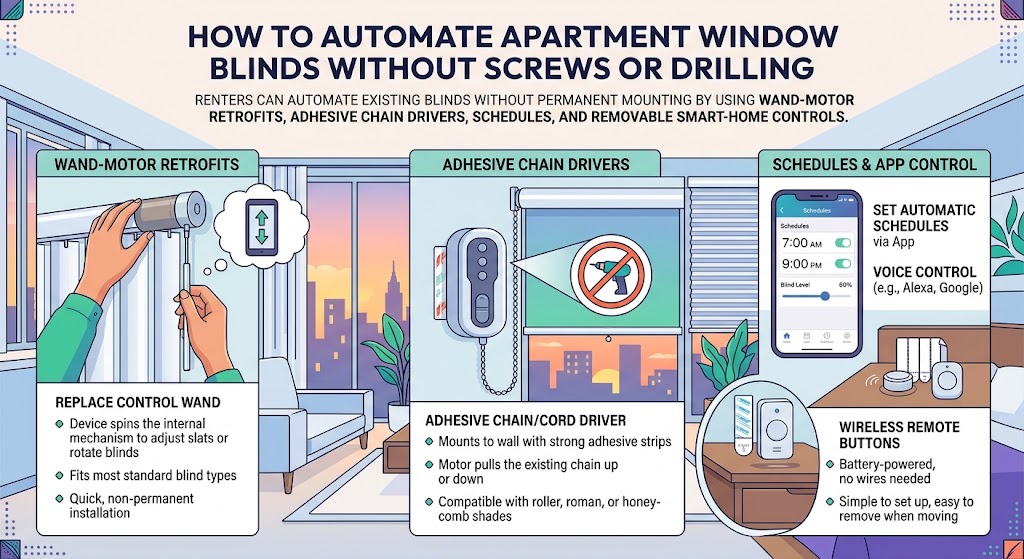
How to Automate Apartment Window Blinds Without Screws or Drilling
Renters can automate existing blinds without permanent mounting by using wand-motor retrofits, adhesive chain drivers, schedules, and removable smart-home controls.
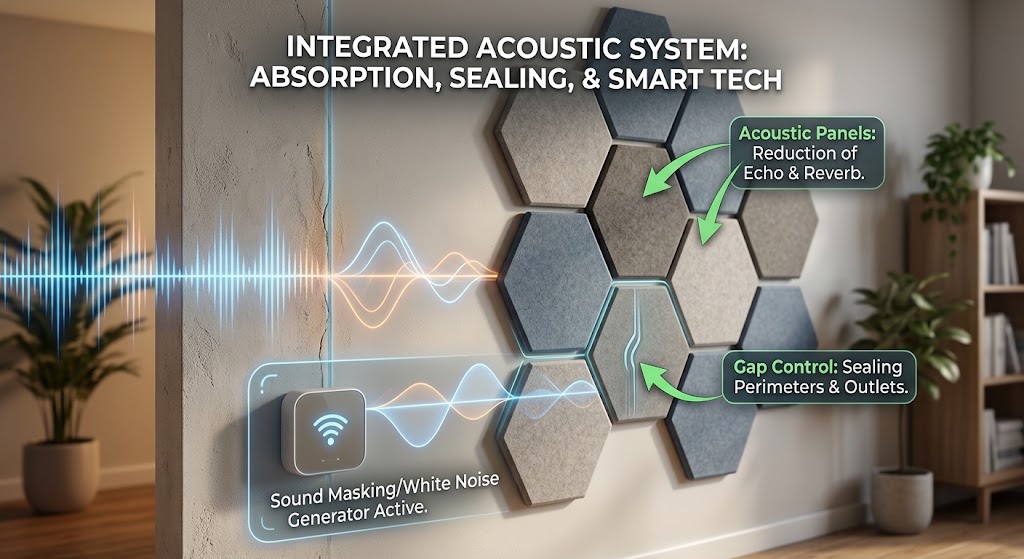
Soundproofing Apartment Walls: Smart Acoustic Panels & Tech Hacks
Acoustic panels can reduce echo, but they do not truly soundproof a shared apartment wall. Here is how renters can combine absorption, gap control, sound masking, and smart tech for a noticeably quieter space.

10 Drill-Free Smart Home Upgrades That Won't Risk Your Security Deposit
These renter-friendly smart home upgrades add automation, energy savings, safety, and comfort without drilling holes or changing permanent wiring.