
Best Adhesive Mounts for Smart Security Cameras in Rental Units
A renter-focused guide to choosing removable camera mounts that balance wall protection, camera stability, viewing angle, and safe removal.
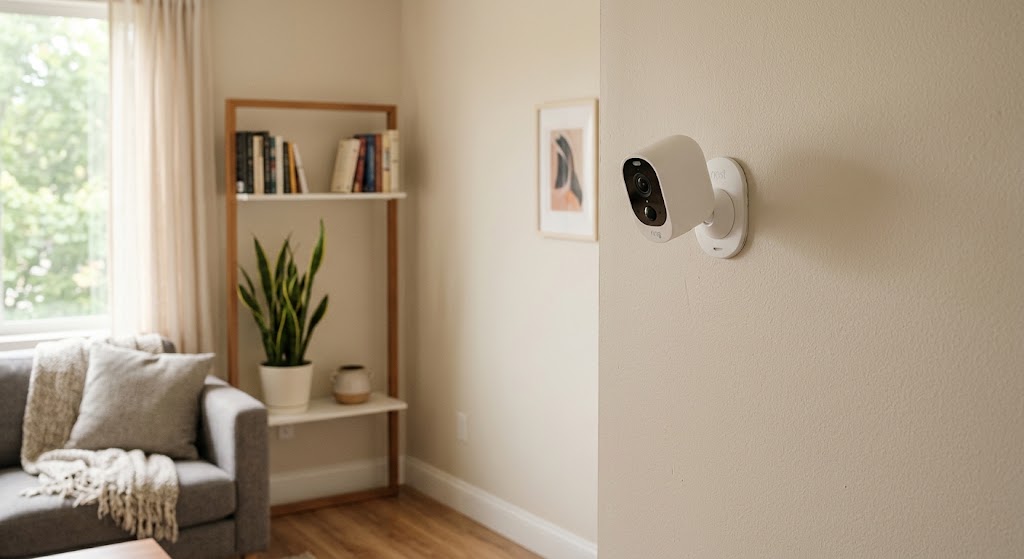
Quick answer
The best renter-friendly adhesive camera mount is usually not a universal sticky pad. Choose a purpose-built, model-compatible no-drill accessory when the camera maker supports one; otherwise, a removable adhesive shelf or ledge is often safer indoors because the camera rests on a platform instead of depending entirely on adhesive bonded to the camera body. Always match the adhesive to the surface, weight, temperature, and mounting height, and use a non-adhesive stand or magnetic option when the manufacturer recommends it.
Table of contents
- The short version: use the least risky mount that still gives you the view you need
- Best overall: a purpose-built no-drill mount made for your exact camera
- What renters should check before buying
- Best indoor renter workaround: a removable adhesive shelf
- Why a shelf often works better for renters
- Where not to use an adhesive shelf
- Best for compatible cameras near metal: use the magnetic mount instead of adhesive
- Be careful with height
- Best removable strip approach: use the adhesive for the accessory, not the camera body
- Surface preparation matters more than people think
- Outdoor use: weather-resistant adhesive is not the same as a camera-rated mount
- The safer renter decision
- Why generic VHB-style tape is not automatically better
- Best for cable management: use removable adhesive clips separately
- A clean renter setup can be surprisingly simple
- The most important factor is not weight—it is leverage
- Match the mount to the wall finish
- Five renter mistakes that cause adhesive camera mounts to fail
- 1. Mounting before the paint has cured
- 2. Cleaning with the wrong product
- 3. Ignoring camera removal forces
- 4. Mounting too high without fall protection
- 5. Assuming “outdoor” means “camera mount”
- What I would choose for common rental scenarios
- Before installation, check the lease and camera rules
- A practical buying checklist
- Conclusion
Key takeaways
- Purpose-built, model-compatible no-drill mounts are preferable to improvised adhesive when the camera manufacturer supports them.
- A removable adhesive shelf can be a better indoor renter solution than bonding adhesive directly to the camera or its proprietary mount.
- Surface type, camera weight, heat, humidity, leverage, and mounting height all affect whether an adhesive installation is safe and reliable.
Editorial transparency
Who worked on this article and how it was handled.
- Written by
- Daniel Reed
- Creation method
- Editorial research
AI assistance: AI assisted with research organization and drafting. Sources, factual claims, and the final article should be reviewed by a human editor before publication.
Rental apartments create a specific smart-home problem: you may want better camera coverage, but you may not be allowed to drill into walls, door frames, tile, or exterior surfaces. Adhesive mounts look like the obvious answer, yet they are also one of the easiest smart-home accessories to misuse.
The trade-off is not simply “holes versus no holes.” A camera mount has to survive the camera’s weight, the leverage created by an angled arm, heat and humidity, surface paint quality, and repeated vibration or handling. A strip that can hold a flat picture frame may behave very differently when a camera projects several inches away from the wall.
The best renter setup therefore depends on the camera, the surface, and how permanent the position needs to be. This guide compares the safest adhesive and no-drill approaches for rental units, explains where common removable strips make sense, and shows when a shelf, stand, or magnetic mount is the better choice.
The short version: use the least risky mount that still gives you the view you need
For most renters, the hierarchy should look like this:
| Rank | Mounting approach | Best use | Main limitation |
|---|---|---|---|
| 1 | Manufacturer-approved no-drill mount | Cameras or doorbells with a verified compatible accessory | Availability is model-specific |
| 2 | Adhesive shelf or picture ledge | Lightweight indoor cameras on smooth walls | Adds visual bulk and still depends on wall finish |
| 3 | Magnetic mount on existing metal | Compatible cameras near metal surfaces | Only works where suitable metal is available |
| 4 | Tabletop or freestanding stand | Indoor cameras on shelves, cabinets, desks, or counters | View may be lower than a wall-mounted camera |
| 5 | Generic adhesive plate or tape | Only when load, surface, environment, and camera compatibility are verified | Highest risk of improvised failure |
That ranking is deliberately conservative. A security camera is both electronics and a falling object. If the adhesive fails, you can damage the camera, the wall, nearby furniture, or someone below it.
Best overall: a purpose-built no-drill mount made for your exact camera
The best adhesive or no-drill mount is the one the camera maker explicitly supports for that model.
That sounds obvious, but compatibility is often narrower than product names suggest. Ring, for example, currently lists its No-Drill Mount for specific video doorbells. Its compatibility list does not identify that accessory for Stick Up Cam or Outdoor Cam. Ring’s camera guidance instead shows tabletop placement or screw-mounted wall hardware for current camera accessories.
This matters because a purpose-built no-drill accessory can account for:
- the camera’s weight;
- the size of its mounting plate;
- the device’s center of gravity;
- expected movement during adjustment;
- weather exposure, if approved for outdoors;
- how the camera detaches for charging.
What renters should check before buying
Do not stop at the phrase “no drill.” Confirm all four of these:
- Exact camera model compatibility. A mount for a video doorbell is not automatically suitable for a stand-alone security camera.
- Indoor versus outdoor rating. Adhesive that survives a bedroom wall may fail on a sun-heated exterior surface.
- Surface restrictions. Stucco, brick, rough plaster, wallpaper, and dusty paint are common failure points.
- Removal method. A renter-friendly product should explain how to remove the adhesive without prying against paint.
If the accessory maker does not publish those details, treat that as a warning sign rather than a bargain.
Best indoor renter workaround: a removable adhesive shelf
For many indoor cameras, the most practical adhesive “mount” is not a camera plate at all. It is a small removable shelf or ledge that the camera sits on.
3M’s Command Slate Picture Ledge is one example of the concept. 3M rates that ledge for up to 5 pounds on compatible smooth surfaces and instructs users to prepare the surface with rubbing alcohol. The product is designed to remove using Command’s stretch-release adhesive rather than screws.
The advantage is mechanical: the camera’s base rests on a horizontal platform instead of hanging from adhesive on the back of the camera or on a long articulated arm.
Why a shelf often works better for renters
A shelf approach can be especially useful when your camera:
- already has a stable tabletop base;
- needs to be removed frequently for charging;
- does not have a manufacturer-approved adhesive wall mount;
- would create too much leverage on a flat adhesive plate;
- is used indoors where weather exposure is not a concern.
It also makes move-out easier. You remove the camera first, then the shelf, then the adhesive strip according to its removal instructions.
Where not to use an adhesive shelf
Even if the shelf is within its published weight limit, do not put it above a bed, crib, staircase, fragile electronics, or a place where a falling camera could injure someone.
3M’s Command guidance also includes restrictions for wallpaper, some rough or porous surfaces, and newly painted walls. One 3M ledge product advises waiting seven days after painting before installation.
For a camera, the safer interpretation is simple: do not use a removable adhesive shelf where a fall would be consequential.
Best for compatible cameras near metal: use the magnetic mount instead of adhesive
A renter may not need adhesive at all.
Google’s installation guidance for Nest Cam (battery) says its magnetic plate can attach directly to a suitable metal surface without screws. Google also supports an optional stand for indoor shelf, desk, or counter placement.
For older Nest Cam Indoor designs, Google likewise describes shelf placement and magnetic attachment to metal as normal installation options.
That gives renters a useful principle:
If your camera already supports a secure stand or magnetic surface, use that before inventing an adhesive solution.
Magnetic mounting can be ideal on:
- steel shelving;
- metal cabinets;
- some refrigerator sides;
- metal structural surfaces permitted by the lease.
The limitation is location. The metal surface must also provide the correct viewing angle and Wi-Fi coverage.
Be careful with height
Google recommends placing Nest Cam (battery) around 6 to 6.5 feet high for optimal detection and says higher installations should use added fall protection such as the secure loop.
That is a useful safety benchmark even if you use another camera brand: the higher the camera, the more serious an adhesive failure becomes.
Best removable strip approach: use the adhesive for the accessory, not the camera body
Renters often ask whether they can simply put Command Strips on the back of a camera.
The better approach is to use removable adhesive with an accessory designed to receive it—a flat shelf, plate, or low-leverage bracket—rather than sticking tape directly to the electronics.
3M publishes detailed surface and preparation guidance for Command products. Depending on the product, compatible surfaces can include smooth painted walls, finished wood, laminate, glass, metal, and tile. The company also warns against wallpaper and several rough or porous surfaces.
Surface preparation matters more than people think
Before applying removable adhesive:
- read the instructions for the exact strip or mount;
- clean the surface as specified, often with rubbing alcohol;
- let recently painted surfaces cure for the recommended time;
- apply at the temperature range listed by the adhesive maker;
- wait the required bonding period before loading the mount;
- test the camera’s live view before committing to the final position.
Do not substitute household cleaner, oily wipes, or a dusty rag if the manufacturer calls for alcohol cleaning. Residue can reduce adhesion.
Outdoor use: weather-resistant adhesive is not the same as a camera-rated mount
Outdoor security cameras are where adhesive mounting becomes much less forgiving.
3M’s Outdoor Command replacement strips are UV- and water-resistant and are rated for a broad outdoor temperature range. But 3M describes those strips as replacement adhesive for specific outdoor hooks and accessories. That is not the same as saying the strips are approved as universal camera mounting tape.
An outdoor camera also creates more stress than a flat decorative object because it may be exposed to:
- direct solar heating;
- rain and condensation;
- wind;
- thermal expansion of the mounting surface;
- repeated battery removal;
- a long lever arm from an adjustable bracket.
The safer renter decision
For outdoor use, choose one of these in order:
- a camera-maker-approved no-drill outdoor mount;
- a lease-approved clamp or freestanding mount designed for the camera;
- a magnetic option explicitly supported by the manufacturer;
- a screw mount only if the landlord permits it.
If none of those works, changing the camera location is usually smarter than improvising with tape.
Why generic VHB-style tape is not automatically better
High-bond acrylic foam tapes are extremely strong in the right engineering application, which is exactly why they are often a poor default for renters.
A stronger adhesive does not necessarily mean a better rental solution. The bond may outlast the paint, pull off drywall paper, leave residue, or require solvents or scraping during removal.
For renters, the goal is not maximum bond strength. The goal is enough holding strength with predictable removal.
That makes stretch-release adhesive systems or purpose-built removable mounts more attractive for indoor use—provided the load and surface are appropriate.
Best for cable management: use removable adhesive clips separately
A wired indoor camera can have a perfectly good tabletop position and still look messy because the power cable hangs down the wall.
This is where removable adhesive is especially useful. 3M makes Command cord-management products for smooth surfaces, and cable clips create far less leverage than a camera body.
Using adhesive for the cable instead of the camera can give you most of the visual benefit of wall mounting without asking the adhesive to carry expensive electronics.
A clean renter setup can be surprisingly simple
For example:
- place the camera on top of a bookcase;
- angle it slightly downward;
- route the cable along the back edge;
- secure the cable with removable clips;
- keep the power adapter accessible.
Google’s placement guidance specifically lists bookcases, refrigerators, and the top of staircases as possible indoor camera locations, depending on the model and view you need.
The most important factor is not weight—it is leverage
Adhesive packaging usually gives you a static weight rating, but camera mounts often place that weight several inches away from the wall.
That changes the load.
A flat 2-pound object applies force mostly downward. A 1-pound camera on a projecting arm can apply a peeling force that tries to pry the adhesive away from the wall.
That is why a low-profile mount or shelf is usually more adhesive-friendly than a long articulating arm.
When comparing mounts, look at:
- how far the camera projects from the wall;
- whether the arm can be bumped or rotated;
- whether battery changes require pulling on the mount;
- how much of the adhesive surface is actually bonded;
- whether the mounting plate remains flat under load.
If the camera moves every time you recharge it, a freestanding or magnetic solution may age better than adhesive.
Match the mount to the wall finish
Adhesive success depends heavily on the surface.
| Surface | Renter-friendly adhesive outlook | Notes |
|---|---|---|
| Smooth painted wall | Usually the best candidate | Follow paint-curing and cleaning guidance |
| Glass | Often good for compatible removable products | Avoid locations with severe solar heat unless rated for it |
| Glazed tile | Often good for compatible products | Grout lines reduce usable bonding area |
| Finished wood or laminate | Often workable | Test discreetly if finish is delicate |
| Textured plaster | Poor to mixed | Reduced contact area makes failure more likely |
| Wallpaper | Usually avoid | Many removable adhesive products explicitly warn against it |
| Bare brick or rough concrete | Usually avoid | Rough porous surfaces are poor for typical removable strips |
| Exterior stucco | Usually avoid improvised adhesive | Weather plus texture creates a difficult mounting environment |
3M’s surface selection guide makes the same broad distinction: smooth finished surfaces are much more adhesive-friendly than rough, porous, or papered ones.
Five renter mistakes that cause adhesive camera mounts to fail
1. Mounting before the paint has cured
Fresh paint may feel dry but still be curing. Some Command products advise waiting seven days after painting before use. Follow the instructions for your exact product.
2. Cleaning with the wrong product
Soap, multipurpose cleaner, and furniture polish can leave residue. If the adhesive maker specifies rubbing alcohol, use that method.
3. Ignoring camera removal forces
Battery-powered cameras need regular handling. If you pull the camera off the mount every few weeks, repeated force can weaken an adhesive setup that looked stable on day one.
4. Mounting too high without fall protection
A camera at 6 feet is not the same risk as one at 9 feet. Google specifically adds secure-loop guidance for higher Nest Cam battery installations. Similar fall-risk thinking should apply to any adhesive-mounted camera.
5. Assuming “outdoor” means “camera mount”
Outdoor adhesive can be weather-resistant without being designed for a camera’s weight, shape, leverage, or removal cycle.
What I would choose for common rental scenarios
| Rental scenario | Best first choice | Why |
|---|---|---|
| Indoor camera watching a living room | Tabletop or shelf stand | Simplest, lowest wall risk |
| Indoor camera needs more height | Removable adhesive ledge on a smooth wall | Adds height without drilling while keeping camera detachable |
| Compatible camera near steel surface | Manufacturer-supported magnetic mount | No adhesive and no wall holes |
| Battery camera above an entry cabinet | Freestanding stand plus cable-free placement | Easy charging and low fall consequence |
| Video doorbell with a verified model-specific no-drill accessory | Manufacturer no-drill mount | Compatibility and geometry are known |
| Outdoor camera on stucco or rough brick | Avoid generic adhesive | Surface and weather make failure more likely |
| Camera near a bed, crib, or stair landing | Do not rely on removable adhesive overhead | Consequence of failure is too high |
Before installation, check the lease and camera rules
Even a no-drill mount can create problems if the lease restricts exterior devices, common-area recording, door attachments, or visible changes to the building.
Before installing a camera:
- review the lease or building rules;
- ask for written permission when required;
- follow local privacy laws;
- avoid pointing cameras into spaces where neighbors or visitors have a reasonable expectation of privacy;
- keep removal instructions and original mounting hardware for move-out.
Google’s camera installation guidance also reminds users to follow local privacy laws and housing safety requirements.
A practical buying checklist
Before ordering any adhesive mount, verify these eight points:
- Exact camera compatibility — not just a similar model name.
- Total supported weight — including camera, battery, bracket, and any cable strain.
- Mounting geometry — flat and low-profile is easier on adhesive than a long arm.
- Surface compatibility — paint, tile, glass, wood, or metal must be explicitly supported.
- Indoor/outdoor rating — heat, moisture, and UV exposure matter.
- Removal method — especially whether the adhesive stretches off cleanly.
- Charging access — you should not have to yank on the wall mount to recharge the camera.
- Fall consequence — do not use removable adhesive where failure could injure someone or damage valuable property.
If a product listing gives you none of that information, the mount is not renter-friendly just because it has adhesive on the back.
Conclusion
The best adhesive mount for a rental security camera is the one that minimizes both wall damage and fall risk. Start with a manufacturer-approved no-drill accessory when your camera supports one. Indoors, a removable adhesive shelf is often a better fallback than sticking adhesive directly to the camera, while tabletop and magnetic mounting can avoid adhesive entirely.
Before you install anything, verify the exact surface, weight, environment, removal method, and lease rules. If the camera needs to sit high, outdoors, or above people, treat a permanent or manufacturer-secured mount as a safety decision—not just a cosmetic one.
Common questions
Questions this guide answers
Can I mount a smart security camera with Command Strips?
Sometimes, but only if the specific Command product is rated for the surface, environment, load, and application. 3M also warns that some Command products are not intended for valuable items, wallpaper, rough surfaces, or overhead locations, so a removable shelf or manufacturer- approved mount is often a safer renter option than sticking strips directly to a camera.
What adhesive mount is safest for a rental apartment?
Indoors, a low-profile removable adhesive shelf on a smooth, properly prepared wall is often the most forgiving setup for a lightweight camera because the camera remains detachable and the adhesive carries a flat shelf rather than the camera body. Keep the installation away from beds, stairs, cribs, and other places where a fall could cause injury.
Can I use outdoor Command Strips for an outdoor security camera?
Outdoor Command strips are weather resistant, but 3M markets many of them as replacement strips for specific outdoor hooks and accessories rather than as universal camera mounts. For an exterior camera, use a mount explicitly approved for that camera and outdoor exposure instead of assuming a weather-resistant strip is suitable for the camera's weight and leverage.
Do Ring no-drill mounts work with Stick Up Cam or Outdoor Cam?
Ring's current compatibility list identifies its No-Drill Mount for specific video doorbell models, not for Stick Up Cam or Outdoor Cam. Ring's camera installation guidance continues to show tabletop placement or screw-based wall mounting for those camera lines.
What is the best no-drill alternative to adhesive for a security camera?
A tabletop stand, shelf placement, or a manufacturer-supported magnetic mount is often the best no-drill alternative. Google, for example, supports shelf or stand placement for several Nest Cam models and allows certain Nest Cam battery models to attach magnetically to suitable metal surfaces.
Evidence & further reading
Sources & references
Primary and authoritative references used to support or contextualize this article. Links open the original source.
- 1Command™ Slate Picture Ledge
3M · Accessed Aug 21, 2026
Supports the removable adhesive ledge approach, 5-pound capacity, smooth-surface compatibility, alcohol surface preparation, and removal guidance.
- 2Command™ 15 Lb White Bath Picture Hanging Strips
3M · Accessed Aug 21, 2026
Supports smooth-surface compatibility, rubbing-alcohol preparation, curing time after painting, and warnings about wallpaper and valuable items.
- 3Command™ Outdoor Assorted Replacement Strips
3M · Accessed Aug 21, 2026
Supports outdoor temperature and weather-resistance claims while showing that these strips are designed as replacement strips for specific outdoor hooks.
- 4Selection Guide - Surfaces
3M · Accessed Aug 21, 2026
Supports the distinction between compatible smooth surfaces and surfaces such as rough walls, bare masonry, and some wallpapers where Command products are not recommended.
- 5Install or mount Nest Cam (battery)
Google Home and Nest Help · Accessed Aug 21, 2026
Supports stand placement, magnetic mounting on metal surfaces, third-party 1/4-20 mount compatibility caveats, and secure-loop guidance for higher installations.
- 6Learn about camera placement
Google Home and Nest Help · Accessed Aug 21, 2026
Supports camera placement height, fall-prevention guidance, and shelf placement for indoor cameras.
- 7Device compatibility list
Ring · Accessed Aug 21, 2026
Supports that Ring's No-Drill Mount is listed for specific video doorbells rather than Stick Up Cam or Outdoor Cam camera models.
- 8Installing the Pan-Tilt Mount for Outdoor Cam
Ring · Accessed Aug 21, 2026
Supports Ring's current tabletop option and screw-based wall mounting instructions for Outdoor Cam accessories.

About the author
Daniel Reed
Daniel writes about connected-home standards, small-space technology, device interoperability, and privacy-conscious urban living.
More from Daniel →Make your home smarter without buying every gadget.
One useful idea, one product worth knowing, and one energy-saving action—delivered weekly.
No spam. Unsubscribe anytime.
Semantic recommendations
Related reading
Selected from topic cluster, entities, tags, search intent, and editorial relationships.
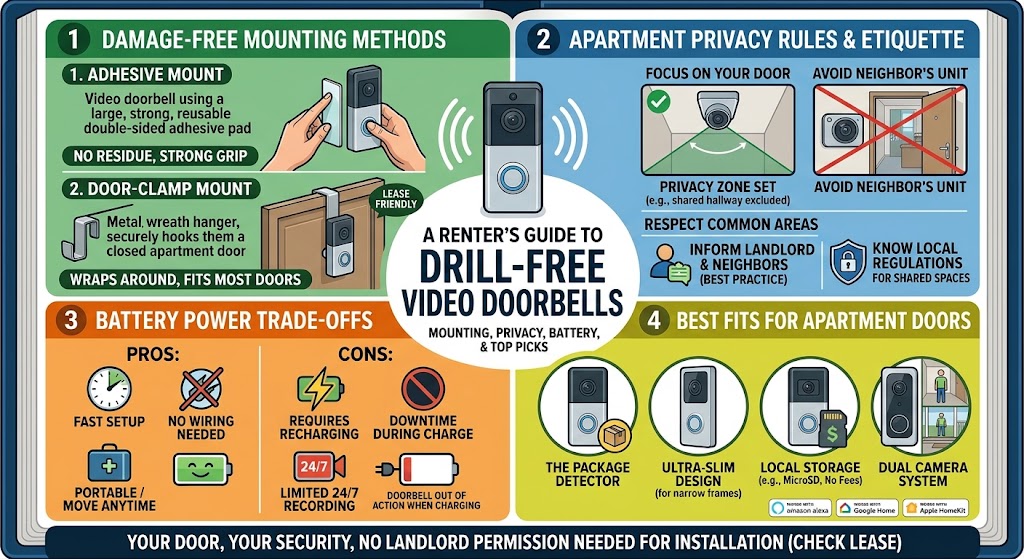
Drill-Free Smart Video Doorbells for Multi-Family Rental Housing
A renter-focused guide to drill-free video doorbells, mounting methods, privacy rules, battery trade-offs, and the best fits for apartment doors.
Renter Move-In Guide: Setting Up Smart Home Tech Without Drilling
A renter-friendly move-in plan for building a useful smart home with portable devices, removable mounts, safer privacy settings, and no permanent wall changes.
Smart Water Timer Setup for Balcony Container Vegetable Gardens
Set up a smart hose timer and drip irrigation for balcony vegetables without overwatering pots, wasting water, or creating runoff problems for neighbors below.
Smart Lock Setup for College Apartment Roommates
Set up a smart lock for college roommates with separate access, safer admin permissions, guest codes, move-out rules, and reliable backup entry.