
How to Set Up an Automatic Balcony Irrigation System Without a Hose Hookup
No outdoor faucet? Build a renter-friendly automatic balcony watering system with a covered reservoir, small pump, timer, tubing, and drip emitters.
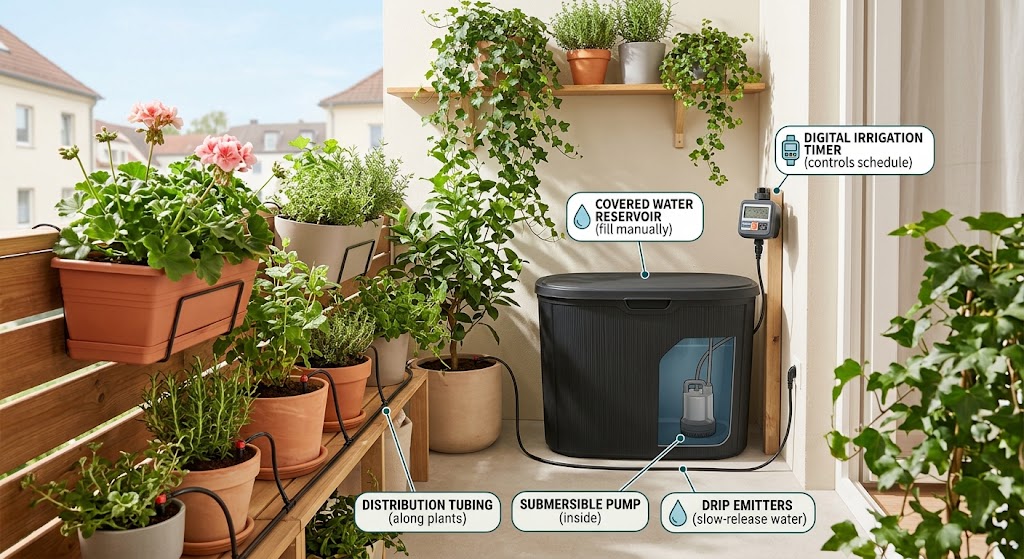
Quick answer
The simplest automatic balcony irrigation system without a hose hookup uses a covered water reservoir, a small purpose-built irrigation pump with a timer, 1/4-inch tubing, and one or more drip emitters for each container. Refill the reservoir from an indoor sink, group plants with similar water needs, run a measured test cycle, and adjust emitter flow or runtime until each pot is watered thoroughly without overflowing onto the balcony or the unit below.
Table of contents
- The Best No-Hose Setup: Reservoir + Pump + Drip Emitters
- What You Need
- 1. A covered water reservoir
- 2. A small irrigation pump
- 3. Irrigation tubing
- 4. Drip emitters
- 5. A timer or smart controller
- Step 1: Group Plants by Water Need
- High-water group
- Moderate-water group
- Low-water group
- Step 2: Choose the Reservoir Location
- Remember the weight
- Step 3: Install the Pump and Intake
- Step 4: Run the Main Tubing
- Step 5: Add an Emitter to Each Pot
- Do not assume equal emitter count means equal watering
- Step 6: Control Balcony Runoff
- Step 7: Measure One Real Watering Cycle
- The reservoir-drop method
- How to Size the Reservoir
- Why generic reservoir recommendations fail
- Step 8: Build the Watering Schedule From Soil Moisture
- Start with the finger test
- Water thoroughly enough to wet the root zone
- Step 9: Test Before Leaving Town
- Simulate the full travel period
- Preventing Siphoning and Accidental Drain-Down
- Keep the Reservoir Covered
- Clean the reservoir periodically
- Should You Use Rainwater?
- Smart Controller or Simple Timer?
- Offline behavior matters
- Three Useful Balcony Configurations
- Small herb balcony
- Mixed vegetable balcony
- Frequent-travel setup
- Common Mistakes
- Using an open bucket
- Programming by guesswork
- Giving every pot the same emitter
- Ignoring drainage
- Making the reservoir huge
- Trusting Wi-Fi more than plumbing
- Leaving for vacation immediately after installation
- Final Setup Checklist
- Conclusion
Key takeaways
- A reservoir-fed pump system is the most flexible way to automate balcony irrigation when there is no outdoor hose connection.
- Measure actual water use before sizing the reservoir; plant demand changes with sun, wind, pot size, and season.
- Drip emitters should be matched to plant needs, and plants with similar watering requirements should share the same zone where practical.
- Balcony drainage matters as much as watering: test the system so runoff cannot stain walls, damage flooring, or drip onto neighbors below.
- Keep the water reservoir tightly covered to reduce debris, algae, and mosquito access.
Editorial transparency
Who worked on this article and how it was handled.
- Written by
- Maya Chen
- Creation method
- Editorial research
AI assistance: AI assisted with research organization and drafting. Sources, factual claims, and the final article should be reviewed by a human editor before publication.
A balcony garden can look easy until the weather turns hot or you leave town for three days. Containers dry much faster than in-ground beds, sunny walls reflect heat, and wind can pull moisture from potting mix surprisingly quickly. The obvious solution is drip irrigation—but many apartments have no outdoor faucet, and running a hose through a window is not a realistic long-term setup.
The good news is that a balcony does not need pressurized plumbing to automate watering.
A reservoir-fed irrigation system can do the same basic job with five components: a water container, a small pump, a timer or controller, micro-tubing, and drip emitters. You refill the reservoir from an indoor sink, and the system distributes measured amounts of water to each planter on schedule.
The important part is building it like an irrigation system rather than a gadget. That means planning plant zones, measuring actual water use, controlling runoff, and testing the system before trusting it while you travel.
The Best No-Hose Setup: Reservoir + Pump + Drip Emitters
There are three common ways to automate balcony watering without a faucet:
| System | How it works | Best for | Main limitation |
|---|---|---|---|
| Pump-fed reservoir | Timed pump draws water from a container and sends it to emitters | Multiple pots, travel, flexible layouts | Requires a pump, power source, and periodic cleaning |
| Gravity-fed reservoir | Elevated container feeds low-pressure drip lines | Very simple small setups | Flow can be uneven and depends on height and compatible emitters |
| Self-watering planters | Water sits in an integrated lower reservoir and wicks upward | Individual containers | Requires compatible planters and is less flexible for an existing collection |
For most renters with several existing pots, the pump-fed reservoir is the easiest system to tune and move later.
It does not require:
- drilling into plumbing;
- a hose bib;
- a permanent water line;
- modifications to the building.
Everything can sit on the balcony and leave with you at move-out.
What You Need
A practical system usually contains the following parts.
1. A covered water reservoir
Use a durable container that:
- can be closed tightly;
- is stable on the balcony surface;
- is easy to refill;
- can accommodate the pump and intake tubing;
- does not block doors, drains, or emergency access.
The lid matters for more than appearance. It helps keep leaves and debris out and reduces mosquito access to standing water.
CDC specifically recommends tightly covering water-storage containers so mosquitoes cannot enter and lay eggs.
2. A small irrigation pump
Choose a pump intended for the watering-system design you are building.
Many compact automatic watering kits combine:
- a low-voltage or battery-powered pump;
- a programmable timer;
- tubing connections;
- sometimes a filter or intake screen.
The pump only needs to overcome the tubing length, vertical lift, and combined emitter demand of a small balcony system. Bigger is not automatically better.
An oversized pump can make balancing tiny containers harder and increase the consequences of a failed fitting.
3. Irrigation tubing
For small container gardens, 1/4-inch micro-tubing is common.
Keep the layout:
- short;
- visible enough to inspect;
- protected from kinks;
- secured so wind or moving pots cannot pull fittings apart.
If your system includes a larger mainline and small feeder tubes, follow the component manufacturer’s sizing rules.
4. Drip emitters
Use one or more emitters per container depending on:
- pot diameter;
- plant size;
- root distribution;
- required flow.
Colorado State University Extension notes that emitters should be located where water reaches plant roots and that larger or higher-water-use plants can require more emitters.
Pressure-compensating emitters can also help produce more consistent output when tubing runs and elevations vary.
5. A timer or smart controller
The controller should let you specify:
- watering days;
- start time;
- duration;
- ideally more than one short cycle when needed.
A moisture sensor can be useful, but it should be treated as additional information rather than a substitute for observing the plants and potting mix.
Step 1: Group Plants by Water Need
Do this before cutting tubing.
A basil plant in a small sunny pot should not necessarily receive the same schedule as:
- rosemary;
- succulents;
- a large tomato;
- shade-loving ornamentals.
UC Agriculture and Natural Resources recommends hydrozoning—grouping plants with similar watering requirements on the same irrigation line or zone.
On a balcony, you can apply the same principle by grouping pots physically.
For example:
High-water group
- tomatoes;
- basil;
- mint;
- flowering annuals in sunny small containers.
Moderate-water group
- many leafy plants;
- established ornamentals;
- larger containers that retain moisture longer.
Low-water group
- rosemary;
- lavender;
- many succulents and drought-tolerant plants.
If one timer controls everything, use emitter flow and emitter count to compensate for different demand.
If the difference is extreme, build two small zones rather than forcing one schedule to serve incompatible plants.
Step 2: Choose the Reservoir Location
Put the reservoir where it is:
- shaded when possible;
- easy to refill;
- unlikely to be kicked;
- protected from pets or children;
- close enough to the plants to keep tubing simple;
- not blocking balcony drainage.
A pump-fed system does not need the tank to sit high above the plants. Elevation is mainly useful in gravity-fed systems.
Keeping the reservoir low and stable is usually preferable.
Remember the weight
Water is heavy.
Do not treat a large storage bin as ordinary lightweight furniture just because it is plastic. Use the smallest reservoir that provides the autonomy you actually need, keep it on a stable surface, and follow your building or balcony rules for stored items.
Step 3: Install the Pump and Intake
Place the pump or intake line according to the manufacturer’s instructions.
Important details:
- keep the intake submerged during operation;
- use the supplied intake screen or filter if the system includes one;
- do not let loose potting mix or leaves fall into the reservoir;
- route electrical or charging components only as their outdoor rating permits.
If a product’s power adapter is intended for indoor use, do not leave it exposed to rain or irrigation water.
For renters, compact battery or low-voltage systems are often easier to position safely than improvised mains-powered pumps.
Step 4: Run the Main Tubing
Lay out the tubing before connecting emitters.
A clean balcony route normally follows:
- the back edge of planters;
- the railing side;
- a plant shelf;
- or another protected path.
Avoid:
- door thresholds;
- walking paths;
- sharp metal edges;
- tight bends;
- places where a chair can crush the line.
Use removable clips, plant ties, or the planter structure itself rather than drilling into rental walls.
Leave a little slack. Tubing pulled tight is more likely to disconnect when pots are moved.
Step 5: Add an Emitter to Each Pot
Place the emitter near the active root zone, not against the plant stem.
For a small pot, one emitter may be enough.
For a large rectangular planter or mature tomato container, two or more emitters can distribute moisture more evenly.
Do not assume equal emitter count means equal watering
Two plants can have the same number of emitters but receive different amounts if:
- the emitters have different flow ratings;
- line pressure changes;
- a fitting is partially clogged;
- one line is kinked.
This is why the finished system needs a measured test.
Step 6: Control Balcony Runoff
Automatic watering introduces one renter-specific risk that backyard irrigation does not: someone may live directly below your garden.
UC Master Gardener guidance specifically recommends saucers under balcony containers to prevent irrigation water from dripping onto neighbors below.
Use:
- saucers;
- planter trays;
- waterproof planter boxes;
- controlled drainage containers where appropriate.
But do not turn the tray into a permanent pool.
Standing water can:
- keep roots saturated;
- stain balcony surfaces;
- attract mosquitoes.
The objective is to capture normal drainage and then manage it—not create a second reservoir under every pot.
Step 7: Measure One Real Watering Cycle
Do not start by programming “10 minutes every morning.”
Start with measurement.
The reservoir-drop method
- Fill the reservoir to a marked level.
- Run the system for a fixed period, such as five minutes.
- Measure how much water was used.
- Check each container.
- Adjust emitters or runtime.
- Repeat.
You are trying to answer two questions:
Does each plant receive enough water?
and
How much water does one complete cycle consume?
Once you know the second number, reservoir sizing becomes easy.
How to Size the Reservoir
Use:
Water per cycle × number of cycles between refills + safety margin
Example:
If your tuned system uses 2 liters per watering cycle, and you want five watering cycles while away:
2 L × 5 = 10 L
Adding a modest buffer might lead you to choose something around 12–15 liters rather than exactly 10.
The important thing is that the 2-liter number comes from your measured system, not a generic article.
Why generic reservoir recommendations fail
Balcony gardens differ enormously.
A system serving:
- four herbs in 6-inch pots
does not need the same reservoir as:
- six tomato and pepper containers in full afternoon sun.
Measure first.
Step 8: Build the Watering Schedule From Soil Moisture
UC container-gardening guidance is consistent on one point: container plants need frequent observation because watering demand changes with:
- season;
- container material;
- plant type;
- direct sun;
- wind.
During hot or windy summer weather, some containers may need water daily.
That does not mean every pot should automatically run every morning all year.
Start with the finger test
Check the top inch or two of potting mix.
If it is still damp, the plant may not need another cycle yet.
If it is dry and the root ball is also drying, watering is due.
Use those observations over several days to build the timer schedule.
Water thoroughly enough to wet the root zone
Drip irrigation is slow by design.
A five-minute cycle that only wets a tiny patch at the surface is not necessarily useful.
Watch how moisture spreads through the pot, and occasionally verify that the deeper root zone is receiving water.
Step 9: Test Before Leaving Town
Never install automatic irrigation the night before a vacation and assume it works.
Run it for several days while you are home.
Check for:
- loose tubing;
- clogged emitters;
- siphoning after the pump stops;
- one planter receiving too much water;
- low reservoir level;
- overflow from saucers;
- leaks at connectors;
- timer mistakes.
Simulate the full travel period
If possible, let the system run through the same number of cycles it will perform while you are away.
That tells you whether:
- the reservoir is actually large enough;
- the battery or power source is reliable;
- runoff accumulates;
- the emitters stay consistent.
Preventing Siphoning and Accidental Drain-Down
Depending on pump position, tubing route, and product design, water can sometimes continue moving after a pump switches off.
Follow the irrigation kit’s anti-siphon instructions.
Common product-specific solutions may include:
- anti-siphon valves;
- keeping line outlets above a certain level;
- routing a return or vent line;
- placing the reservoir relative to the emitters as specified.
Do not improvise here.
A timer that switches the pump off is not useful if gravity continues emptying the reservoir afterward.
Keep the Reservoir Covered
A balcony irrigation tank is standing water, so treat it accordingly.
CDC recommends:
- tightly covering water-storage containers;
- or using mesh small enough to prevent mosquitoes from entering when a full lid is not possible.
Also inspect:
- plant saucers;
- empty decorative pots;
- buckets;
- trays.
Mosquitoes do not need a large pond.
Clean the reservoir periodically
A covered container still accumulates:
- mineral deposits;
- biofilm;
- algae if light enters;
- debris from refilling.
Clean the reservoir and intake according to the pump manufacturer’s maintenance guidance.
If emitter flow becomes uneven, inspect the filter and emitters before simply increasing runtime.
Should You Use Rainwater?
Rainwater can be attractive because it reduces the need to carry tap water from inside.
On an apartment balcony, however, collection depends on:
- building rules;
- whether you have a legal collection surface;
- local restrictions;
- water cleanliness;
- mosquito control.
Colorado State University Extension notes that drip systems need relatively clean water and that non-potable sources can create clogging problems because of dirt, algae, or salts.
For a small balcony system, clean tap water is often the simplest choice.
If you do use collected water, filtration and reservoir hygiene become more important.
Smart Controller or Simple Timer?
A smart controller is useful when you want:
- phone alerts;
- remote start/stop;
- weather-aware routines;
- moisture-sensor integration;
- low-water warnings.
But the basic reliability hierarchy is still:
- good tubing;
- correct emitters;
- correct reservoir;
- correct schedule;
- automation features.
A Wi-Fi app cannot compensate for a blocked emitter.
Offline behavior matters
If you depend on the system while traveling, confirm whether the watering schedule continues when:
- Wi-Fi drops;
- the internet fails;
- the cloud service is unavailable.
A controller that stores schedules locally is preferable for unattended irrigation.
Three Useful Balcony Configurations
Small herb balcony
Plants: 4–6 herbs
System: one compact pump, one emitter per pot
Reservoir: sized from measured multi-day use
Best feature: simple timer
This is the easiest starting point.
Mixed vegetable balcony
Plants: tomatoes, peppers, basil, greens
System: multiple emitter flow rates or two watering zones
Reservoir: larger, but still manageable
Best feature: adjustable or pressure-compensating emitters
The challenge is not volume alone. It is different plant demand.
Frequent-travel setup
Plants: mixed established containers
System: tested pump + timer + low-water alert
Reservoir: measured for the longest realistic absence
Best feature: local schedule plus remote monitoring
For trips longer than the tested reservoir capacity, automatic irrigation should not replace a human backup plan.
Common Mistakes
Using an open bucket
It collects debris and creates easy mosquito access.
Use a covered reservoir.
Programming by guesswork
“Five minutes per day” means nothing until you know emitter output and plant demand.
Measure the actual cycle.
Giving every pot the same emitter
A 5-inch herb pot and a mature tomato container are not the same irrigation zone.
Ignoring drainage
Watering the plants successfully while creating a balcony runoff problem is not a successful system.
Making the reservoir huge
More stored water is not always better. It increases weight, takes up balcony space, and creates more water that can escape if a fitting fails.
Trusting Wi-Fi more than plumbing
The smart part should monitor a mechanically reliable system—not replace basic testing.
Leaving for vacation immediately after installation
Test through multiple cycles first.
Final Setup Checklist
Before calling the system finished:
- Reservoir has a secure lid.
- Pump and controller are rated for the location where they are installed.
- Tubing is protected from footsteps and sharp edges.
- Every pot receives water during the test.
- High- and low-water plants are separated or emitter flow is adjusted.
- Drainage is captured without leaving permanent standing water.
- One full cycle has been measured.
- Reservoir capacity is calculated from actual cycle use.
- Timer schedule is based on observed soil moisture.
- Anti-siphon behavior has been tested.
- System continues safely if Wi-Fi is unavailable.
- The setup has completed several unattended test cycles while you were still home.
Conclusion
You do not need a hose hookup to automate a balcony garden.
For most apartment gardeners, the most practical design is a covered reservoir + timed pump + micro-tubing + drip emitters. It is portable, renter-friendly, scalable across several containers, and easy to refill from an indoor faucet.
The part that determines whether it works is not the app. It is calibration.
Group plants by water demand, control drainage, measure one real watering cycle, size the reservoir from that measurement, and test the entire system for several days before relying on it.
Once those fundamentals are right, a small no-hose irrigation system can keep a balcony garden consistently watered without permanent plumbing—or a daily trip outside with a watering can.
Common questions
Questions this guide answers
Can I install automatic balcony irrigation without an outdoor faucet?
Yes. A reservoir-fed system does not need a pressurized hose connection. A small pump draws water from a covered container and sends it through micro-tubing to drip emitters placed in each planter.
How large should the water reservoir be?
Size it from measured water use rather than a generic gallon rule. Run the finished system for one normal watering cycle, measure how much water the reservoir loses, multiply that by the number of cycles needed while you are away, and add a reasonable safety margin. Keep the container small enough for the balcony location and easy to refill safely.
How often should balcony containers be watered automatically?
There is no universal schedule. Container watering changes with plant type, pot size, material, sun, wind, and season. University extension guidance notes that containers can require daily watering in hot or windy summer weather, so start by checking soil moisture and then tune the timer to actual conditions.
How do I keep a balcony irrigation reservoir from attracting mosquitoes?
Keep the reservoir tightly covered and do not leave open standing water in trays or buckets. CDC recommends tightly covering water-storage containers and regularly emptying or scrubbing other items that hold standing water so mosquitoes cannot use them for breeding.
Evidence & further reading
Sources & references
Primary and authoritative references used to support or contextualize this article. Links open the original source.
- 1Container Gardening Basics
UC Agriculture and Natural Resources · Accessed Aug 10, 2026
Supports the need for frequent container watering, soil-moisture checks, and the use of drip irrigation on a timer.
- 2Drip Irrigation for Home Gardens
Colorado State University Extension · Accessed Aug 10, 2026
Supports drip-emitter placement, pressure-compensating emitters, filtration, flow-rate planning, and matching irrigation to plant needs.
- 3Drip Irrigation
UC Agriculture and Natural Resources · Accessed Aug 10, 2026
Supports grouping plants with similar water needs into irrigation zones.
- 4Container Vegetable Gardening in the Central Valley
UC Master Gardeners of Merced County · Accessed Aug 10, 2026
Supports using saucers and managing balcony runoff so watering does not drip onto neighbors below.
- 5Container Gardening - Orange County
UC Master Gardeners of Orange County · Accessed Aug 10, 2026
Supports checking container moisture, watering thoroughly, and adapting frequency for hot or windy weather.
- 6Mosquito Control at Home
Centers for Disease Control and Prevention · Accessed Aug 10, 2026
Supports tightly covering water-storage containers and eliminating or cleaning standing-water containers to reduce mosquito breeding.

About the author
Maya Chen
Maya covers residential energy, HVAC controls, and practical home automation, translating technical systems into useful decisions for homeowners and renters.
More from Maya →Make your home smarter without buying every gadget.
One useful idea, one product worth knowing, and one energy-saving action—delivered weekly.
No spam. Unsubscribe anytime.
Semantic recommendations
Related reading
Selected from topic cluster, entities, tags, search intent, and editorial relationships.
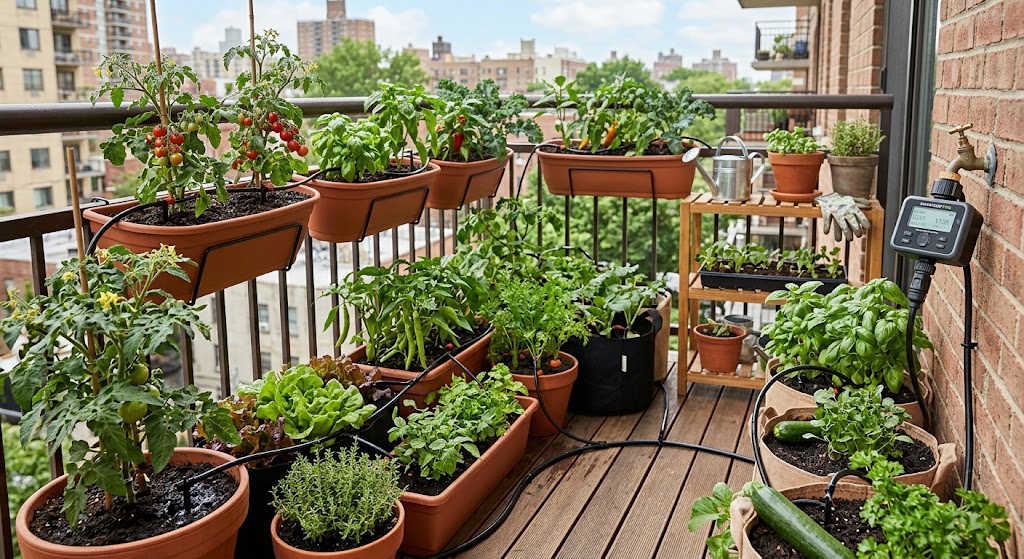
Smart Water Timer Setup for Balcony Container Vegetable Gardens
Set up a smart hose timer and drip irrigation for balcony vegetables without overwatering pots, wasting water, or creating runoff problems for neighbors below.
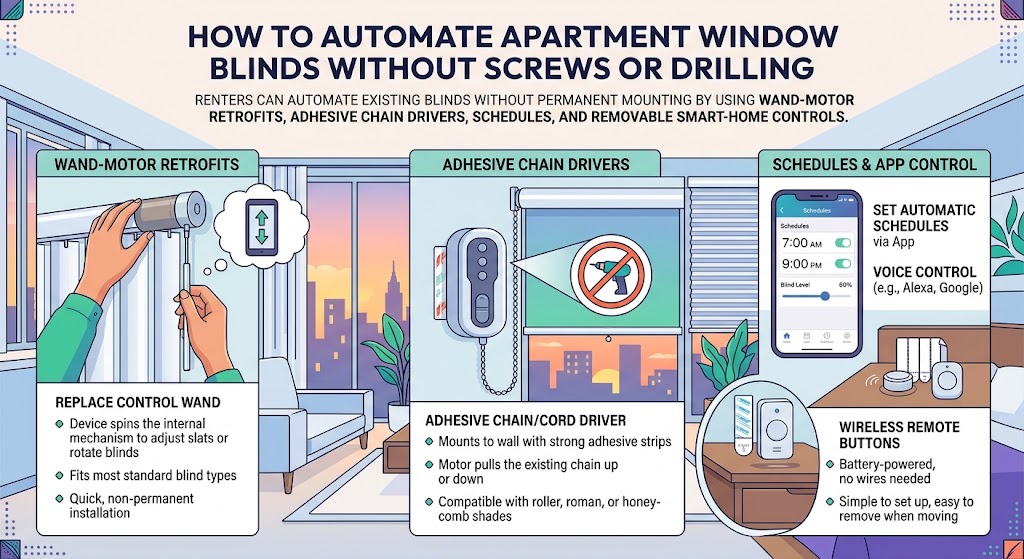
How to Automate Apartment Window Blinds Without Screws or Drilling
Renters can automate existing blinds without permanent mounting by using wand-motor retrofits, adhesive chain drivers, schedules, and removable smart-home controls.
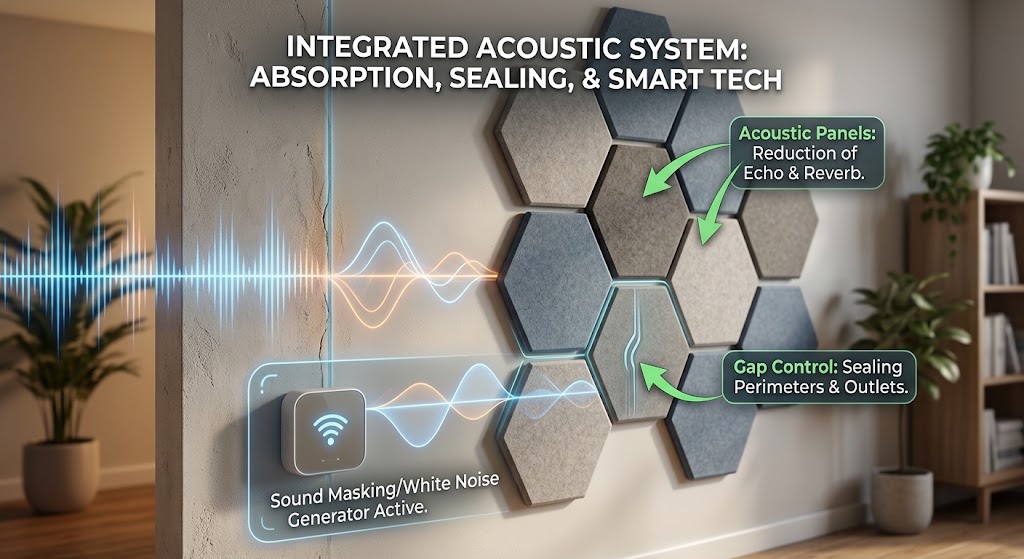
Soundproofing Apartment Walls: Smart Acoustic Panels & Tech Hacks
Acoustic panels can reduce echo, but they do not truly soundproof a shared apartment wall. Here is how renters can combine absorption, gap control, sound masking, and smart tech for a noticeably quieter space.

10 Drill-Free Smart Home Upgrades That Won't Risk Your Security Deposit
These renter-friendly smart home upgrades add automation, energy savings, safety, and comfort without drilling holes or changing permanent wiring.