Home Assistant Starter Guide: How to Build a Private, Local Smart Home
Home Assistant lets you run automations, dashboards, and device control on hardware inside your home. This beginner guide shows the cleanest 2026 path to a private, local-first setup.
Quick answer
The simplest 2026 path to a private, local Home Assistant setup is to run Home Assistant OS on Home Assistant Green, Home Assistant Yellow, a supported Raspberry Pi, or an x86-64 machine; connect the hub to Ethernet; complete onboarding; add local integrations first; build automations through the visual editor; enable automatic encrypted backups; and add remote access only if you actually need it. Home Assistant itself runs on your own hardware and stores data locally, but some third-party integrations still depend on vendor clouds, so a truly local-first home depends on choosing devices and integrations with local protocols such as Zigbee, Z-Wave, Matter, Thread, ESPHome, or documented local APIs.
Table of contents
- What Home Assistant Actually Is
- What “Local Smart Home” Really Means
- Local protocols Home Assistant highlights
- Step 1: Choose the Right Home Assistant Installation
- Easiest Hardware: Home Assistant Green
- Best for
- More Expandable Hardware: Home Assistant Yellow
- Bring Your Own Hardware
- Why a mini PC can be attractive
- Avoid Overcomplicating Storage on Day One
- Step 2: Use Ethernet for the Home Assistant Hub
- Step 3: Complete Onboarding
- Step 4: Learn the Four Core Concepts
- Integration
- Device
- Entity
- Automation
- Step 5: Add Local Integrations First
- Matter is not always the best path
- Step 6: Build the Dashboard Around Tasks
- Avoid dashboard duplication
- Step 7: Build Your First Automation in the Visual Editor
- Trigger
- Conditions
- Actions
- First automation example
- Blueprints Can Accelerate the First Month
- Step 8: Build Presence Slowly
- Step 9: Add Zigbee Only If You Need Zigbee
- Step 10: Add Matter Carefully
- Matter over Wi-Fi
- Matter over Thread
- 2026 Home Assistant Matter update
- Thread Requires More Planning Than Zigbee Beginners Expect
- Step 11: Keep Remote Access Optional
- Easiest official remote-access path
- Why not immediately expose Home Assistant yourself?
- Step 12: Configure Backups Before You Customize Everything
- Download the emergency kit
- Do not keep the only backup on the Home Assistant box
- Step 13: Update Regularly—But Not Recklessly
- How Private Can a Home Assistant Home Be?
- Home Assistant
- Lighting
- Sensors
- Plugs
- Locks
- Climate
- Cameras
- Voice
- Remote access
- Where Cloud Dependence Usually Sneaks Back In
- Robot vacuums
- Cameras
- Smart appliances
- Weather
- Voice assistants
- A Minimal Private Starter Build
- Core
- Lighting
- Sensors
- Power
- Automation 1
- Automation 2
- Automation 3
- A More Advanced Local Setup
- Add
- Then improve resilience
- Network Placement Matters for Radios
- Security Basics
- Use a strong Home Assistant administrator password
- Create separate users
- Keep Home Assistant updated
- Do not expose ports casually
- Secure the underlying network
- Review cloud integrations
- Common Beginner Mistakes
- Installing Home Assistant Container because it sounds more professional
- Buying every radio immediately
- Moving everything to YAML
- Making dashboards before automations
- Adding cloud integrations without checking for local alternatives
- Skipping backups
- Treating Matter as a replacement for every native integration
- 30-Day Home Assistant Starter Plan
- Week 1 — Foundation
- Week 2 — First local devices
- Week 3 — Automations
- Week 4 — Expansion decision
- Final Starter Checklist
- Conclusion
Key takeaways
- Home Assistant OS is the recommended installation type for most beginners because it includes the full Home Assistant ecosystem, one-click updates, apps, backups, and easier Matter/Thread support.
- Home Assistant itself is local-first, but some third-party integrations are still cloud-dependent; device selection determines how private and offline-capable the final system really is.
- Start with Ethernet, local integrations, and a small number of useful automations before adding advanced protocols, dashboards, or custom YAML.
- Automatic encrypted backups and the backup emergency kit should be configured before the system becomes critical to daily life.
- Remote access is optional; Home Assistant Cloud is the easiest official option and avoids opening router ports manually.
Editorial transparency
Who worked on this article and how it was handled.
- Written by
- Daniel Reed
- Creation method
- Editorial research
AI assistance: AI assisted with research organization and drafting. Sources, current Home Assistant behavior, integration support, and the final article should be reviewed by a human editor before publication.
Home Assistant is one of the strongest ways to build a smart home without making one vendor’s cloud the center of your house.
The platform runs on hardware you control, stores its data locally, and can talk directly to many devices over protocols such as Zigbee, Z-Wave, Matter, Thread, ESPHome, Bluetooth, and local network APIs. If the internet goes down, a well-designed Home Assistant system can keep running core automations inside the home.
That is the ideal.
The important caveat is that Home Assistant cannot magically make a cloud-only product local. If a thermostat, camera, vacuum, or plug only exposes a vendor cloud API, Home Assistant may still need the internet to control that device.
So the goal of this starter guide is not merely to install Home Assistant.
It is to build the system in the right order:
- choose the right Home Assistant host;
- keep the network simple;
- prioritize local integrations;
- build automations through the UI;
- create backups before experimenting;
- add Matter, Thread, Zigbee, or Z-Wave only when they solve a real device problem;
- keep remote access optional.
What Home Assistant Actually Is
Home Assistant is an open-source home-automation platform maintained under the Open Home Foundation.
At a practical level, it acts as the local control plane for your smart home.
It can:
- discover devices;
- connect multiple brands;
- expose one dashboard;
- run automations;
- manage scenes;
- track presence;
- collect sensor data;
- control local protocols;
- connect optional cloud services when you choose to use them.
The important architectural difference is that Home Assistant runs on your hardware rather than existing only as a vendor-hosted web service.
That lets local-capable devices communicate without sending every command through the public internet.
What “Local Smart Home” Really Means
The phrase is often used too loosely.
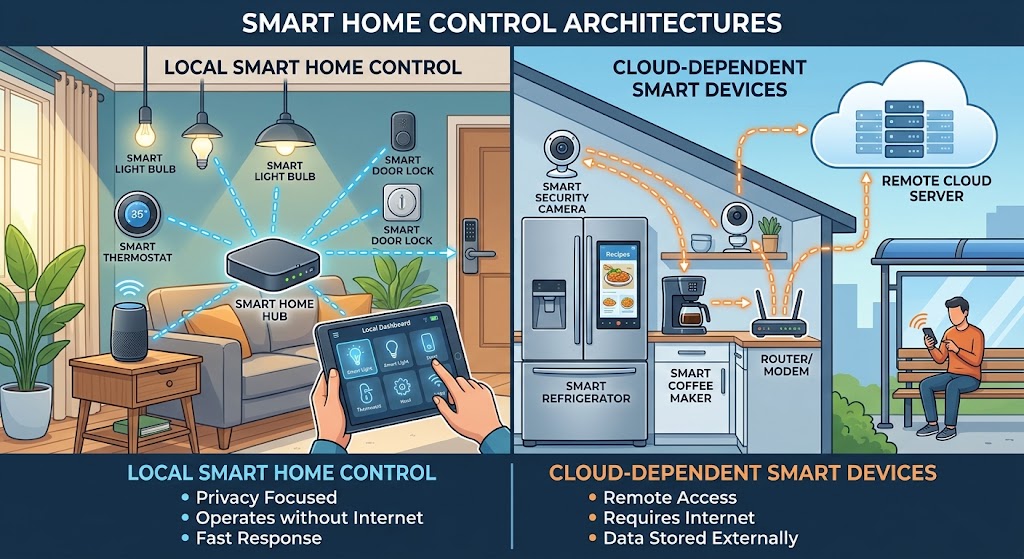
A truly local path looks like:
Sensor → local network/protocol → Home Assistant → local automation → device
A cloud-dependent path can look like:
Sensor → vendor cloud → internet → Home Assistant integration → automation → vendor cloud → device
Both can appear inside the same Home Assistant dashboard.
But they have very different privacy and resilience characteristics.
Local protocols Home Assistant highlights
Home Assistant’s own privacy documentation specifically calls out protocols such as:
- Zigbee;
- Z-Wave;
- Matter;
- Thread;
- ESPHome;
as technologies that can operate without internet connectivity.
Some Wi-Fi and Ethernet products also have excellent local APIs.
That is why the right question before buying a device is not:
Does it work with Home Assistant?
It is:
Does it work with Home Assistant locally?
Step 1: Choose the Right Home Assistant Installation
Home Assistant currently offers two main installation types:
- Home Assistant Operating System
- Home Assistant Container
For most beginners, use Home Assistant OS.
Home Assistant’s official installation guide explicitly recommends Home Assistant OS for most users.
Why?
Because it includes the full managed Home Assistant environment, including:
- Home Assistant Core;
- Supervisor;
- Apps;
- one-click updates;
- backups;
- easier management of supporting services.
Container installations can be excellent for experienced Linux and Docker users, but you become responsible for more of the host system and supporting services.
Some features such as the official Matter Server experience are also most straightforward on Home Assistant OS.
Easiest Hardware: Home Assistant Green
If you want the least complicated route, Home Assistant Green is the obvious starter hardware.
Home Assistant OS is already installed.
The basic setup is:
- connect Ethernet;
- connect power;
- wait for the system to start;
- open Home Assistant in a browser or the companion app;
- complete onboarding.
There is no operating-system image to flash and no Linux host to maintain.
Best for
- first-time Home Assistant users;
- apartment smart homes;
- people who value stability over hardware experimentation;
- users planning to add USB Zigbee, Z-Wave, or Thread radios later.
More Expandable Hardware: Home Assistant Yellow
Home Assistant Yellow is more DIY-oriented.
You provide a compatible Raspberry Pi Compute Module and assemble the hardware.
It is a better fit if you specifically want:
- official expandable hardware;
- a more integrated radio-oriented Home Assistant platform;
- a system you are comfortable assembling yourself.
For a first Home Assistant installation, Green is easier.
For a tinkerer’s long-term hub, Yellow can be more interesting.
Bring Your Own Hardware
Home Assistant OS can also run on hardware you already own, including:
- supported Raspberry Pi models;
- x86-64 systems;
- virtual machines;
- selected single-board computers.
This can be excellent if you already have:
- a mini PC;
- an unused x86 computer;
- a virtualization server.
Why a mini PC can be attractive
A small x86 system gives you:
- SSD storage;
- more CPU headroom;
- more RAM;
- strong long-term expandability.
But for a basic smart home, more CPU does not automatically make automations meaningfully faster.
Choose the hardware that you will actually maintain.
Avoid Overcomplicating Storage on Day One
A beginner Home Assistant installation does not need a giant storage array.
What matters more is:
- reliable storage;
- proper backups;
- reasonable free space.
If you use a Raspberry Pi, storage quality matters because Home Assistant writes history, databases, logs, and updates over time.
For a system you expect to depend on for years, SSD-based storage is attractive where the hardware supports it.
But do not turn the first installation into a NAS project unless you already need one.
Step 2: Use Ethernet for the Home Assistant Hub
For the main Home Assistant server, wired Ethernet is the clean default.
Your hub is infrastructure.
Keeping it on Ethernet provides:
- predictable connectivity;
- no Wi-Fi roaming;
- fewer radio variables;
- better stability during router changes.
Wi-Fi devices can still communicate with it through the local network.
The Home Assistant host itself does not need to be another Wi-Fi client unless the hardware or apartment makes Ethernet impossible.
Step 3: Complete Onboarding
Home Assistant’s current getting-started process is designed to be UI-first.
You do not need to begin with a terminal.
During onboarding, you will configure basics such as:
- administrator account;
- home location;
- units;
- detected devices and services.
Home Assistant can automatically discover many compatible products on the local network.
This is one of the best parts of the beginner experience:
you may already have devices waiting in Settings → Devices & services before you manually add anything.
Step 4: Learn the Four Core Concepts
You do not need to memorize Home Assistant terminology, but four concepts make everything easier.
Integration
An integration connects Home Assistant to:
- a device family;
- protocol;
- service;
- platform.
Examples:
- Matter;
- Philips Hue;
- MQTT;
- ESPHome;
- weather service.
Device
A physical or logical product.
Example:
Bedroom motion sensor
Entity
One controllable or measurable function of a device.
A thermostat might expose entities for:
- temperature;
- humidity;
- HVAC mode;
- setpoint.
Automation
A rule that reacts to something and performs one or more actions.
Example:
When the entry door opens after sunset, turn on the hallway light.
Understanding entities is especially important because automations ultimately operate on the actual capabilities exposed by integrations and devices.
Step 5: Add Local Integrations First
This is where the privacy-first design becomes real.
Before adding a vendor cloud account, search Home Assistant’s integrations to see whether the product has a local option.
You may find that the same hardware can be controlled through:
- a native local integration;
- Matter;
- HomeKit Device;
- Zigbee;
- Z-Wave;
- ESPHome;
- MQTT;
- a cloud API.
When more than one path exists, compare feature depth and locality.
Matter is not always the best path
Home Assistant’s Matter documentation gives an important example.
A Philips Hue Bridge can expose devices through Matter.
But the native Home Assistant Hue integration already communicates locally and exposes richer Hue-specific features.
Using Matter in that case can actually reduce functionality.
So the rule is not:
Always choose Matter.
It is:
Choose the best local integration that exposes the features you need.
Step 6: Build the Dashboard Around Tasks
Home Assistant’s new Home dashboard became the default for new installations in 2026.
You can use the default dashboard first.
Do not spend the first weekend building a wall-mounted control center.
A good beginner dashboard answers common questions:
- Are the doors locked?
- Is anyone home?
- What is the temperature?
- Are important lights on?
- Is the AC running?
- Is there a leak?
- What needs attention?
Once you use the system for a week or two, you will know which controls deserve prominent placement.
Avoid dashboard duplication
If an automation works correctly, you may not need a dashboard button for it.
The best smart home should require less tapping, not more.
Step 7: Build Your First Automation in the Visual Editor
Home Assistant’s automation editor is visual.
No YAML is required for basic automations.
The model is simple:
Trigger
What happened?
Example:
- motion detected;
- sun set;
- person arrived home;
- temperature exceeded 28°C.
Conditions
Should the automation run right now?
Example:
- someone is home;
- time is after 6 p.m.;
- light level is low.
Actions
What should Home Assistant do?
Example:
- turn on light;
- set thermostat;
- send notification;
- close blind.
First automation example
Trigger
- entry motion detected
Condition
- after sunset
Action
- turn on entry lamp
That is enough.
Do not start with twenty nested conditions.
Blueprints Can Accelerate the First Month
Home Assistant recommends automation blueprints for beginners.
A blueprint is a reusable automation template.
Instead of creating the logic from scratch, you select:
- motion sensor;
- light;
- timing options;
and the blueprint builds the automation structure.
Blueprints are especially useful for repetitive patterns such as:
- motion lighting;
- low-battery alerts;
- door notifications.
Use community blueprints carefully and understand what they control before making them critical to home security or HVAC operation.
Step 8: Build Presence Slowly
Presence detection can become one of Home Assistant’s most valuable features.
It can drive:
- away mode;
- lighting;
- HVAC setbacks;
- security notifications;
- occupancy-aware automations.
But presence logic should not begin with:
If phone disconnects from Wi-Fi, assume nobody is home.
Phones sleep, networks roam, batteries die, and people leave devices behind.
Start with the official Home Assistant companion app and basic person entities.
Then refine the logic if you need more confidence.
Step 9: Add Zigbee Only If You Need Zigbee
Zigbee is still a strong choice for:
- sensors;
- buttons;
- plugs;
- lighting;
- battery devices.
A local Zigbee network can keep dozens of small smart-home endpoints off Wi-Fi.
If you already own Zigbee hardware, Home Assistant can become a strong local coordinator.
But do not buy a Zigbee radio before you own any Zigbee devices.
The same rule applies to:
- Z-Wave;
- Thread;
- Bluetooth proxies;
- MQTT infrastructure.
Add protocols because devices require them, not because a YouTube rack tour says every Home Assistant installation needs them.
Step 10: Add Matter Carefully
Home Assistant includes a Matter controller integration.
Matter devices can communicate locally over:
- Wi-Fi;
- Thread.
Home Assistant OS is the recommended and supported path for the official Matter Server app.
Matter over Wi-Fi
Does not require a Thread radio.
The device uses your normal local IP network.
Matter over Thread
Requires a Thread network and at least one Thread Border Router.
That Border Router can come from:
- Apple;
- Google;
- Amazon;
- Home Assistant-compatible Thread hardware;
- other Thread-capable infrastructure.
2026 Home Assistant Matter update
In June 2026, Home Assistant moved its Matter experience to the matter.js-based Matter Server.
The official announcement said the new server improved:
- stability;
- startup;
- recovery;
- network visualization.
At that release point, Home Assistant supported Matter 1.5.1 and stated Matter 1.6 was coming next.
That is useful context, but for a starter home the priority should be device reliability—not chasing the newest Matter revision number.
Thread Requires More Planning Than Zigbee Beginners Expect
Home Assistant’s Thread integration documentation still describes parts of the Home Assistant Thread experience as work in progress.
Current Home Assistant hardware such as:
- Yellow;
- Connect ZBT-1;
- Connect ZBT-2;
can provide Thread-capable radios, but they normally ship or operate in Zigbee-oriented configurations and may require manual steps to become Home Assistant Thread Border Routers.
For a beginner, it can be easier to use an existing compatible Apple or Google Thread Border Router and let Home Assistant access the Thread network.
Do not reconfigure a stable Zigbee coordinator into Thread unless you understand what devices depend on it.
Step 11: Keep Remote Access Optional
By default, Home Assistant listens on your local network.
That is exactly what a privacy-first beginner setup should do.
You do not need remote access on day one.
Build the local system first.
Easiest official remote-access path
Home Assistant Cloud is the official convenience option.
Home Assistant says it provides encrypted remote access without opening ports on your router.
It can also simplify integrations with:
- Apple Home;
- Google Home;
- Amazon Alexa.
The service is optional and subscription-based.
Why not immediately expose Home Assistant yourself?
Self-hosted remote access is possible, but it introduces:
- DNS;
- TLS certificates;
- reverse proxies;
- router configuration;
- attack-surface decisions.
Do it because you understand the architecture, not because the local URL stopped working from the office.
Step 12: Configure Backups Before You Customize Everything
This is one of the most important steps in the guide.
Home Assistant now supports automatic encrypted backups.
Go to:
Settings → System → Backups
Configure:
- backup schedule;
- retention;
- backup locations;
- pre-update backup behavior.
Download the emergency kit
Home Assistant’s documentation explicitly instructs users to download the backup emergency kit.
Encrypted backups require the encryption key for restoration.
Do not store the only copy of that key inside Home Assistant itself.
Do not keep the only backup on the Home Assistant box
If the device fails, a backup stored only on that failed device is less useful.
Home Assistant recommends another system and ideally an off-site copy.
Possible destinations include:
- NAS;
- supported cloud storage integration;
- Home Assistant Cloud backup;
- manually downloaded archive.
Step 13: Update Regularly—But Not Recklessly
Home Assistant evolves quickly.
That is one of its strengths.
It also means your smart home is now software infrastructure.
A safe update routine is:
- create or confirm backup;
- read breaking-change notes for integrations you depend on;
- update Home Assistant;
- verify critical automations;
- verify radios and network integrations;
- only then update everything else.
For a tiny beginner setup, updates are usually straightforward.
As the system grows, treat it more like a server than a phone app.
How Private Can a Home Assistant Home Be?
Very private—if the devices cooperate.
A highly local setup might include:
Home Assistant
- running on Green or x86 Home Assistant OS.
Lighting
- Zigbee or Matter over Thread.
Sensors
- Zigbee, Thread, ESPHome.
Plugs
- Zigbee, Matter, or local Wi-Fi integrations.
Locks
- Matter over Thread or Z-Wave.
Climate
- local thermostat integration.
Cameras
- local RTSP/ONVIF-capable system when appropriate.
Voice
- optional local voice architecture.
Remote access
- disabled or explicitly configured.
In that design, the internet becomes optional for many everyday functions.
Where Cloud Dependence Usually Sneaks Back In
Robot vacuums
Some brands expose rich functionality primarily through vendor cloud APIs.
Cameras
Cloud recording and AI subscriptions can make otherwise local networks cloud-dependent.
Smart appliances
Wi-Fi ovens, refrigerators, washers, and portable ACs often rely on manufacturer services.
Weather
Remote weather services are naturally internet-dependent.
Voice assistants
Mainstream cloud voice assistants depend on external services.
Home Assistant can still unify these products.
Just do not label the whole system “offline” if critical functions depend on them.
A Minimal Private Starter Build
You do not need 50 devices.
A strong first setup could be:
Core
- Home Assistant Green
- Ethernet connection
- automatic encrypted backups
Lighting
- 2 local smart bulbs or switches
Sensors
- 1 entry contact sensor
- 1 motion sensor
- 1 temperature/humidity sensor
Power
- 1 local smart plug
Automation 1
Motion after sunset → entry light on
Automation 2
Door opens while away → phone notification
Automation 3
Temperature high while occupied → fan or climate action
This teaches:
- integrations;
- entities;
- dashboards;
- automations;
- notifications;
- presence.
Only after that should you expand.
A More Advanced Local Setup
Once the basics are stable:
Add
- Zigbee coordinator or Z-Wave adapter;
- Matter/Thread devices;
- energy monitoring;
- local voice;
- presence sensors;
- leak detection;
- blinds;
- local cameras.
Then improve resilience
- UPS for Home Assistant and router;
- external backups;
- redundant Thread Border Router coverage;
- better wireless coordinator placement;
- documented recovery process.
The progression should be driven by problems you want to solve.
Network Placement Matters for Radios
A Home Assistant server can be perfectly stable while its Zigbee or Thread radio performs poorly.
Common causes:
- USB 3 interference;
- hub hidden inside a metal rack;
- coordinator next to Wi-Fi access point;
- poor mesh-router distribution.
Use a USB extension cable when recommended for external radios.
Place wireless coordinators:
- away from dense electronics;
- away from metal enclosures;
- in a location with good coverage.
This matters more than buying a “stronger” coordinator every year.
Security Basics
A private smart home still needs security hygiene.
Use a strong Home Assistant administrator password
Do not reuse your router password.
Create separate users
Household members do not all need the same administrator credentials.
Keep Home Assistant updated
Security fixes arrive through normal releases.
Do not expose ports casually
Remote access changes the threat model.
Secure the underlying network
Home Assistant cannot compensate for an insecure Wi-Fi network or an unmanaged router.
Review cloud integrations
Every vendor account introduces another place where:
- credentials;
- telemetry;
- device data;
may exist.
Local-first device selection reduces that surface.
Common Beginner Mistakes
Installing Home Assistant Container because it sounds more professional
Container is excellent for people who already want to manage Linux and Docker.
It is not automatically more private or more powerful than Home Assistant OS.
Buying every radio immediately
Start with devices.
Then buy the radio those devices need.
Moving everything to YAML
Home Assistant has invested heavily in visual configuration.
Use YAML when it solves a real limitation.
Making dashboards before automations
A smart home is more valuable when it acts automatically than when it has a beautiful control panel.
Adding cloud integrations without checking for local alternatives
This is how a local-first architecture quietly becomes cloud-first again.
Skipping backups
The first hardware failure is the worst time to learn that your automations were never copied elsewhere.
Treating Matter as a replacement for every native integration
Matter prioritizes interoperability.
A native local integration can expose richer device-specific capabilities.
30-Day Home Assistant Starter Plan
Week 1 — Foundation
- install Home Assistant OS;
- connect Ethernet;
- complete onboarding;
- configure automatic backups;
- add companion app.
Week 2 — First local devices
- add lights;
- add one plug;
- add motion/contact sensor;
- organize rooms and areas.
Week 3 — Automations
Build three automations that solve real daily problems.
Examples:
- motion lighting;
- away notification;
- climate or fan control.
Week 4 — Expansion decision
Only now decide whether you need:
- Zigbee;
- Z-Wave;
- Matter;
- Thread;
- remote access;
- custom dashboards;
- YAML.
This prevents the most common beginner pattern: installing ten advanced components before the first useful automation works.
Final Starter Checklist
Before you call the system “production ready”:
- Home Assistant OS is installed on reliable hardware.
- Hub uses Ethernet where possible.
- Administrator account uses a strong unique password.
- Household users have separate accounts.
- Automatic backups are enabled.
- Backup emergency kit is stored outside Home Assistant.
- At least one backup exists off the Home Assistant device.
- Critical devices use local integrations where available.
- I know which devices still depend on the cloud.
- First three automations work without manual intervention.
- Remote access is disabled unless I intentionally configured it.
- Matter and Thread were added only when needed.
- Wireless radios are positioned away from interference.
- Critical automations were tested after the latest update.
Conclusion
The best Home Assistant setup is not the one with the most integrations.
It is the one that keeps working when the internet is unavailable, keeps sensitive home data under your control, and automates enough of daily life that you stop thinking about the technology.
For beginners in 2026, the cleanest path is:
Home Assistant OS → Ethernet → local integrations → simple automations → encrypted backups → optional protocols and remote access.
Use Home Assistant Green if you want the easiest appliance-like start. Use your own x86 or Raspberry Pi hardware if you are comfortable maintaining it. Add Zigbee, Z-Wave, Matter, and Thread because your device strategy needs them—not because every Home Assistant installation must contain every protocol.
Most importantly, remember that Home Assistant provides the local-first foundation.
The final privacy of the smart home is determined by the devices you connect to it.
Common questions
Questions this guide answers
Is Home Assistant really local and private?
Home Assistant runs on hardware inside your home and stores its data locally. The project states that there is no required Home Assistant cloud account and that local protocols such as Zigbee, Z-Wave, Matter, Thread, and ESPHome can work without an internet connection. However, individual third-party devices can still require vendor-cloud integrations, so privacy depends partly on the hardware you choose.
What is the easiest Home Assistant installation for beginners?
Home Assistant OS is the recommended installation type for most users. Home Assistant Green is the easiest appliance-style starting point because Home Assistant OS is preinstalled; you connect power and Ethernet, then complete onboarding from a browser or mobile app.
Do I need to know YAML to use Home Assistant?
No. Home Assistant's current getting-started documentation says most setup can be done through the user interface. Integrations, dashboards, and automations can all be built visually. YAML remains useful for a smaller number of integrations and advanced features, but it is not a prerequisite for a beginner setup.
Can Home Assistant control Matter and Thread devices locally?
Yes, with the right setup. Home Assistant has a local Matter controller integration and can control Matter devices over local Wi-Fi or Thread. Thread devices also require access to a Thread Border Router. Home Assistant OS is the recommended and supported path for the official Matter Server app.
Evidence & further reading
Sources & references
Primary and authoritative references used to support or contextualize this article. Links open the original source.
- 1Installation
Home Assistant · Accessed Aug 10, 2026
Supports Home Assistant OS as the recommended installation type, Home Assistant Green as the easiest starting point, and the differences between OS and Container installations.
- 2Getting started with Home Assistant
Home Assistant · Accessed Aug 10, 2026
Supports the beginner setup path, UI-first configuration, local hardware model, and the getting-started sequence from installation through automations.
- 3Is my smart home data private with Home Assistant?
Home Assistant · Accessed Aug 10, 2026
Supports local data storage, optional cloud use, direct local communication where supported, and offline operation for local protocols such as Zigbee, Z-Wave, Matter, Thread, and ESPHome.
- 4Adding integrations
Home Assistant · Accessed Aug 10, 2026
Supports the Settings > Devices & services integration workflow and automatic discovery of compatible local devices.
- 5Automating Home Assistant
Home Assistant · Accessed Aug 10, 2026
Supports the visual automation editor, trigger/action model, and the recommendation for beginners to start with blueprints.
- 6Common tasks for every Home Assistant
Home Assistant · Accessed Aug 10, 2026
Supports encrypted backups, automatic backup scheduling, backup emergency kits, external/off-site backup locations, and pre-update backups.
- 7Remote access to Home Assistant
Home Assistant · Accessed Aug 10, 2026
Supports local-only access by default and Home Assistant Cloud as the easiest official remote-access option without opening router ports.
- 8Matter
Home Assistant · Accessed Aug 10, 2026
Supports Home Assistant as a local Matter controller, Home Assistant OS as the recommended supported path for the official Matter Server app, Matter over Wi-Fi/Thread, and multi-fabric sharing.
- 9Thread
Home Assistant · Accessed Aug 10, 2026
Supports Thread Border Router requirements, Home Assistant Thread network management, and current Home Assistant Yellow / Connect ZBT radio setup notes.
- 10The Matter upgrade you’ve been waiting for
Home Assistant · Accessed Aug 10, 2026
Supports the 2026 matter.js-based Matter Server update, Matter 1.5.1 support at the time of the release, Thread 1.4 OTBR update, and improved Matter stability and network visualization.
- 112026.2: Home, sweet overview
Home Assistant · Accessed Aug 10, 2026
Supports the new Home dashboard becoming the default for new installations and the terminology change from add-ons to Apps.

About the author
Daniel Reed
Daniel writes about connected-home standards, small-space technology, device interoperability, and privacy-conscious urban living.
More from Daniel →Make your home smarter without buying every gadget.
One useful idea, one product worth knowing, and one energy-saving action—delivered weekly.
No spam. Unsubscribe anytime.
Semantic recommendations
Related reading
Selected from topic cluster, entities, tags, search intent, and editorial relationships.
How to Set Up an Offline Smart Home Network That Works When Wi-Fi Drops
Build a local-first smart home that keeps critical lights, sensors, locks, and automations working during internet outages—and can keep core automations alive even when the Wi-Fi access point itself fails.
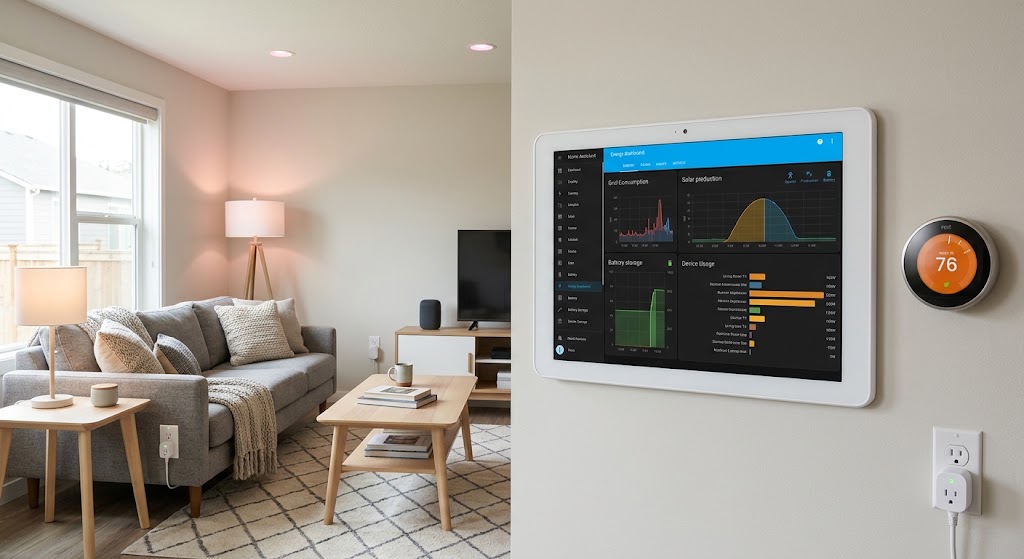
5 Essential Home Assistant Automations for Energy Saving
These five Home Assistant automations target the biggest sources of avoidable household energy use: HVAC runtime, unnecessary lighting, standby loads, expensive tariff windows, and solar heat gain.
Local Control vs. Cloud Smart Home: Why You Should Avoid Cloud Dependency
Cloud features are useful, but your lights, locks, sensors, and core automations should not stop working when the internet or a vendor service fails. Here is how to build a local-first smart home in 2026.
Local DIY Smart Home Hub vs Cloud Ecosystems for Studio Apartments
Compare local smart home hubs with Apple Home, Google Home, Alexa, and other cloud ecosystems to choose the right setup for a small studio apartment.