
5 Essential Home Assistant Automations for Energy Saving
These five Home Assistant automations target the biggest sources of avoidable household energy use: HVAC runtime, unnecessary lighting, standby loads, expensive tariff windows, and solar heat gain.
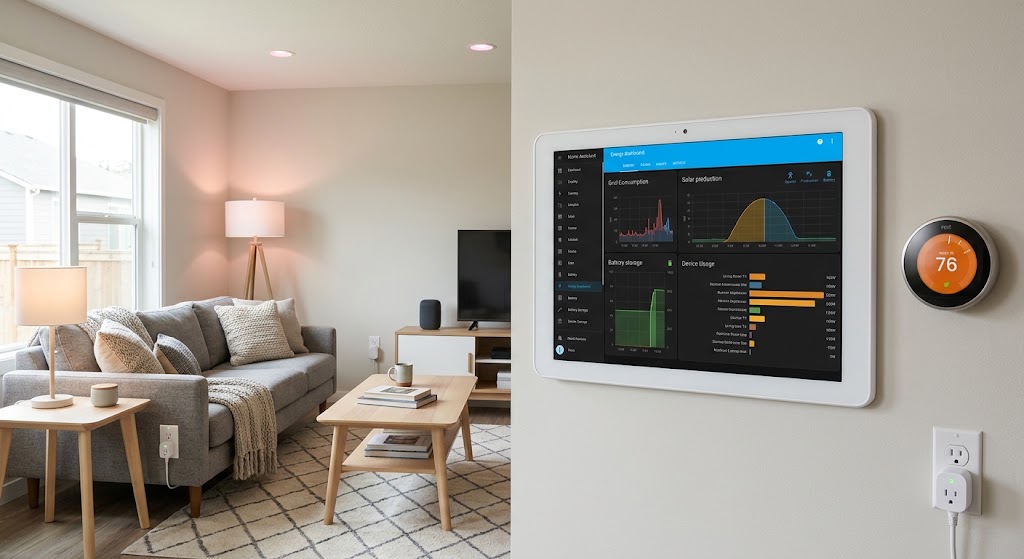
Quick answer
The most effective Home Assistant energy automations are the ones that reduce runtime of high-energy equipment or shift it to better times. Start with five: automatically set back heating or cooling when nobody is home; turn lights off when rooms are unoccupied; cut selected standby loads after they remain idle; delay flexible appliances until off-peak prices or strong solar production; and close sun-facing blinds when solar heat would increase cooling demand. Home Assistant's Energy dashboard, Utility Meter helper, presence zones, climate actions, power triggers, and solar forecasting make these automations possible without depending on a single hardware brand.
Table of contents
- Before Automating: Build an Energy Baseline
- Why measure first?
- Automation 1: HVAC Setback When Everyone Leaves
- What you need
- Basic logic
- Example: cooling setback
- Return-home automation
- Make it better with pre-conditioning
- Important heat-pump caution
- Automation 2: Occupancy-Aware Lighting With a Delay
- Example logic
- Basic motion timeout
- Add daylight logic to the ON automation
- Presence sensors can improve this dramatically
- Automation 3: Kill Standby Loads After They Become Idle
- What this works well for
- What not to control casually
- Example idle cutoff
- Add a manual override
- Use the Energy dashboard to decide whether this is worth it
- Automation 4: Shift Flexible Loads to Cheap Power or Solar
- Good flexible loads
- Method A: time-of-use tariff
- Method B: dynamic electricity price
- Method C: solar surplus
- Solar logic
- Cheapest power vs. cleanest power
- Automation 5: Close Sun-Facing Blinds Before the AC Has to Fight the Heat
- Basic summer logic
- Example using sun elevation sensor
- Why room orientation matters
- Winter can use the opposite strategy
- Bonus: Build a High-Usage Alert Before Automating Anything Else
- Bonus: Compare This Week With Last Week
- Better testing
- What Actually Runs Locally?
- Add Fallbacks to Every Energy Automation
- HVAC
- Solar automation
- Blinds
- Standby cutoffs
- Avoid Automation Wars
- Better architecture
- A Practical Energy Mode Design
- Normal
- Saver
- Peak Price
- Solar Surplus
- Vacation
- Do Not Optimize Away Comfort
- What to Buy First
- Step 1: whole-home or circuit energy data
- Step 2: reliable presence detection
- Step 3: controllable thermostat
- Step 4: a few energy-monitoring plugs
- Step 5: motorized shades or flexible-load controls
- The Five-Automation Scorecard
- Conclusion
Key takeaways
- Automate high-energy equipment first; HVAC runtime usually matters more than optimizing tiny plug loads.
- Presence detection lets Home Assistant reduce heating, cooling, lighting, and selected plug loads when the home or room is genuinely unoccupied.
- Power-monitoring smart plugs can identify idle devices and trigger automatic standby shutdown, but they should only be used with loads explicitly supported by the plug manufacturer.
- Utility Meter tariffs, dynamic-price integrations, solar sensors, and Forecast.Solar can shift flexible loads toward cheaper or self-generated electricity.
- Sun-aware blinds can reduce unwanted solar heat gain and work especially well when combined with indoor temperature and HVAC-state conditions.
Editorial transparency
Who worked on this article and how it was handled.
- Written by
- Maya Chen
- Creation method
- Editorial research
AI assistance: AI assisted with research organization and drafting. Sources, Home Assistant entity names, example YAML, and the final article should be reviewed against the user's actual devices before publication.
Home Assistant’s Energy dashboard is excellent at showing where electricity goes.
But a dashboard does not save energy by itself.
The useful step is turning measurement into automatic decisions.
A good energy-saving automation does one of four things:
- reduces the time a device runs;
- reduces its power level;
- shifts consumption to a cheaper or cleaner time;
- uses free environmental energy—sunlight, outdoor temperature, or passive shading—to reduce mechanical heating and cooling.
That framework is more useful than chasing dozens of tiny automations.
Turning one LED lamp off five minutes earlier is fine. Preventing an air conditioner from cooling an empty house for four hours is much more important.
So this guide focuses on five Home Assistant automations with the strongest practical logic:
- HVAC setback when nobody is home;
- occupancy-aware lighting;
- automatic standby-load cutoff;
- tariff- or solar-aware load shifting;
- sun-aware blinds that reduce HVAC demand.
All five can be built in Home Assistant’s visual automation editor. The YAML snippets are included because they make the logic easy to understand and copy, but you do not have to manage your system in YAML.
Before Automating: Build an Energy Baseline
Open:
Settings → Dashboards → Energy
Home Assistant’s Energy dashboard can combine:
- grid electricity consumption;
- grid export;
- solar production;
- battery charging and discharging;
- gas;
- water;
- individual appliance energy.
You do not need all of those.
Start with one reliable electricity source.
That might come from:
- a utility meter integration;
- CT clamps;
- a whole-home energy monitor;
- a compatible inverter;
- an energy-monitoring smart plug.
Why measure first?
Without a baseline, people often optimize the wrong devices.
Imagine this household:
| Load | Monthly energy |
|---|---|
| HVAC | 410 kWh |
| Water heating | 180 kWh |
| Gaming PC | 52 kWh |
| TV setup | 18 kWh |
| Six standby chargers | 2 kWh |
A complicated automation for the chargers may save almost nothing.
A small reduction in HVAC runtime could save much more.
Use the dashboard to find the large flexible loads first.
Automation 1: HVAC Setback When Everyone Leaves
If you build only one automation from this article, start here.
Heating and cooling are ideal automation targets because:
- they consume substantial energy;
- comfort requirements change with occupancy;
- thermostats already expose adjustable targets;
- Home Assistant has dedicated climate actions and conditions.
DOE guidance says households can save as much as about 10% per year on heating and cooling by turning the thermostat back 7°F to 10°F for eight hours a day in suitable systems.
That is not a promise that one Home Assistant automation saves exactly 10%.
It establishes the underlying principle:
A house does not need the occupied comfort setpoint while nobody is there.
What you need
- a thermostat or AC exposed as a
climateentity; - reliable presence detection;
- a home zone.
Home Assistant can detect presence through the companion app or compatible network tracking.
The zone.home state represents the number of tracked people currently in the home zone.
Basic logic
When:
zone.home = 0
for 10-15 minutes:
- increase cooling setpoint;
- or decrease heating setpoint.
When someone returns:
- restore the normal comfort temperature.
The delay prevents the house from changing mode because someone walks the dog for two minutes or briefly crosses the zone boundary.
Example: cooling setback
alias: Energy - AC setback when home is empty
triggers:
  - trigger: numeric_state
    entity_id: zone.home
    below: 1
    for: "00:15:00"

conditions:
  - condition: state
    entity_id: climate.living_room
    state: "cool"

actions:
  - action: climate.set_temperature
    target:
      entity_id: climate.living_room
    data:
      temperature: 28
The exact state model depends on your climate integration. Many users will prefer the visual editor’s dedicated climate conditions rather than checking a raw state directly.
Return-home automation
alias: Energy - Restore AC when someone arrives
triggers:
  - trigger: numeric_state
    entity_id: zone.home
    above: 0

actions:
  - action: climate.set_temperature
    target:
      entity_id: climate.living_room
    data:
      temperature: 25
Make it better with pre-conditioning
Do not wait until the person enters the front door.
Home Assistant zones can detect when someone leaves:
- work;
- school;
- another known location.
You could restore the target temperature when someone leaves work only if the home has been empty.
That gives the system time to recover without maintaining the occupied temperature all day.
Important heat-pump caution
Do not blindly apply large temperature setbacks to every heat-pump system.
Some systems can respond to recovery by engaging expensive auxiliary resistance heat.
The thermostat manufacturer and HVAC design should determine the appropriate strategy.
Automation is most effective when it respects the equipment.
Automation 2: Occupancy-Aware Lighting With a Delay
Lighting is not usually the largest modern household load, especially after switching to LEDs.
It is still one of the easiest sources of unnecessary runtime.
The mistake is building this automation as:
no motion → immediately turn lights off.
That creates a terrible smart home.
Someone reading quietly on a sofa does not generate constant motion.
A better automation combines:
- occupancy or motion;
- a timeout;
- optional illuminance;
- optional sun position.
Example logic
When:
- no motion has been detected for 10 minutes;
and:
- nobody is considered present in the room;
then:
- turn the room lights off.
Basic motion timeout
alias: Energy - Office lights off when empty
triggers:
  - trigger: state
    entity_id: binary_sensor.office_motion
    to: "off"
    for: "00:10:00"

actions:
  - action: light.turn_off
    target:
      entity_id: light.office
Add daylight logic to the ON automation
Do not turn lights on automatically just because somebody entered the room.
If the room already has enough natural light, leave them off.
With a lux sensor:
alias: Energy - Office lights on only when dark
triggers:
  - trigger: state
    entity_id: binary_sensor.office_motion
    to: "on"

conditions:
  - condition: numeric_state
    entity_id: sensor.office_illuminance
    below: 120

actions:
  - action: light.turn_on
    target:
      entity_id: light.office
Tune the lux threshold to the actual room.
A hallway can tolerate a much lower threshold than a kitchen work surface.
Presence sensors can improve this dramatically
mmWave presence sensors can often detect more subtle occupancy than conventional PIR motion sensors.
That can reduce false “empty room” events.
But do not buy another sensor solely because it sounds advanced.
First test whether:
- the existing motion sensor;
- door state;
- device presence;
- timer
already gives reliable behavior.
Automation 3: Kill Standby Loads After They Become Idle
A smart plug with power monitoring lets Home Assistant do something more useful than a fixed schedule:
detect that a device has finished being used.
Home Assistant’s numeric-state and power triggers can react when wattage crosses a threshold.
That means you can create logic such as:
If the entertainment system has drawn less than 8W for 30 minutes after midnight, cut power to the accessory strip.
This is better than:
switch the strip off at 11 p.m.
because the automation responds to actual usage.
What this works well for
- desk speakers;
- monitor accessories;
- TV peripherals;
- game-console accessories;
- printers;
- chargers;
- hobby equipment;
- selected entertainment devices.
What not to control casually
Avoid using automatic power cutoff for:
- refrigerators;
- freezers;
- medical equipment;
- routers;
- NAS servers;
- alarms;
- equipment requiring graceful shutdown;
- heaters or portable ACs unless the smart relay is explicitly approved and correctly rated.
A 15A headline specification does not mean every motor, compressor, or heating load is safe.
Example idle cutoff
Assume the monitored strip exposes:
sensor.tv_console_power
and the controllable outlet is:
switch.tv_console
alias: Energy - Cut entertainment standby load
triggers:
  - trigger: numeric_state
    entity_id: sensor.tv_console_power
    below: 8
    for: "00:30:00"

conditions:
  - condition: time
    after: "23:00:00"
    before: "06:00:00"

actions:
  - action: switch.turn_off
    target:
      entity_id: switch.tv_console
Add a manual override
Create an input_boolean such as:
input_boolean.keep_tv_powered
Then gate the automation:
conditions:
  - condition: state
    entity_id: input_boolean.keep_tv_powered
    state: "off"
That avoids fighting the automation when:
- firmware updates are running;
- someone is using the device late;
- the household wants the system left alone.
Use the Energy dashboard to decide whether this is worth it
If the standby load is 1W, there is almost nothing to optimize.
If a desk setup sits at 35W all night, the opportunity is more interesting.
Measure first.
Automation 4: Shift Flexible Loads to Cheap Power or Solar
The biggest energy automation is sometimes not:
use fewer kilowatt-hours.
It is:
use the same kilowatt-hours at a better time.
This matters for homes with:
- peak/off-peak electricity;
- dynamic pricing;
- solar panels;
- batteries;
- EV charging;
- flexible appliances.
Home Assistant’s Utility Meter integration can track different tariffs.
Home Assistant’s electricity-grid documentation explicitly notes that utilities use peak and off-peak pricing to encourage load shifting.
Good flexible loads
- dishwasher;
- washing machine;
- dryer when manufacturer-supported;
- EV charging;
- water heating with suitable controls;
- battery charging;
- dehumidification;
- pool equipment;
- selected appliance cycles.
Method A: time-of-use tariff
Create:
- peak tariff;
- off-peak tariff.
Then start a flexible load only when the current tariff is off-peak.
Conceptually:
alias: Energy - Start dishwasher off peak
triggers:
  - trigger: state
    entity_id: select.house_energy_tariff
    to: "off_peak"

conditions:
  - condition: state
    entity_id: input_boolean.dishwasher_ready
    state: "on"

actions:
  - action: switch.turn_on
    target:
      entity_id: switch.dishwasher_start
The actual entity and start action depend entirely on the appliance integration.
Do not place a dishwasher behind an arbitrary smart plug and assume interrupting mains power is equivalent to safely starting a cycle.
Method B: dynamic electricity price
Some integrations expose current or future electricity prices.
For example, Home Assistant’s Tibber integration exposes current price data that can be used in automations.
A more advanced routine can:
- identify the cheapest hours;
- wait until that window;
- charge an EV or battery;
- stop before the expensive period.
Method C: solar surplus
If you have solar, Home Assistant can integrate:
- real production;
- grid import/export;
- battery state;
- solar forecast.
Forecast.Solar estimates upcoming PV production using:
- location;
- panel orientation;
- panel size;
- weather and historical data.
Home Assistant specifically gives examples such as deciding whether enough solar is expected to run a washing machine or charge an EV.
Solar logic
A robust automation should not start a large appliance because PV briefly spikes for 20 seconds.
Use a threshold plus duration.
Example:
alias: Energy - Run flexible load on solar surplus
triggers:
  - trigger: numeric_state
    entity_id: sensor.grid_export_power
    above: 1800
    for: "00:05:00"

conditions:
  - condition: state
    entity_id: input_boolean.flexible_load_ready
    state: "on"

actions:
  - action: switch.turn_on
    target:
      entity_id: switch.flexible_load
Your energy meter may represent export as negative power instead of positive power.
Always confirm the sensor convention first.
Cheapest power vs. cleanest power
Home Assistant also supports Electricity Maps.
Where available, the integration exposes regional grid carbon intensity.
You can use that to run flexible tasks when the grid is cleaner rather than merely cheaper.
Those goals can conflict.
A low-price hour is not always the lowest-carbon hour.
Decide what you are optimizing.
Automation 5: Close Sun-Facing Blinds Before the AC Has to Fight the Heat
The cheapest cooling load is the one that never enters the room.
Home Assistant’s Sun integration calculates:
- sunrise;
- sunset;
- solar noon;
- sun elevation;
from the home’s configured location.
That makes automated blinds or shades much more useful than a simple clock schedule.
Instead of:
close west blinds at 3 p.m.
you can create:
close west blinds when the sun is high enough, indoor temperature is rising, and cooling is relevant.
Basic summer logic
When:
- sun elevation is above a threshold;
- indoor temperature exceeds 25°C;
- AC is in cooling mode;
then:
- close or partially close the sun-facing shade.
Example using sun elevation sensor
Different Home Assistant versions and integrations can expose sun conditions in slightly different ways, so use the current automation editor if you prefer dedicated Sun triggers.
A conceptual YAML implementation:
alias: Energy - Close west shades for cooling
triggers:
  - trigger: numeric_state
    entity_id: sensor.living_room_temperature
    above: 25

conditions:
  - condition: sun
    after: sunrise
    before: sunset

  - condition: state
    entity_id: climate.living_room
    state: "cool"

actions:
  - action: cover.set_cover_position
    target:
      entity_id: cover.west_blinds
    data:
      position: 20
You can make it more precise with:
- sun azimuth;
- sun elevation;
- outdoor temperature;
- forecast;
- room orientation.
Why room orientation matters
East windows receive stronger morning sun.
West windows often create afternoon cooling load.
South-facing windows behave differently by season and latitude.
Do not create one identical automation for every blind in the building.
Winter can use the opposite strategy
During heating season:
- open sun-facing blinds when useful solar gain is available;
- close them later to improve privacy and reduce radiant heat loss near the glass.
That makes the same motorized shade part of both cooling and heating strategy.
Bonus: Build a High-Usage Alert Before Automating Anything Else
Home Assistant’s power and numeric-state triggers are excellent for abnormal-use alerts.
For example:
Notify me if whole-home demand stays above 6 kW for 10 minutes.
alias: Energy - High power warning
triggers:
  - trigger: numeric_state
    entity_id: sensor.house_power
    above: 6000
    for: "00:10:00"

actions:
  - action: notify.send_message
    target:
      entity_id: notify.my_phone
    data:
      message: "Household power has been above 6 kW for 10 minutes."
This does not directly save energy.
It exposes behavior you may not know exists.
A high-demand warning can reveal:
- heater left on;
- unexpected auxiliary heat;
- multiple major appliances overlapping;
- EV charging during peak tariff;
- malfunctioning equipment.
Sometimes awareness should come before automatic shutdown.
Bonus: Compare This Week With Last Week
The Energy dashboard allows time ranges and period comparison.
Use that after implementing each automation.
Do not deploy all five on Monday and celebrate a lower bill on Friday.
Weather changes.
Occupancy changes.
Electricity rates change.
Better testing
- establish a baseline;
- implement one meaningful automation;
- run it for one or more comparable weeks;
- compare usage;
- inspect comfort complaints;
- tune;
- move to the next automation.
For HVAC, consider normalizing results against:
- outdoor temperature;
- heating degree days;
- cooling degree days.
Otherwise, a mild week can make a mediocre automation look brilliant.
What Actually Runs Locally?
Home Assistant is particularly valuable for energy automation because many devices can be controlled locally through:
- Zigbee;
- Z-Wave;
- Matter;
- Thread;
- ESPHome;
- local LAN integrations.
That means an occupancy sensor can trigger a thermostat or switch without requiring an internet round trip.
This is especially useful for energy automations because they happen continuously.
However, some data sources remain cloud-dependent.
Examples include:
- Forecast.Solar;
- Electricity Maps;
- dynamic utility-price APIs;
- cloud thermostat integrations.
The best architecture is:
local control for the action, optional cloud data for optimization.
If a price API fails, the house should fall back to a safe normal schedule.
Add Fallbacks to Every Energy Automation
A good automation needs an answer to:
What happens if one sensor becomes unavailable?
HVAC
If presence tracking fails:
- do not shut HVAC down indefinitely.
Solar automation
If production sensor is unavailable:
- use tariff schedule;
- or skip the flexible-load start.
Blinds
If temperature data is unavailable:
- leave manual control intact.
Standby cutoffs
If power monitoring is unavailable:
- do not make assumptions about whether the appliance is idle.
Automation should fail conservatively.
Avoid Automation Wars
Energy-saving automations often conflict with comfort automations.
Example:
Automation A:
Nobody is home → raise AC setpoint to 29°C.
Automation B:
Indoor temperature above 28°C → lower AC to 24°C.
The two automations fight all afternoon.
Better architecture
Create central helpers such as:
input_boolean.home_occupiedinput_select.energy_modeinput_boolean.guest_modeinput_boolean.vacation_modeinput_boolean.energy_override
Then make automations respect those states.
A single house mode is easier to understand than 40 independent routines changing the same thermostat.
A Practical Energy Mode Design
Create:
input_select.energy_mode
with:
- Normal
- Saver
- Peak Price
- Solar Surplus
- Vacation
Then build device actions around the mode.
Normal
Comfort priorities.
Saver
Slight thermostat setback and stronger idle-device rules.
Peak Price
Delay flexible loads.
Solar Surplus
Allow discretionary loads.
Vacation
Maximum sensible setback and minimal occupied lighting.
This turns energy management into a coherent policy.
Do Not Optimize Away Comfort
The purpose of a smart home is not to produce the smallest possible kWh number.
A house that saves electricity by making everyone miserable is not well automated.
Use gradual changes.
For HVAC:
- start with a modest setback.
For lighting:
- use long enough occupancy delays.
For blinds:
- preserve useful daylight.
For standby:
- never cut power to equipment people expect to remain available.
Energy automation should become invisible.
The best version is:
the utility bill goes down and nobody remembers exactly why.
What to Buy First
You do not need a shopping cart full of smart hardware.
Step 1: whole-home or circuit energy data
This tells you where to focus.
Step 2: reliable presence detection
This enables:
- HVAC;
- lighting;
- away mode.
Step 3: controllable thermostat
If HVAC is a major load.
Step 4: a few energy-monitoring plugs
Use them to investigate high-consumption devices.
Step 5: motorized shades or flexible-load controls
Only after the core data and automations work.
The measurement layer should come before the gadget layer.
The Five-Automation Scorecard
| Automation | Energy-saving potential | Complexity | Best prerequisite |
|---|---|---|---|
| Presence HVAC setback | High | Medium | Climate + presence |
| Occupancy lighting | Low to medium | Low | Motion/presence |
| Standby-load cutoff | Low to medium | Low | Power-monitoring plug |
| Tariff / solar load shifting | Medium to high cost savings | Medium-high | Energy prices / solar |
| Sun-aware blinds | Medium in suitable homes | Medium | Motorized cover + temperature |
The exact value depends on the home.
A poorly insulated house in a hot climate may get far more benefit from blinds and HVAC logic than a mild-climate apartment.
A solar-heavy home with an EV may get most of its financial benefit from load shifting.
The scorecard is a starting point, not a guarantee.
Conclusion
Home Assistant becomes an energy-saving tool when it stops being a dashboard and starts making small, repeatable decisions.
The five best places to start are:
- reduce HVAC demand when the home is empty;
- turn lighting off when rooms are genuinely unoccupied;
- disconnect selected idle plug loads;
- shift flexible appliances toward cheap or self-generated electricity;
- use automated blinds to reduce unnecessary solar heating.
Do not build all five at once.
Start with the largest load in your Energy dashboard, automate one behavior, measure the result, and keep a manual override.
That is how Home Assistant saves energy effectively: not through one magic blueprint, but by turning real household energy data into reliable local actions every day.
Common questions
Questions this guide answers
Can Home Assistant actually reduce my energy bill?
Yes, when the automations change equipment runtime or shift consumption. The largest opportunities are usually HVAC, electric water heating, EV charging, large appliances, and solar self-consumption. Home Assistant itself does not create energy savings; it provides the measurements, triggers, conditions, and local control needed to automate more efficient behavior.
Which Home Assistant energy automation should I build first?
Start with HVAC setback based on presence if you have a compatible thermostat or climate entity. Heating and cooling are often among the largest household loads, and U.S. Department of Energy guidance says appropriate thermostat setbacks can save as much as about 10% per year on heating and cooling in suitable systems.
Do I need solar panels to use these automations?
No. Four of the five strategies work without solar. The load-shifting automation can use a time-of-use tariff, dynamic electricity-price sensor, or grid-carbon signal instead of solar production. Home Assistant's Utility Meter integration supports tariffs, and its Electricity Maps integration can expose grid carbon intensity where supported.
Do these automations require YAML?
No. Home Assistant's automation editor lets you build triggers, conditions, and actions visually. YAML remains useful when you want to copy examples, version-control automations, or create more advanced templates. Current Home Assistant documentation also allows many YAML automation snippets to be pasted directly into the visual editor.
Evidence & further reading
Sources & references
Primary and authoritative references used to support or contextualize this article. Links open the original source.
- 1Home energy management
Home Assistant · Accessed Aug 10, 2026
Supports the Energy dashboard, grid consumption, solar production, batteries, individual device monitoring, and using energy data to plan automations.
- 2Utility Meter
Home Assistant · Accessed Aug 10, 2026
Supports utility billing cycles, peak/off-peak tariffs, tariff entities, billing estimation, and tariff changes through automations.
- 3Setting up presence detection
Home Assistant · Accessed Aug 10, 2026
Supports presence detection through mobile apps and compatible network devices and using presence information in automations.
- 4Zone
Home Assistant · Accessed Aug 10, 2026
Supports home-zone occupancy, zone entered/left triggers, and occupancy-based automations.
- 5Set thermostat target temperature
Home Assistant · Accessed Aug 10, 2026
Supports changing thermostat target temperature from Home Assistant automations.
- 6Thermostat is in HVAC mode
Home Assistant · Accessed Aug 10, 2026
Supports conditioning energy automations on heat, cool, auto, dry, fan-only, and other climate modes.
- 7Numeric state
Home Assistant · Accessed Aug 10, 2026
Supports automations triggered when numeric sensors such as power, temperature, humidity, or battery levels cross thresholds.
- 8Power changed
Home Assistant · Accessed Aug 10, 2026
Supports power-threshold automations based on measured device or circuit power.
- 9Sun
Home Assistant · Accessed Aug 10, 2026
Supports sunrise, sunset, sun elevation, and location-aware solar-position triggers for cover and lighting automations.
- 10Forecast.Solar
Home Assistant · Accessed Aug 10, 2026
Supports solar-production forecasting and planning flexible appliance or EV loads around expected solar generation.
- 11Electricity Maps
Home Assistant · Accessed Aug 10, 2026
Supports automations based on regional grid carbon intensity where Electricity Maps coverage is available.
- 12Integrating your electricity grid
Home Assistant · Accessed Aug 10, 2026
Supports time-of-use electricity pricing and the idea of shifting consumption from peak to off-peak periods.
- 13Home Upgrades
U.S. Department of Energy · Accessed Aug 10, 2026
Supports the statement that appropriate 7°F to 10°F thermostat setbacks for eight hours per day can save as much as about 10% per year on heating and cooling in suitable systems.

About the author
Maya Chen
Maya covers residential energy, HVAC controls, and practical home automation, translating technical systems into useful decisions for homeowners and renters.
More from Maya →Make your home smarter without buying every gadget.
One useful idea, one product worth knowing, and one energy-saving action—delivered weekly.
No spam. Unsubscribe anytime.
Semantic recommendations
Related reading
Selected from topic cluster, entities, tags, search intent, and editorial relationships.
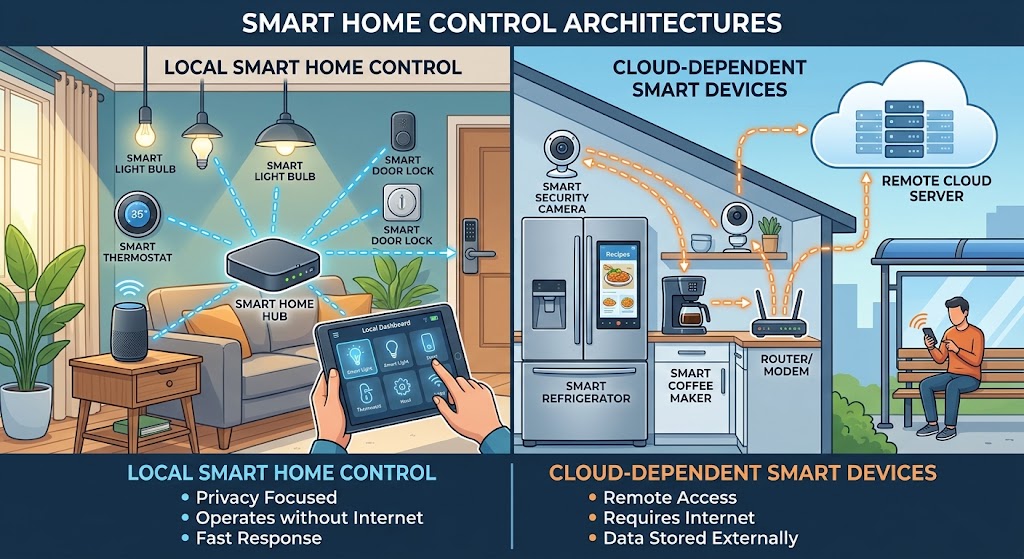
Local Control vs. Cloud Smart Home: Why You Should Avoid Cloud Dependency
Cloud features are useful, but your lights, locks, sensors, and core automations should not stop working when the internet or a vendor service fails. Here is how to build a local-first smart home in 2026.

Zigbee vs. Z-Wave vs. Thread: Which Smart Home Protocol Wins in 2026?
Thread is the strongest choice for new Matter-first smart homes in 2026, while Zigbee remains the value and device-selection leader and Z-Wave excels in sub-GHz reliability, security, and long-range installations.
Home Assistant Starter Guide: How to Build a Private, Local Smart Home
Home Assistant lets you run automations, dashboards, and device control on hardware inside your home. This beginner guide shows the cleanest 2026 path to a private, local-first setup.
How to Set Up an Offline Smart Home Network That Works When Wi-Fi Drops
Build a local-first smart home that keeps critical lights, sensors, locks, and automations working during internet outages—and can keep core automations alive even when the Wi-Fi access point itself fails.