
Smart Motion Sensor Automations for Dark Apartment Hallways
Build hallway lighting that turns on only when needed, stays dim at night, and avoids the annoying false-offs common with basic motion automations.
Quick answer
The best hallway motion-light automation uses motion as the trigger, ambient light as a condition, and different brightness levels for daytime, evening, and overnight use. For most apartment hallways, a battery-powered PIR motion sensor with an illuminance sensor is sufficient; mmWave presence sensing is more useful when people regularly remain still in the space rather than simply walking through it.
Table of contents
- Start with the hallway, not the sensor
- PIR motion vs mmWave presence: choose the simpler sensor first
- PIR motion sensors
- mmWave presence sensors
- For a hallway, PIR is usually enough
- Add an illuminance condition so the light does not fight daylight
- Weak automation
- Better automation
- Do not copy a universal lux threshold
- Use different brightness at different times
- Daytime
- Evening
- Overnight
- Keep the off timer short—but restart it on new motion
- A good timeout depends on hallway behavior
- Do not automate a shared apartment-building hallway as if it were yours
- Hallway inside your rental unit
- Common corridor outside the apartment
- Sensor placement matters more than detection range on the box
- Aim for early detection
- Avoid unrelated traffic
- Test all approach directions
- Renter-friendly mounting requires restraint
- Matter-over-Thread sensors are attractive for renters
- Matter compatibility does not mean every platform exposes every feature identically
- Home Assistant pattern: motion + darkness + automatic off
- Separate overnight brightness
- Apple Home, Google Home, and other ecosystems can use the same logic
- Add manual override instead of fighting the residents
- Manual-on hold
- Temporary automation disable
- Night mode
- Away mode
- Avoid the “light turns off while I am still here” problem
- The timeout is too short
- The sensor does not see the activity area
- Motion sensing is the wrong technology for the space
- Do not make motion automation your only usable lighting control
- Smart bulb vs smart switch for a hallway
- Smart bulb
- Smart wall switch
- Smart plug or lamp
- A practical three-scene hallway setup
- Scene 1: Daylight
- Scene 2: Evening
- Scene 3: Overnight
- How to tune the automation in one week
- Days 1–2: placement
- Days 3–4: lux threshold
- Day 5: timeout
- Day 6: night brightness
- Day 7: manual control
- Common hallway automation mistakes
- Motion without darkness
- One brightness level for 24 hours
- One fixed timer from the first motion event
- Sensor aimed at another room
- Using mmWave where PIR is enough
- Hiding the only manual control
- Mounting adhesive before testing placement
- Automating common building space without permission
- The recommended setup for most renters
- Conclusion
Key takeaways
- For a pass-through hallway, a PIR motion sensor is usually simpler and more appropriate than an always-on mmWave presence sensor.
- Use ambient-light or time conditions so the hallway does not illuminate unnecessarily when daylight is already sufficient.
- Night automations should use lower brightness and warmer light where the fixture supports it instead of firing the same full-bright scene used in the evening.
- A robust automation extends its off timer when new motion occurs and provides a manual override so residents are never trapped by automation logic.
Editorial transparency
Who worked on this article and how it was handled.
- Written by
- Maya Chen
- Creation method
- Editorial research
AI assistance: AI assisted with research organization and drafting. Sources, factual claims, and the final article should be reviewed by a human editor before publication.
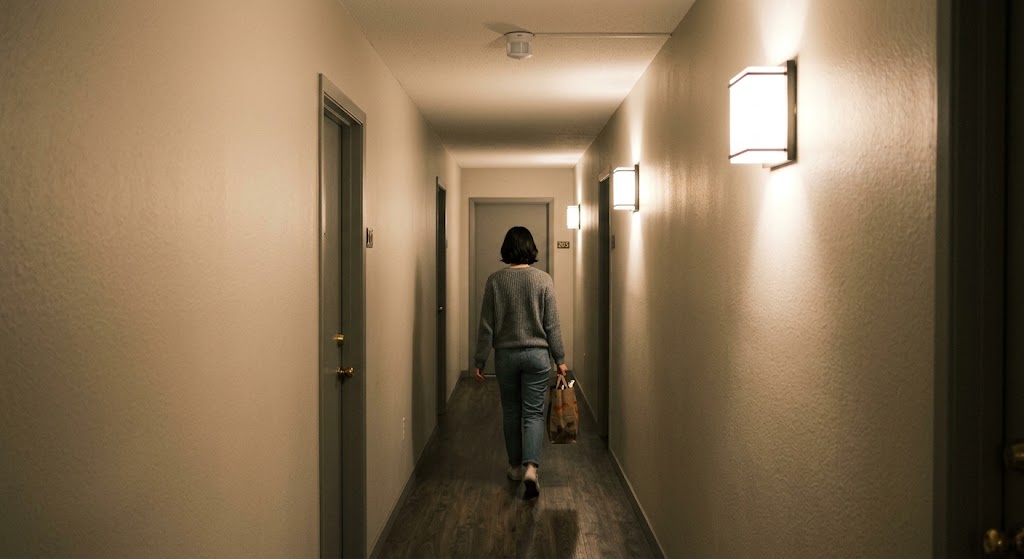
A dark apartment hallway is one of the easiest places to automate badly. The basic rule—motion detected, light on, wait, light off—works until the hallway catches daylight, someone pauses to put on shoes, a roommate walks past an adjacent doorway, or the automation blasts full brightness at 2 a.m.
The better approach is to treat hallway lighting as a small control system. Motion should answer whether someone is moving through the space, illuminance should answer whether artificial light is needed, and time or household mode should determine how bright the light should be.
For most apartments, you do not need an expensive presence-tracking system. A well-placed PIR motion sensor with light-level data, paired with a dimmable smart light or smart switch, can deliver fast, reliable hallway lighting while remaining renter-friendly.
Start with the hallway, not the sensor
Before buying hardware, identify what kind of hallway you are automating.
A hallway can be:
- a short path between bedroom and bathroom;
- a long interior corridor with no windows;
- an entry passage between the front door and living room;
- an L-shaped corridor with blind corners;
- a transition space that receives daylight from another room.
Those layouts need different sensor positions and timers.
The key question is:
What should happen from the moment someone enters until the moment they leave?
For a simple pass-through corridor, the answer may be:
- detect entry;
- turn on low-to-medium lighting if the hallway is dark;
- keep the light on while motion continues;
- turn it off shortly after the last motion event.
For an entry hallway, the automation may need to stay active longer because people stop to:
- remove shoes;
- unlock another door;
- set down groceries;
- check a bag;
- greet a pet;
- look for keys.
Do not copy the same timeout into every hallway.
PIR motion vs mmWave presence: choose the simpler sensor first
The two sensor categories are often marketed as if mmWave automatically replaces PIR.
It does not.
PIR motion sensors
Passive infrared sensors detect changes in infrared energy caused by movement.
They are well suited to hallways because a hallway is fundamentally a movement space.
Advantages include:
- battery operation;
- small size;
- simple installation;
- low maintenance;
- fast trigger behavior;
- easy Matter, Thread, Zigbee, or ecosystem integration depending on the model.
Current examples include Eve Motion and Aqara’s Motion and Light Sensor P2. Both combine motion sensing with ambient-light information, which is especially useful for lighting automations.
mmWave presence sensors
A mmWave presence sensor is designed to determine whether someone remains in an area, even when their movement is much smaller.
Aqara’s Presence Sensor FP2, for example, uses 60 GHz radar and can expose presence by configured zones.
That solves a different problem.
It makes more sense when someone may remain almost still, such as:
- sitting at a desk;
- reading on a sofa;
- working at a kitchen counter;
- staying in a bathroom;
- standing at a dressing area.
For a hallway, PIR is usually enough
If the hallway exists mainly to walk through, a mmWave sensor can be unnecessary complexity.
It may require:
- continuous USB power;
- more careful placement;
- zone calibration;
- false-presence tuning;
- additional cost.
Use mmWave when the hallway doubles as an entry or storage area where people routinely stay in place long enough for PIR to clear.
Otherwise, start with PIR.
Add an illuminance condition so the light does not fight daylight
Motion alone does not know whether the hallway is dark.
That is why a good hallway sensor setup either includes a light sensor or uses another source of ambient-light information.
Eve Motion includes a light sensor and allows automations to be refined based on brightness. Aqara’s Motion and Light Sensor P2 similarly exposes independent motion and illuminance sensing.
Home Assistant treats illuminance as a measured input, normally expressed in lux, and brightness as a controllable property of a light.
Those should be two separate concepts in your automation.
Weak automation
IF motion detected
THEN turn hallway light on
This will fire at noon even if sunlight from the living room already makes the hallway bright.
Better automation
IF motion detected
AND hallway illuminance is below threshold
THEN turn hallway light on
Now the automation only adds light when the space actually needs it.
Do not copy a universal lux threshold
There is no single correct lux number for every hallway.
Sensor position changes the reading dramatically.
A sensor facing a bright doorway may report much more light than the darkest point of the corridor. A ceiling-mounted sensor can also read differently from a sensor positioned near eye level.
Use the sensor’s historical readings and your own perception.
A practical calibration process is:
- Leave the hallway lights off.
- Observe the sensor reading when the hallway feels comfortably bright from daylight.
- Observe it again when you first think, “I would turn the light on now.”
- Set the automation threshold somewhere around that transition.
- Test it on both sunny and overcast days.
The goal is not to achieve a standardized lux value.
The goal is for the automation to make the same decision you would.
Use different brightness at different times
The biggest quality-of-life improvement is often not the motion sensor. It is time-dependent brightness.
A hallway light that feels comfortable at 7 p.m. can be unpleasant at 2 a.m.
Use multiple scenes.
Daytime
If the hallway is dark despite daylight:
- moderate brightness;
- neutral or normal color temperature.
Evening
Use the normal hallway scene:
- enough brightness for safe movement;
- whatever color temperature matches adjacent rooms.
Overnight
Use a night-navigation scene:
- much lower brightness;
- warmer color temperature if the fixture supports it;
- enough light to see the floor and obstacles without fully waking the household.
A simple model is:
Motion + dark + daytime/evening
-> normal hallway scene

Motion + dark + overnight
-> dim night hallway scene
This is more comfortable than changing only the off timer.
Keep the off timer short—but restart it on new motion
A hallway does not usually need to stay illuminated for 10 or 20 minutes after a person walks through.
That wastes energy and makes the automation feel slow.
But a fixed timer has another problem.
Imagine:
- person enters;
- automation turns light on;
- 90-second timer starts;
- another person enters after 80 seconds;
- original timer reaches 90 seconds;
- light turns off while the second person is still there.
That is poor automation logic.
The timer should effectively represent:
time since the most recent relevant motion, not time since the first trigger.
Different smart-home platforms implement this differently.
The design goal is the same:
- motion turns light on;
- new motion extends the active period;
- only sustained absence turns it off.
Home Assistant provides both motion-detected and motion-cleared events, making it possible to build this behavior without relying only on one fixed delay.
A good timeout depends on hallway behavior
Use the shortest timeout that still feels natural.
A starting framework:
| Hallway use | Reasonable starting behavior |
|---|---|
| Short bedroom-to-bath corridor | Short timeout after motion clears |
| Long pass-through hallway | Short-to-moderate timeout |
| Entry hallway with shoes/coats | Longer timeout |
| Hallway with storage cabinets | Longer timeout |
| Hallway where people stand and talk | Consider presence sensing or longer hold |
Do not interpret this as a building-code recommendation.
It is automation behavior for supplementary smart lighting inside a residence.
Required egress illumination, emergency lighting, shared-building corridors, and landlord-controlled common areas are separate safety and property-management concerns.
Do not automate a shared apartment-building hallway as if it were yours
“Apartment hallway” can mean two different spaces.
Hallway inside your rental unit
This is usually part of your private living space.
Renter-friendly sensors and smart bulbs are generally straightforward as long as the lease permits the modifications.
Common corridor outside the apartment
That area may be:
- landlord-controlled;
- part of a fire-egress route;
- controlled by occupancy sensors already;
- covered by building electrical systems;
- covered by CCTV or access-control policy.
Do not mount personal sensors, replace common-area bulbs, modify switches, or add adhesive hardware without permission.
The article’s automation strategies are intended primarily for hallways inside the apartment.
Sensor placement matters more than detection range on the box
A sensor can advertise a large field of view and still perform poorly if it is aimed at the wrong area.
Eve Motion, for example, specifies a 120-degree field of view and a maximum range of 9 meters under its stated conditions. Aqara’s P2 specifies a wider detection angle and an adjustable stand.
Those numbers help with product selection, but placement should be validated in the actual hallway.
Aim for early detection
The sensor should see a person before they reach the section that needs light.
A light that turns on only after you are halfway through the dark corridor feels broken even if the sensor technically works.
Avoid unrelated traffic
If the sensor can see:
- people moving in the living room;
- a frequently used doorway;
- a pet route;
- motion outside a glass door;
it may trigger when nobody intends to use the hallway.
Test all approach directions
Walk into the hallway from:
- bedroom side;
- living-room side;
- front-door side;
- any connected room.
Temporary placement is valuable here.
Do not permanently stick the sensor to painted drywall until the automation behaves correctly.
Renter-friendly mounting requires restraint
Battery-powered sensors are ideal for rentals because they do not require wiring.
But “adhesive” does not automatically mean “damage-free.”
Paint quality, wall texture, humidity, adhesive age, and removal technique all matter.
Prefer:
- freestanding placement where practical;
- removable mounting systems appropriate for the surface;
- manufacturer-provided stands;
- shelves or furniture edges;
- non-destructive brackets.
Before applying adhesive to painted surfaces:
- check the lease;
- test a discreet area when appropriate;
- clean the surface as the mount manufacturer instructs;
- avoid fresh or weak paint;
- follow removal instructions instead of pulling straight outward.
If the sensor ships with a permanent-style adhesive pad, consider whether you really need to use it.
Matter-over-Thread sensors are attractive for renters
Matter-over-Thread motion sensors can be a good fit for apartments because they can be:
- battery powered;
- wireless;
- compact;
- locally responsive;
- portable when you move.
Eve Motion currently uses Thread and requires a compatible Matter controller and Thread Border Router. Aqara’s Motion and Light Sensor P2 similarly uses Thread and requires the appropriate Matter infrastructure.
That means the sensor itself is only part of the purchase.
Before buying, confirm that your ecosystem already provides:
- a Matter controller;
- a Thread Border Router where required;
- the automation features you want;
- access to the illuminance data if you plan to use it.
Matter compatibility does not mean every platform exposes every feature identically
Aqara explicitly notes that platform functionality can differ.
That matters for advanced automations.
A sensor may expose:
- motion in one platform;
- motion plus illuminance in another;
- additional sensitivity or timeout controls only in the manufacturer’s own ecosystem.
Choose based on the feature path you intend to use, not only the Matter logo.
Home Assistant pattern: motion + darkness + automatic off
Home Assistant’s current automation model provides specific motion triggers and illuminance conditions.
A conceptual automation can look like this:
alias: Hallway - motion lighting
triggers:
  - trigger: motion.detected
    target:
      entity_id: binary_sensor.hallway_motion

conditions:
  - condition: numeric_state
    entity_id: sensor.hallway_illuminance
    below: 35

actions:
  - action: light.turn_on
    target:
      entity_id: light.hallway
    data:
      brightness_pct: 55
The 35 lux threshold is only an example.
Calibrate it to your hallway.
For a robust setup, use a second automation or motion-cleared logic to turn the light off after a sustained period without motion.
Separate overnight brightness
You can also branch on time:
IF motion detected
AND illuminance below threshold

  IF overnight
  -> turn hallway light on at low brightness

  ELSE
  -> turn hallway light on at normal brightness
This is often easier to maintain than creating several nearly identical automations.
Apple Home, Google Home, and other ecosystems can use the same logic
The implementation UI changes, but the control model remains:
trigger + condition + action + reset
For example:
- Trigger: motion detected.
- Condition: after sunset or ambient light below threshold.
- Action: hallway light on.
- Reset: no motion for the desired period, then light off.
The main limitation is that not every platform exposes every sensor attribute.
If your ecosystem cannot use the sensor’s lux reading as a condition, the next-best option is usually:
- sunrise/sunset;
- fixed time windows;
- household mode.
Illuminance is more adaptive, but time-based logic is still much better than turning the hallway light on all day.
Add manual override instead of fighting the residents
Automations should disappear into the background.
If a resident manually turns the hallway light on, the automation should not immediately decide that it knows better.
Useful override patterns include:
Manual-on hold
If the wall button is pressed manually, keep the light on longer than the motion timeout.
Temporary automation disable
A scene or helper can suspend automatic shutoff for:
- cleaning;
- moving furniture;
- maintenance;
- guests.
Night mode
A household “Sleep” or “Night” state can force low brightness even if the normal evening scene would be brighter.
Away mode
When nobody is home, hallway motion might generate a notification rather than simply turning on a light—if that behavior fits the household’s security preferences.
Do not turn a simple hallway into an unmaintainable automation project.
One manual override is usually enough.
Avoid the “light turns off while I am still here” problem
This complaint usually means one of three things.
The timeout is too short
Increase it.
The sensor does not see the activity area
Reposition it.
Motion sensing is the wrong technology for the space
If people routinely remain still in the hallway area, consider a presence sensor.
Aqara’s FP2 demonstrates the difference well: its mmWave radar is designed to detect much smaller movement and continued human presence than a conventional PIR sensor.
For a hallway that includes:
- a dressing mirror;
- shoe bench;
- storage wall;
- folding station;
- entry desk;
presence sensing may genuinely improve the experience.
For a six-foot corridor used only for walking, it probably will not.
Do not make motion automation your only usable lighting control
A hallway light should remain usable if:
- the sensor battery dies;
- the hub is offline;
- Thread or Zigbee connectivity fails;
- the automation has an error;
- the smart bulb resets;
- a guest does not understand the system.
Keep a normal control path.
That can mean:
- a physical wall switch;
- a smart switch that still works locally;
- a wireless button with local binding where supported;
- a lamp with manual control.
The best smart-home automation enhances a basic function rather than making that function dependent on a cloud service or app.
Smart bulb vs smart switch for a hallway
Either can work.
Smart bulb
Best when:
- you rent;
- rewiring is not allowed;
- you want dimming or color temperature;
- the existing fixture accepts replaceable bulbs.
Weakness:
If someone turns the physical wall switch off, the smart bulb loses power and the motion automation stops working.
Smart wall switch
Best when:
- the apartment allows electrical modification;
- the light fixture should always remain normally controllable;
- multiple bulbs are controlled together.
Weakness:
Installation may require mains wiring, neutral availability, box compatibility, and landlord permission.
Electrical work should follow local code and be performed by a qualified person when required.
Smart plug or lamp
Best when:
- the hallway uses a plug-in lamp;
- you want zero electrical modification.
This is often the most renter-friendly setup of all.
A practical three-scene hallway setup
For most apartments, start here.
Scene 1: Daylight
Motion detected
AND hallway is already bright
-> do nothing
Scene 2: Evening
Motion detected
AND hallway is dark
AND household is not in night mode
-> normal hallway brightness
Scene 3: Overnight
Motion detected
AND hallway is dark
AND household is in night mode
-> low, warm light
Then add one common off rule:
No motion for configured duration
-> fade hallway light off
This is simple enough to understand six months later.
How to tune the automation in one week
Do not try to perfect everything on installation day.
Days 1–2: placement
Watch for:
- late triggers;
- false triggers;
- missed approaches.
Move the sensor before changing software.
Days 3–4: lux threshold
Note when the automation turns on unnecessarily or stays off when you need it.
Adjust the threshold gradually.
Day 5: timeout
If the light stays on noticeably after you leave, shorten it.
If it turns off while someone is using the hallway, extend it.
Day 6: night brightness
Walk through when your eyes are dark-adapted.
Reduce brightness until it is comfortable but still sufficient for navigation.
Day 7: manual control
Confirm that everyone in the apartment can still operate the light without opening an app.
The final setup should feel boring.
That is a compliment.
Common hallway automation mistakes
Motion without darkness
The light turns on unnecessarily during daylight.
One brightness level for 24 hours
Night trips become harsh and disruptive.
One fixed timer from the first motion event
New motion does not extend the lighting period correctly.
Sensor aimed at another room
People trigger the hallway light without entering the hallway.
Using mmWave where PIR is enough
The system becomes more expensive and harder to tune without solving a real problem.
Hiding the only manual control
Residents become dependent on automation health.
Mounting adhesive before testing placement
You discover the sensor is pointed incorrectly after attaching it permanently.
Automating common building space without permission
The smart-home project becomes a lease or safety issue.
The recommended setup for most renters
For a typical dark hallway inside an apartment, use:
- a battery-powered PIR sensor with ambient-light sensing;
- a dimmable smart bulb, smart lamp, or approved smart switch;
- motion as the trigger;
- illuminance as the daylight filter;
- normal evening and dim overnight scenes;
- an off delay that resets with new motion;
- a physical manual control;
- removable sensor placement.
A Matter-over-Thread sensor is attractive when your existing smart-home platform already has the required controller and Thread Border Router.
If you use Home Assistant, the same architecture becomes even more flexible because motion, illuminance, time, household mode, and manual-override helpers can all be combined explicitly.
Only move to mmWave presence sensing if the hallway behaves more like a room than a corridor.
Conclusion
The best smart hallway automation is not simply “motion equals light.”
For a dark apartment hallway, start with a PIR motion sensor that also reports ambient light. Use motion to detect passage, illuminance to prevent unnecessary daytime lighting, and time or household mode to choose between normal evening brightness and a dimmer overnight scene.
Keep the off timer responsive to new motion, preserve a manual control path, and test sensor placement before attaching anything permanently. If people regularly stop or remain still in the hallway, then consider mmWave presence sensing; otherwise, PIR is usually simpler, cheaper, and better matched to the job.
The result should be a hallway that lights itself before you think about the switch—and disappears back into darkness soon after you leave.
Common questions
Questions this guide answers
Where should I place a motion sensor in a dark apartment hallway?
Place it where a person entering the hallway is detected before reaching the darkest section, while avoiding direct views of unrelated rooms or areas that create unwanted triggers. A sensor with an adjustable mount is useful because hallway geometry varies, and the final position should be tested from every normal approach direction before permanent mounting.
Should hallway lights turn on every time motion is detected?
Usually no. Add an illuminance or time-of-day condition so motion does not turn lights on when daylight already makes the hallway usable. Sensors such as Eve Motion and Aqara Motion and Light Sensor P2 combine motion detection with ambient-light measurements that can be used in automations.
How long should motion-activated hallway lights stay on?
There is no universal timeout. A short passage hallway may work well with roughly one to three minutes after the last motion event, while an entry alcove where people put on shoes or carry groceries may need longer. The automation should restart or extend the timer whenever new motion is detected.
Is a mmWave presence sensor better than a PIR sensor for a hallway?
Not necessarily. PIR is usually ideal for a hallway because the use case is movement through a space. mmWave sensors can detect much smaller movements and continued presence, which is useful in areas where someone may stand still, but they add cost, tuning, and often continuous power requirements.
Can I use Matter motion sensors for hallway lighting?
Yes. Matter-over-Thread motion sensors such as Eve Motion and Aqara Motion and Light Sensor P2 can expose motion and, depending on the platform and device, illuminance data to compatible smart-home ecosystems. Feature availability can vary by platform, so verify that your chosen controller exposes the sensor data you need before building the automation.
Evidence & further reading
Sources & references
Primary and authoritative references used to support or contextualize this article. Links open the original source.
- 1Eve Motion
Eve · Accessed Aug 29, 2026
Supports Matter-over-Thread motion sensing, integrated light-level measurement, sensitivity and duration controls, and motion-based lighting automation.
- 2Motion and Light Sensor P2
Aqara · Accessed Aug 29, 2026
Supports native Matter-over-Thread operation, independent motion and light sensing, adjustable mounting, and platform compatibility.
- 3Presence Sensor FP2
Aqara · Accessed Aug 29, 2026
Supports the distinction between PIR motion sensing and mmWave presence detection, including detection of very small movements and zone-based automations.
- 4Motion
Home Assistant · Accessed Aug 29, 2026
Supports motion-detected and motion-cleared automation triggers in Home Assistant.
- 5Illuminance
Home Assistant · Accessed Aug 29, 2026
Supports using measured illuminance in lux as an automation trigger or condition and distinguishes illuminance input from light brightness output.
- 6Motion detected
Home Assistant · Accessed Aug 29, 2026
Provides an official hallway example that turns on a light after motion is detected when dark.
- 7Indoor motion sensor
Philips Hue · Accessed Aug 29, 2026
Supports adjustable indoor motion-sensor behavior, sensitivity controls, and battery-powered smart-lighting use.

About the author
Maya Chen
Maya covers residential energy, HVAC controls, and practical home automation, translating technical systems into useful decisions for homeowners and renters.
More from Maya →Make your home smarter without buying every gadget.
One useful idea, one product worth knowing, and one energy-saving action—delivered weekly.
No spam. Unsubscribe anytime.
Semantic recommendations
Related reading
Selected from topic cluster, entities, tags, search intent, and editorial relationships.

How to Automate Lights Based on Motion and Ambient Room Brightness
Build smarter lighting that turns on only when a room is occupied and actually dark. This guide combines motion or presence sensing, ambient lux thresholds, timeouts, hysteresis, and Home Assistant automation logic.
Local DIY Smart Home Hub vs Cloud Ecosystems for Studio Apartments
Compare local smart home hubs with Apple Home, Google Home, Alexa, and other cloud ecosystems to choose the right setup for a small studio apartment.
Home Assistant Starter Guide: How to Build a Private, Local Smart Home
Home Assistant lets you run automations, dashboards, and device control on hardware inside your home. This beginner guide shows the cleanest 2026 path to a private, local-first setup.
How to Set Up an Offline Smart Home Network That Works When Wi-Fi Drops
Build a local-first smart home that keeps critical lights, sensors, locks, and automations working during internet outages—and can keep core automations alive even when the Wi-Fi access point itself fails.