
How to Recalibrate Smart Thermostat Temperature Offset Sensors
Learn how to verify a smart thermostat temperature error, apply the right offset, and fix placement problems before they waste comfort or HVAC energy.
Quick answer
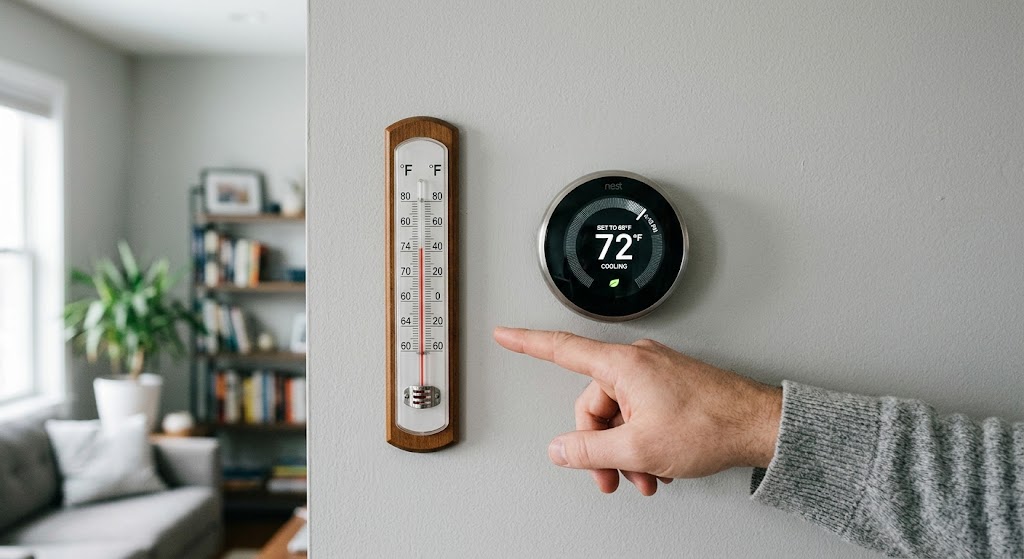
To recalibrate a smart thermostat, first verify that the thermostat or active remote sensor is consistently reading high or low compared with a reliable thermometer placed beside it. If your model supports Temperature Offset, Temperature Correction, or Indoor Display Offset, apply only the measured difference and retest; if the error changes with time of day or HVAC operation, correct sensor placement, drafts, sunlight, wall-cavity airflow, or sensor selection instead of masking the problem with a large offset.
Table of contents
- First, understand what “recalibration” actually means
- Step 1: Find out which sensor is actually controlling the HVAC
- A simple diagnostic rule
- Step 2: Compare the thermostat with a reliable reference thermometer
- Step 3: Rule out placement errors before changing the offset
- Direct sunlight
- Nearby supply or return airflow
- Wall-cavity air behind the thermostat
- Electronics and household heat sources
- Step 4: Calculate the temperature offset
- Use the smallest correction that solves the problem
- Step 5: Apply the correction according to your thermostat brand
- Sensi: Temperature Offset
- ecobee: Temperature Correction
- Resideo / Honeywell Home: Display offsets depend on model
- Google Nest: troubleshoot placement and sensor selection first
- Step 6: Retest after changing the offset
- Step 7: Reset the offset if you move the thermostat or sensor
- When you should not use a temperature offset
- The reading is wildly wrong
- The error changes throughout the day
- Only one room is uncomfortable
- The HVAC cannot reach the setpoint
- You are changing advanced HVAC thresholds instead of sensor correction
- A five-minute diagnostic checklist
- How accurate does the thermostat need to be?
- Remote sensors often solve the real problem better than an offset
- Conclusion
Key takeaways
- Use an offset only for a small, consistent temperature bias; a reading that changes with sunlight, drafts, or HVAC cycles points to a placement problem instead.
- Before adjusting anything, confirm which sensor is actually controlling the thermostat, because remote-sensor schedules and averaging can make the wall thermostat's temperature look misleading.
- Offset controls vary by brand: Sensi documents ±5°F adjustment on the thermostat, some Resideo models provide display offsets, while Nest Temperature Sensor settings emphasize placement and sensor selection rather than manual calibration.
- After any correction, retest under stable conditions and avoid changing advanced HVAC thresholds just to make the displayed temperature look right.
Editorial transparency
Who worked on this article and how it was handled.
- Written by
- Maya Chen
- Creation method
- Editorial research
AI assistance: AI assisted with research organization and drafting. Sources, factual claims, and the final article should be reviewed by a human editor before publication.
A smart thermostat that reads 74°F when the room feels closer to 71°F can create more than an annoying number on the wall. Because the thermostat uses temperature data to decide when heating or cooling should start and stop, a biased reading can shift comfort, increase runtime, or make a remote room feel consistently wrong.
The tempting fix is to open an advanced menu and add a temperature offset immediately. That can be the right solution for a small, consistent bias, but it can also hide a more important problem: direct sunlight, a supply vent, air leaking through the wall cavity, a remote sensor schedule, or even a thermostat that is displaying an average rather than its own internal sensor.
A proper recalibration process therefore starts with measurement, not adjustment. This guide explains how to determine whether the reading is truly wrong, calculate a safe offset, handle brand-specific differences, and recognize when moving or reconfiguring the sensor is more appropriate than changing the number.
First, understand what “recalibration” actually means
On many consumer smart thermostats, you are not recalibrating the physical temperature sensor in a laboratory sense. You are applying a software correction to the temperature that the thermostat reports or uses for control.
Manufacturers use several names for this:
- Temperature Offset
- Temperature Correction
- Indoor Display Offset
- Calibration Offset
The result is similar: if the thermostat consistently reads warmer or cooler than the actual air temperature at its location, the correction shifts the reported value.
That distinction matters because not every thermostat or remote sensor supports a field-adjustable offset. Resideo documentation for one C7189 remote indoor sensor, for example, states that the sensor is factory calibrated and cannot be recalibrated in the field. Google’s current Nest Temperature Sensor settings documentation likewise provides controls for placement, association, connection testing, schedules, and active-sensor selection, but does not document a user temperature-offset setting for the remote sensor.
So before searching for a hidden calibration menu, identify exactly which device is producing the temperature your HVAC system is using.
Step 1: Find out which sensor is actually controlling the HVAC
This is the most commonly skipped step in homes with remote sensors.
A thermostat can display one temperature while using another sensor—or an average of multiple sensors—to decide when the HVAC runs. If you compare a thermometer beside the wall thermostat with an app temperature that comes from a bedroom sensor, the comparison is meaningless.
Check the app or thermostat for settings such as:
- active sensor;
- participating sensors;
- sensor schedule;
- room priority;
- averaging;
- occupancy or Follow Me behavior.
Google documents that Nest thermostats can use a selected remote Temperature Sensor instead of the thermostat’s internal sensor. On the Nest Learning Thermostat 4th gen, selecting multiple sensors can cause the thermostat to use their average. That means a displayed or control temperature can differ from the physical temperature beside the thermostat without anything being “out of calibration.”
A simple diagnostic rule
Before comparing temperatures, make sure you know whether you are testing:
- the thermostat’s built-in sensor;
- one specific remote sensor; or
- an average of several sensors.
Only compare your reference thermometer with the sensor you are actually evaluating.
Step 2: Compare the thermostat with a reliable reference thermometer
Once you know which sensor is active, place a reliable digital thermometer as close to that sensor as practical without blocking airflow around either device.
Do not compare a thermostat in the hallway with a thermometer on a coffee table across the room. Even within one room, temperature can vary near windows, exterior walls, ceiling height, electronics, and HVAC vents.
For a useful comparison:
- Put the reference thermometer beside the thermostat or remote sensor.
- Keep both away from direct sun, lamps, portable heaters, cooking appliances, and open exterior doors.
- Let the thermometer and sensor settle under stable room conditions.
- Record both temperatures more than once rather than reacting to a single momentary difference.
- Note whether the discrepancy stays similar before, during, and after an HVAC cycle.
The goal is to find a repeatable bias.
For example:
| Reference thermometer | Thermostat | Difference | What it suggests |
|---|---|---|---|
| 72°F | 74°F | Thermostat +2°F | Possible -2°F correction if consistent |
| 72°F | 72–73°F | 0–1°F | Usually not worth aggressive correction |
| 72°F morning, 72°F afternoon | 72°F morning, 76°F afternoon | Variable | Investigate sunlight or heat source |
| 72°F HVAC off, 72°F thermostat | 72°F HVAC on, 75°F thermostat | Cycle-dependent | Investigate vent or wall-cavity airflow |
A calibration offset is best suited to the first pattern, not the last two.
Step 3: Rule out placement errors before changing the offset
A sensor can be accurate and still report a temperature that is unrepresentative of the room.
Google’s Nest troubleshooting guidance identifies several problem locations for remote sensors, including proximity to heating vents, stoves, hot-water pipes, direct sunlight, drafty doors, poorly insulated walls, and locations that are too high or low. It also warns against placing a sensor in a room that is not actually conditioned by the thermostat’s HVAC zone.
These issues matter because an offset only shifts the number. It does not fix the physical cause.
Direct sunlight
A sensor receiving afternoon sun can report several degrees warmer than the surrounding air. If the error appears mainly at one time of day, move or shade the sensor rather than applying a permanent correction that will be wrong at night.
Nearby supply or return airflow
A thermostat near a supply register may warm or cool more quickly than the occupied part of the room. A remote sensor close to a vent can have the same problem.
If the reading changes sharply whenever the HVAC starts, placement deserves more attention than calibration.
Wall-cavity air behind the thermostat
Wall-mounted thermostats have wiring passing through an opening behind the device. If that cavity carries warmer or cooler air, it can influence the internal sensor.
Ecobee’s thermostat documentation specifically warns that warm or cold air from the wall cavity can affect temperature readings and recommends sealing the wire opening appropriately. If you suspect this issue, follow the thermostat manufacturer’s installation guidance rather than improvising around HVAC wiring.
Electronics and household heat sources
Televisions, lamps, routers, game consoles, kitchens, and other heat-producing equipment can create a localized warm zone. The thermostat does not know that the rest of the room is cooler; it only knows the temperature where its sensor sits.
Step 4: Calculate the temperature offset
If the sensor is in a reasonable location and the difference is consistent, calculate the correction from the reference temperature.
Use this simple relationship:
Desired correction = reference temperature − thermostat reading
Example:
- Reference thermometer: 72°F
- Thermostat: 74°F
- Difference: 72 − 74 = -2°F
Conceptually, the thermostat needs to read 2°F lower.
However, do not assume every manufacturer’s menu expresses the correction in exactly the same direction. One interface may say “adjust display by -2°F,” while another may phrase the setting differently. Confirm what the menu means before saving.
Use the smallest correction that solves the problem
Do not use a large offset to force a preferred comfort number onto a badly placed sensor.
If you need a 5°F, 8°F, or 10°F correction to make the thermostat agree with the room, pause and investigate the environment, sensor selection, equipment performance, or sensor health. A large offset may make the displayed number look reasonable while HVAC control remains poorly matched to the home.
Step 5: Apply the correction according to your thermostat brand
There is no universal menu path. The adjustment range and whether remote sensors are included vary significantly by platform.
Sensi: Temperature Offset
Sensi documents a Temperature Offset feature that adjusts the room temperature reading by ±5°F.
The current Sensi app path is:
Thermostat → Settings → System settings → Temperature Offset
Sensi states that the thermostat will then use the adjusted value as the room temperature. It also explicitly notes that the feature applies to the thermostat, not separate sensors.
That last detail is important. If the problem is a remote sensor, changing the thermostat offset may not solve the sensor discrepancy you are actually seeing.
ecobee: Temperature Correction
Ecobee documentation describes a Temperature Correction control in the thermostat’s installation thresholds. On supported models, the correction changes the thermostat sensor reading rather than physically recalibrating the sensing hardware.
The documented path is generally:
Main Menu → Settings → Installation Settings → Thresholds → Temperature Correction
Ecobee also cautions that when SmartSensors are participating, users should understand whether they are comparing the thermostat’s own sensor or a combined/averaged temperature.
Because menu structures can change between models and software generations, use the exact manual for your thermostat before changing installer-level settings.
Resideo / Honeywell Home: Display offsets depend on model
Resideo’s current ElitePRO installation documentation includes Indoor Display Offsets that can move the displayed indoor temperature higher or lower on compatible models. It also explains that wireless sensor priority can affect what indoor temperature is shown.
This is a useful example of why “my thermostat reads wrong” can actually be a configuration issue rather than a sensor error.
Older Resideo remote-sensor documentation also shows the opposite case: some sensors are factory calibrated and cannot be recalibrated in the field.
The correct approach is therefore model-specific. Do not copy an installer setting from a different Honeywell Home or Resideo thermostat just because the menus look similar.
Google Nest: troubleshoot placement and sensor selection first
Google’s current Nest Temperature Sensor settings provide controls for:
- associating sensors with thermostats;
- testing their connection;
- assigning room/placement labels;
- scheduling which sensor is active;
- manually selecting active sensors.
Google’s troubleshooting guidance focuses on moving a poorly located sensor, changing which sensor is active, changing its schedule, and verifying that the correct zone is being controlled.
For the Nest Temperature Sensor itself, the current support documentation does not expose a manual user temperature-offset control. If a Nest sensor is consistently behaving strangely, use Google’s placement and connection troubleshooting and contact support if the issue persists.
Step 6: Retest after changing the offset
Do not treat the new number as correct simply because you entered the calculated correction.
Repeat the comparison with your reference thermometer after the thermostat has had time to settle. Check the reading under more than one operating condition.
A good result looks like this:
- thermostat and reference remain close during stable room conditions;
- the difference remains reasonably consistent over time;
- HVAC cycling does not suddenly create a large sensor error;
- the occupied room feels more consistent with the displayed temperature.
If the offset fixes the reading at noon but makes it wrong in the evening, you have probably compensated for a changing environmental effect rather than calibrated a stable bias.
Step 7: Reset the offset if you move the thermostat or sensor
An offset is tied to the environment where you measured it.
If you move a remote sensor from a shaded bedroom to a sunny office, or relocate a thermostat during renovation, do not assume the old correction still applies. Return the correction to neutral where appropriate, then repeat the comparison process.
The same principle applies when you:
- add or remove participating remote sensors;
- change sensor averaging or priority;
- change which sensor is active at different times;
- seal a draft behind the thermostat;
- alter nearby furniture, vents, or window coverings in a way that changes airflow.
A corrected environment deserves a fresh measurement.
When you should not use a temperature offset
Temperature correction is useful, but it is not a universal troubleshooting tool.
The reading is wildly wrong
If a thermostat reports a temperature that is far outside the plausible room condition, the problem may be a failed sensor, communication issue, mounting problem, or software fault. Sensi, for example, recommends contacting support when its thermostat reports obviously abnormal values or sensor errors rather than relying on offset adjustment.
The error changes throughout the day
A changing error points toward sun exposure, drafts, local heat sources, or room stratification. A fixed offset cannot correct a moving target.
Only one room is uncomfortable
If the thermostat itself reads correctly but one bedroom is always warmer, recalibrating the thermostat can make the rest of the home worse. The problem may instead be airflow, zoning, insulation, solar gain, or sensor scheduling.
The HVAC cannot reach the setpoint
Do not keep increasing calibration offsets because the system fails to heat or cool the home properly. Restricted airflow, dirty filters, duct issues, refrigerant problems, incorrect equipment sizing, or other HVAC faults require diagnosis rather than display correction.
You are changing advanced HVAC thresholds instead of sensor correction
Compressor minimum run time, heat-pump balance points, staging, cycle rates, and equipment configuration are not temperature-calibration controls. Changing them merely to make the thermostat “feel more accurate” can alter how the HVAC equipment operates.
If the correct offset option is not documented for your model, stop before changing unrelated installer settings.
A five-minute diagnostic checklist
Before applying any temperature correction, work through this order:
- Identify the active sensor. Confirm whether the thermostat, one remote sensor, or an average is controlling the HVAC.
- Place a reliable thermometer beside that sensor. Compare temperatures in the same physical location.
- Wait for stable conditions. Avoid testing immediately after moving the thermometer or while direct sun is hitting the sensor.
- Repeat the reading. Make sure the error is consistent rather than a one-time difference.
- Inspect placement. Look for vents, drafts, windows, heat-producing electronics, exterior walls, and wall-cavity airflow.
- Calculate the difference. Reference temperature minus thermostat reading gives the conceptual correction.
- Use the manufacturer’s documented offset control. Do not guess at installer settings.
- Retest after adjustment. Verify comfort and sensor agreement over time.
This process is more reliable than repeatedly changing the thermostat until the displayed number matches how the room feels.
How accurate does the thermostat need to be?
Home thermostats are control devices, not laboratory instruments. A tiny difference between two consumer temperature sensors does not automatically justify calibration.
More important questions are:
- Is the difference consistent?
- Does it materially affect comfort?
- Is the thermostat cycling the HVAC based on a clearly biased temperature?
- Does the reference thermometer itself have enough stability to justify the correction?
If two devices disagree by only a small amount, an aggressive offset can create more confusion than it solves. The useful target is consistent, representative control of the occupied space—not forcing every thermometer in the room to display an identical number.
Remote sensors often solve the real problem better than an offset
Sometimes the thermostat is accurate but mounted in the wrong place for how you use the home.
A hallway thermostat may reach 72°F while the west-facing bedroom is 76°F. Applying a -4°F offset to the hallway thermostat would not calibrate anything; it would simply force the entire HVAC system to overcool the rest of the home in an attempt to compensate for one room.
A better solution may be to use a properly placed remote sensor during the hours when that room matters.
Nest explicitly supports scheduling different sensors at different times of day. For example, a bedroom sensor can control nighttime comfort while the thermostat or another sensor controls daytime operation. Other ecosystems offer their own approaches to sensor participation, averaging, occupancy, or room priority.
This is a control strategy problem, not a calibration problem.
Conclusion
Recalibrating a smart thermostat should begin by proving that a calibration error actually exists. Confirm which sensor is controlling the HVAC, compare it with a reliable thermometer in the same location, and make sure the difference is small and repeatable before applying an offset.
If the reading changes with sunlight, HVAC cycles, drafts, or time of day, fix the environment or sensor selection instead. And if your thermostat does support Temperature Offset, Temperature Correction, or an Indoor Display Offset, apply only the measured correction, retest it, and leave unrelated HVAC installer settings alone.
Common questions
Questions this guide answers
How do I know if my smart thermostat needs a temperature offset?
Compare the thermostat with a reliable thermometer placed close to the same sensor location. An offset is appropriate when the difference is small and repeatable under stable conditions. If the difference changes substantially during the day, the cause is more likely sensor placement, direct sunlight, drafts, wall-cavity air, or a different remote sensor being active.
What temperature offset should I use if my thermostat reads 2°F too high?
If a trusted thermometer consistently reads 72°F while the thermostat reads 74°F, the target correction is generally 2°F downward. Because thermostat menus define offsets differently, confirm the direction shown by your model before saving the change, then verify the result again.
Can Nest Temperature Sensors be manually calibrated with an offset?
Google's current Nest Temperature Sensor settings documentation focuses on sensor association, connection testing, placement, scheduling, and choosing which sensor controls the thermostat; it does not document a user-adjustable temperature offset for the Nest Temperature Sensor. If a Nest sensor reads unusually warm or cool, placement and active-sensor selection should be checked first.
Can Sensi thermostats adjust the displayed room temperature?
Yes. Sensi documents a Temperature Offset feature that can adjust the thermostat's room temperature reading by plus or minus 5°F. Sensi also notes that this offset applies to the thermostat itself rather than separate sensors.
Why does my thermostat temperature change when the HVAC starts running?
A reading that shifts when heating or cooling starts can indicate air from a nearby supply or return vent, leakage through the wiring hole behind the thermostat, or another placement issue. A fixed offset is designed for a consistent bias, not a temperature error that changes with equipment operation.
Evidence & further reading
Sources & references
Primary and authoritative references used to support or contextualize this article. Links open the original source.
- 1Temperature Offset
Sensi by Copeland · Accessed Aug 25, 2026
Supports Sensi's ±5°F Temperature Offset control, menu path, thermostat-only limitation, and guidance that persistent inaccuracies can reflect thermostat location or HVAC sizing.
- 2How to change Nest Temperature Sensor settings
Google Home and Nest Help · Accessed Aug 25, 2026
Supports Nest sensor association, connection testing, schedules, active-sensor selection, and current multi-sensor behavior.
- 3Troubleshoot issues with the Nest Temperature Sensor
Google Home and Nest Help · Accessed Aug 25, 2026
Supports checking the active sensor, target temperature, sensor placement, schedule, connection, and thermostat fallback behavior.
- 4Troubleshooting when a Nest Temperature Sensor isn't in a good spot
Google Home and Nest Help · Accessed Aug 25, 2026
Supports placement cautions involving vents, heat sources, direct sunlight, drafts, poorly insulated walls, sensor height, and HVAC zones.
- 533-00762-01 ElitePro Series Thermostats Installation Manual
Resideo · Accessed Aug 25, 2026
Supports indoor display offsets on compatible Resideo thermostats and explains that sensor priority or other configuration can affect the displayed indoor temperature.
- 668-0280—01 - VisionPRO 8000 Touchscreen Programmable Thermostat
Resideo · Accessed Aug 25, 2026
Supports the important limitation that some remote indoor temperature sensors are factory-calibrated and cannot be recalibrated in the field.
- 7ecobee Smart Thermostat Premium Setup and User Manual
ecobee (manual hosted by GeoSmart Energy) · Accessed Aug 25, 2026
Supports ecobee Temperature Correction guidance, the distinction between thermostat readings and sensor averages, and the effect of wall-cavity airflow on thermostat temperature readings.

About the author
Maya Chen
Maya covers residential energy, HVAC controls, and practical home automation, translating technical systems into useful decisions for homeowners and renters.
More from Maya →Make your home smarter without buying every gadget.
One useful idea, one product worth knowing, and one energy-saving action—delivered weekly.
No spam. Unsubscribe anytime.
Semantic recommendations
Related reading
Selected from topic cluster, entities, tags, search intent, and editorial relationships.
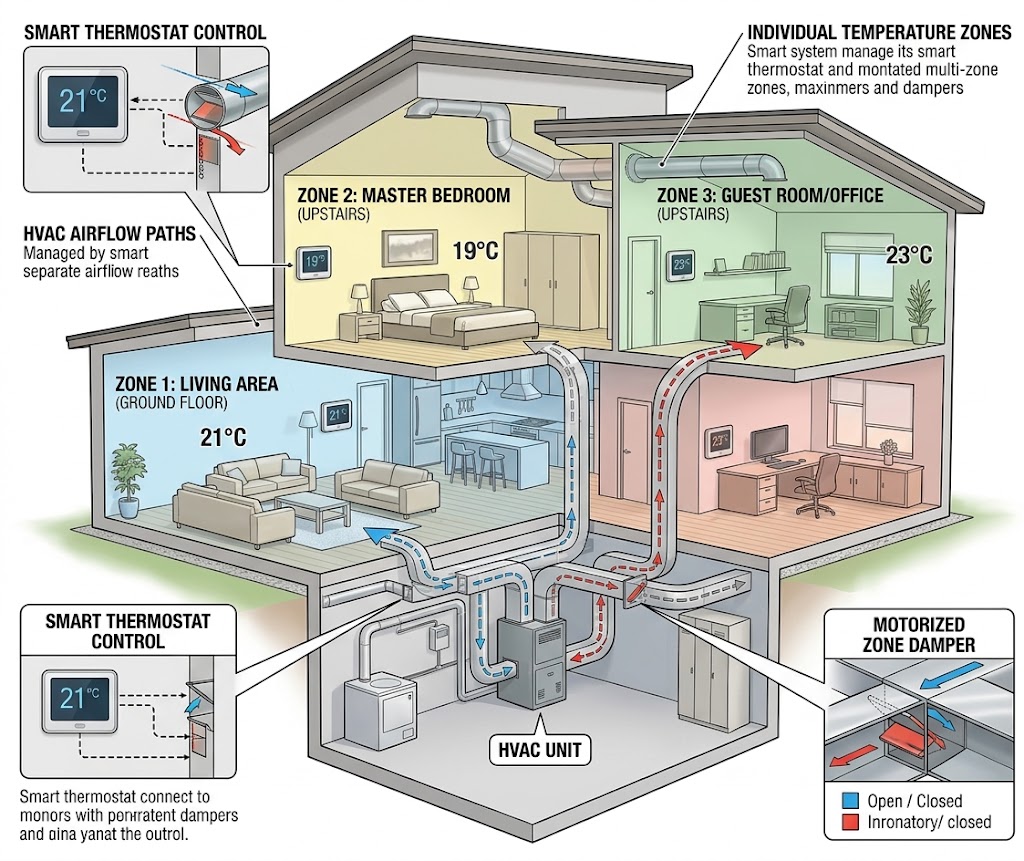
How Smart Thermostats Handle Multi-Zone HVAC Systems Efficiently
Multi-zone HVAC works best when thermostats, zone controls, sensors, and equipment capacity cooperate instead of fighting each other.
Smart Thermostat Geofencing for Back-to-School Family Schedules
Use smart thermostat geofencing without leaving kids, parents, or caregivers uncomfortable when back-to-school schedules change from day to day.
How to Automate Ceiling Fans for Reverse Rotation in Upcoming Fall
Set ceiling fans for fall without climbing a ladder: learn which smart fans can reverse from an app, what can be automated, and the safest seasonal setup.
How to Set Up NFC Tags Around the House for One-Touch Lighting
Use inexpensive NFC tags as intentional one-touch lighting controls for bedside scenes, entryways, desks, and whole-home off routines without adding wall switches.