
How to Stop Drafts Under Exterior Doors Without Replacing the Frame
Cold air under an exterior door usually comes from a worn sweep, misadjusted threshold, tired weatherstripping, or unsealed trim. Here is how to fix it without replacing the frame.
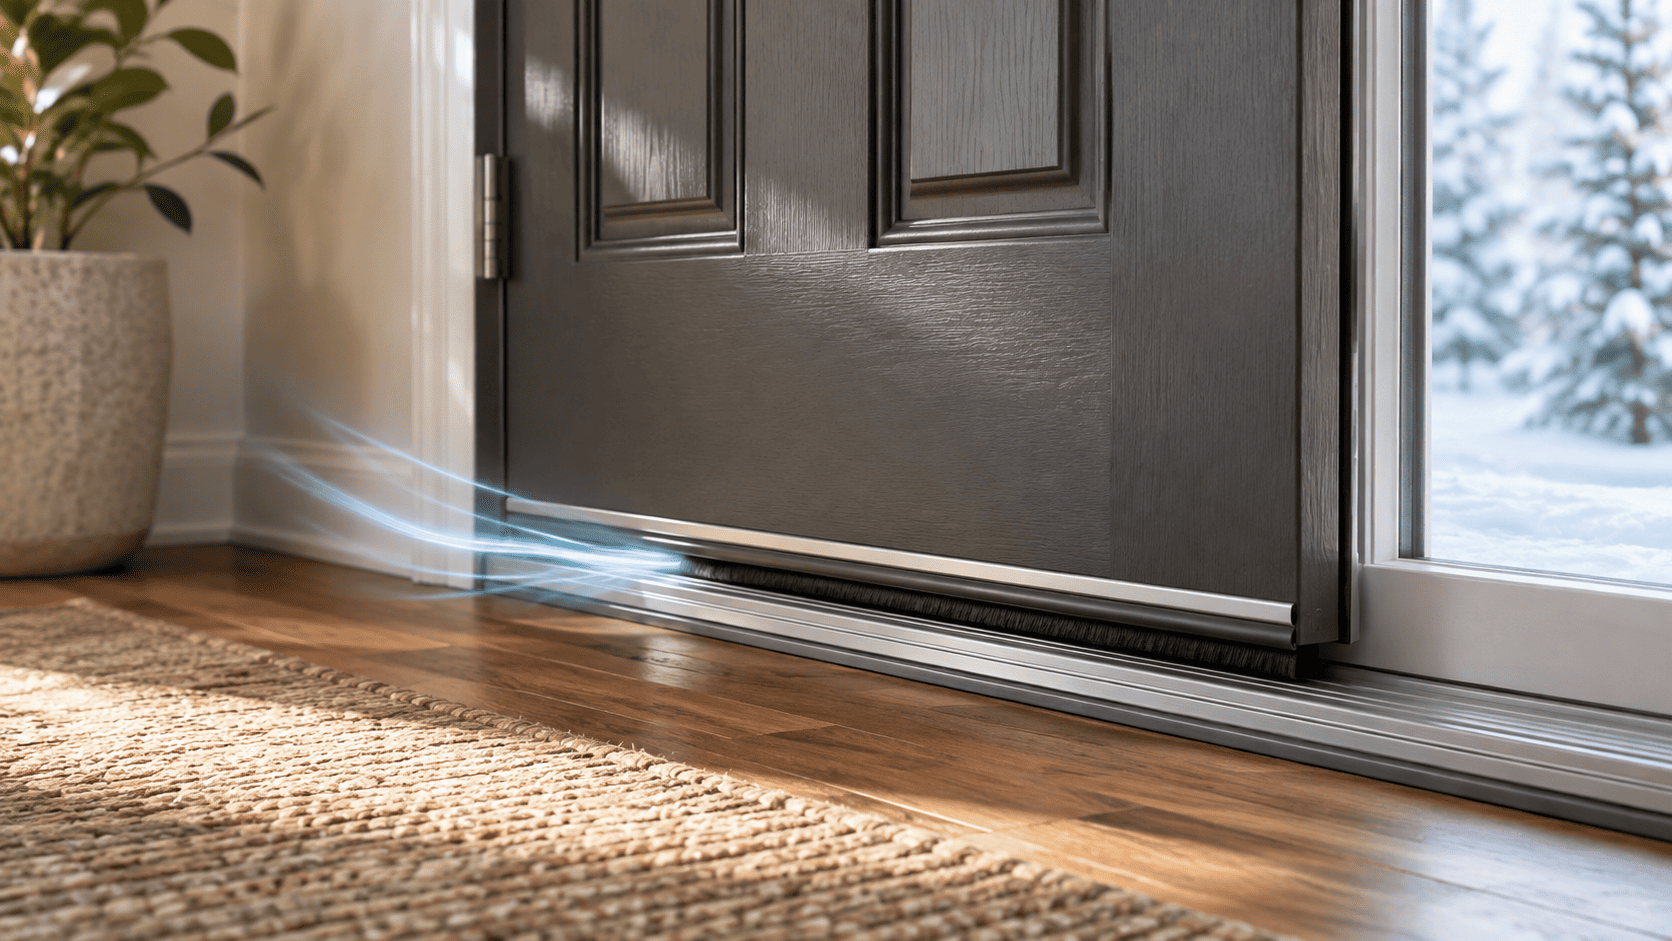
Quick answer
In most homes, you can stop drafts under an exterior door without replacing the frame by identifying the exact leak path, installing or replacing the bottom door sweep or door shoe, adjusting the threshold if it is adjustable, renewing the weatherstripping on the jamb, and sealing any hidden gaps behind the interior trim with low-expansion foam, backer rod, or caulk. Frame replacement is usually only necessary when the door unit is severely damaged, rotten, badly warped, or fundamentally misaligned.
Table of contents
- Step 1: Confirm Where the Draft Is Really Coming From
- Step 2: Replace the Bottom Seal First
- Signs the bottom seal is the problem
- How tight should it be?
- Common sweep options
- Step 3: Check Whether the Threshold Is the Real Issue
- When threshold adjustment helps
- A practical rule
- Step 4: Renew the Weatherstripping on the Sides and Top
- What to look for
- Compression matters
- Step 5: Seal Hidden Gaps Behind the Trim
- Signs the trim area is leaking
- Best materials for this job
- Important caution
- Step 6: Make Sure the Door Is Actually Aligned
- Common alignment clues
- Step 7: Decide Whether You Need a Temporary or Permanent Fix
- Good temporary options
- Better permanent options
- What Usually Works Best in Real Life
- When You Probably Do Need More Than a Simple Retrofit
- Mistakes to Avoid
- 1. Replacing only the sweep without testing anything
- 2. Using foam that expands too aggressively
- 3. Over-tightening the bottom seal
- 4. Ignoring the corners
- 5. Assuming frame replacement is the default answer
- A Simple Decision Tree
- Conclusion
Key takeaways
- Most drafts under exterior doors come from worn sweeps, bad threshold contact, or missing weatherstripping—not from the whole frame needing replacement.
- Always identify the exact leak path first with a paper, flashlight, or smoke test before buying materials.
- A door sweep and an adjustable threshold often solve bottom-edge drafts faster and cheaper than door replacement.
- If air is leaking around the jamb, sealing behind the trim with low-expansion foam, backer rod, or caulk can make a major difference.
- If the door is rotten, badly warped, or structurally out of square, repair or replacement may still be the better long-term fix.
Editorial transparency
Who worked on this article and how it was handled.
- Written by
- Maya Chen
- Creation method
- Editorial research
AI assistance: AI assisted with research organization and drafting. Sources, factual claims, and the final article should be reviewed by a human editor before publication.
Cold air sneaking under a front door feels like a small problem until winter settles in and the entryway never seems comfortable. The good news is that a draft under an exterior door often does not mean you need a full replacement door unit or a new frame. In many cases, the real problem is much simpler: the bottom seal is worn out, the threshold is too low, the weatherstripping is tired, or the trim area around the jamb was never properly air sealed.
That is why the smartest fix starts with diagnosis, not demolition. If you know exactly where the air is entering, you can usually solve it with a sweep, threshold adjustment, fresh weatherstripping, or targeted sealing behind the trim.
This guide walks through the practical order of operations for stopping drafts under exterior doors while keeping the existing frame in place.
Step 1: Confirm Where the Draft Is Really Coming From
Before you buy anything, verify the leak path.
ENERGY STAR recommends several simple DIY leak checks for windows and doors:
- Paper test: Shut the door on a strip of paper. If you can pull the paper out easily without resistance, the seal is weak at that point.
- Flashlight test: At night, shine a flashlight along likely gaps while someone checks from the other side. If light passes through, air can pass through too.
- Smoke test: On a windy day, use incense smoke or a similar visible air stream to see where air moves in or out.
This matters because a draft that feels like it is “under the door” is sometimes coming from one of three other places:
- the door jamb weatherstripping on the sides or top;
- the gap behind the interior trim around the frame; or
- the threshold-to-sweep interface, where the seal is touching only in some spots.
If you skip this step, you may install a new sweep and still feel cold air because the real leak is higher up the jamb or behind the casing.
Step 2: Replace the Bottom Seal First
For true under-door drafts, the most common fix is a new door sweep or door shoe.
A sweep mounts to the bottom edge or face of the door and uses flexible rubber, vinyl, brush, or a similar sealing element to close the gap against the threshold. A door shoe wraps around the bottom of the slab and usually provides a cleaner, more durable seal, but it can require a bit more fitting.
Signs the bottom seal is the problem
Look for these clues:
- visible daylight under the closed door;
- a brittle, cracked, flattened, or missing sweep;
- the sweep touching on one side but not the other;
- cold air concentrated at the bottom center or corners.
How tight should it be?
The seal should make light, even contact across the threshold. It should not be so loose that daylight or air passes through, and it should not be so tight that the door drags hard or becomes difficult to latch.
That balance is important. Over-compressing the seal can make the door awkward to use and may wear the sweep out quickly.
Common sweep options
| Type | Best use | Pros | Watch-out |
|---|---|---|---|
| Surface-mount sweep | Quick retrofit | Easiest to install | More visible from inside or outside |
| Door shoe / U-shaped bottom | Cleaner, more durable seal | Better long-term contact | Can require removing the door |
| Brush-style sweep | Uneven thresholds or garage-adjacent situations | Good on slightly irregular surfaces | Often less airtight than a tight rubber seal |
| Automatic door bottom | Premium retrofit | Drops a seal only when door closes | More expensive and more technical |
For most homeowners, a standard quality sweep is the simplest first move.
Step 3: Check Whether the Threshold Is the Real Issue
If the sweep is in decent condition but still not sealing, the threshold may be sitting too low.
Many exterior thresholds are adjustable. That means you can raise the sealing surface slightly so the door bottom seal meets it evenly.
When threshold adjustment helps
Threshold adjustment is often the answer when:
- the sweep looks fine but barely touches the threshold;
- the seal works at the corners but leaks in the middle;
- the floor or slab has settled slightly;
- a previous owner changed the sweep but never tuned the threshold height.
A practical rule
Raise the threshold gradually and test the door after each adjustment. You want just enough contact to stop air movement, not so much that the door rubs, binds, or requires force to shut.
If your threshold is damaged, bowed, or badly worn, you may need to replace the threshold itself. That is still far less invasive than replacing the entire frame.
Step 4: Renew the Weatherstripping on the Sides and Top
Even when the cold air feels strongest near the floor, the door jamb weatherstripping may be part of the problem. Building America guidance for exterior doors emphasizes tight-fitting weatherstripping around the top and sides and a tight-fitting door sweep at the bottom.
What to look for
Check whether the weatherstripping is:
- compressed flat,
- torn,
- hardened with age,
- missing in spots,
- or no longer touching the door consistently.
If the paper test fails at the latch side or hinge side, fresh weatherstripping can make a big difference.
Compression matters
Good weatherstripping should compress slightly when the door closes. If it barely touches, it will leak. If it is too thick, the latch may not catch properly.
This is why some “the door still leaks” complaints are really alignment complaints. The weatherstrip can only work if the slab closes squarely against it.
Step 5: Seal Hidden Gaps Behind the Trim
This is the fix many homeowners overlook.
The draft may not be coming through the visible bottom gap at all. It may be traveling through the rough opening around the door frame and escaping at the casing or baseboard.
ENERGY STAR specifically describes a project for sealing behind window and door trim. Building Science Education and the Building America Solution Center likewise note that the gap between the jamb and the rough opening should be air sealed with materials such as low-expansion foam, backer rod, or caulk. They also warn that fibrous insulation alone is not enough to stop airflow.
Signs the trim area is leaking
You may have a trim-area leak if:
- the draft is strongest at the lower corners of the frame,
- the baseboard beside the door feels cold,
- the door hardware seems fine but the area around the casing is still chilly,
- or the house is older and the trim has likely never been removed for sealing.
Best materials for this job
Depending on the gap size, typical options include:
- Low-expansion foam for windows and doors for larger concealed gaps;
- Backer rod plus caulk for controlled, clean sealing;
- Caulk for small finish gaps at the trim or casing.
Important caution
Use low-expansion products designed for doors and windows. High-expansion foam can distort the jamb and create new fit problems.
Step 6: Make Sure the Door Is Actually Aligned
Sometimes the door is technically “sealed,” but only at one corner. A slight sag or misalignment can create an uneven bottom gap that no sweep adjustment fully fixes.
Common alignment clues
- the reveal around the door looks uneven;
- the latch catches poorly;
- the top corner rubs while the opposite bottom corner leaks;
- the sweep contacts only one side of the threshold.
Before assuming the frame must be replaced, check for smaller correctable issues such as:
- loose hinge screws,
- hinge movement,
- strike-plate position,
- or minor slab adjustment needs.
A surprisingly large number of draft complaints improve after basic hinge tightening and latch-side adjustment.
Step 7: Decide Whether You Need a Temporary or Permanent Fix
Not every home needs the same level of repair.
Good temporary options
If you need a stopgap during cold weather, a draft snake or temporary bottom draft blocker can reduce discomfort quickly. These are useful for renters or for short-term relief while you plan a better repair.
Better permanent options
If you own the home and want the draft solved correctly, the longer-lasting sequence is usually:
- inspect and diagnose the leak path,
- replace the bottom seal,
- adjust or replace the threshold if needed,
- renew weatherstripping,
- seal behind the trim,
- correct alignment.
That sequence addresses both the visible gap and the hidden air paths around the frame.
What Usually Works Best in Real Life
If the door and frame are generally in decent shape, the highest-probability fix is usually a combination of:
- a new bottom sweep or door shoe,
- threshold tuning,
- and fresh weatherstripping.
If the draft remains after those steps, the next best move is to investigate behind the trim and air seal the rough opening.
That layered approach works because many doors leak in more than one place at the same time.
When You Probably Do Need More Than a Simple Retrofit
This article is about fixing the problem without replacing the frame, but there are cases where the frame or whole door unit may really be the issue.
Consider a bigger repair if you see:
- visible rot or water damage,
- major warping in the door slab,
- a threshold that is structurally failing,
- a frame that is badly out of square,
- repeated leakage despite correct seals and alignment,
- or significant damage from settling or forced entry.
If the structure itself is compromised, better weatherstripping will only be a temporary patch.
Mistakes to Avoid
1. Replacing only the sweep without testing anything
You can waste time and money if the leak is actually coming from the trim or jamb.
2. Using foam that expands too aggressively
Wrong foam can bow the jamb and make the door harder to close.
3. Over-tightening the bottom seal
A seal that drags excessively is uncomfortable to use and often wears out faster.
4. Ignoring the corners
Lower corners are common leak points because that is where trim gaps, threshold transitions, and weatherstrip issues all meet.
5. Assuming frame replacement is the default answer
For many homeowners, replacement is far beyond what the problem actually requires.
A Simple Decision Tree
If you want the shortest path to a solution, follow this order:
- You see daylight under the slab: start with the sweep and threshold.
- The paper test fails on the sides or top: replace weatherstripping.
- The door seals poorly at one corner only: check alignment and hinges.
- The area around the trim feels cold even after new seals: seal behind the casing and jamb.
- The door is rotten, warped, or badly out of square: price a larger repair or replacement.
That is the logic that keeps you from replacing good parts unnecessarily.
Conclusion
You can often stop drafts under exterior doors without replacing the frame, and the fix is usually more about better sealing than major carpentry.
Start by locating the leak with a simple test. Then focus on the likely trouble spots in order: bottom sweep, threshold adjustment, weatherstripping, trim-area air sealing, and basic alignment. That sequence solves the vast majority of “cold air under the door” complaints while preserving the existing frame.
If the door is still leaking badly after those steps—or if the slab or frame is visibly damaged—then it is time to think about a bigger repair. But for most homes, a careful retrofit beats a full replacement.
Common questions
Questions this guide answers
What usually causes drafts under an exterior door?
The most common causes are a worn or poorly fitted door sweep, an out-of-adjustment threshold, compressed or missing weatherstripping, hidden air gaps around the jamb or trim, or a door that is slightly out of alignment.
Can I fix a drafty door without replacing the frame?
Yes. Many draft problems can be fixed with a new sweep, threshold adjustment, fresh weatherstripping, minor hinge or latch adjustments, and air sealing behind the trim. Full frame replacement is not the first step for most draft complaints.
Should the door sweep touch the threshold tightly?
It should make light, consistent contact or slight compression, but it should not drag aggressively. Too much pressure can make the door hard to open, wear the sweep faster, and still fail to seal evenly.
What if the leak is not only under the door?
Check the sides, top, and trim too. ENERGY STAR recommends tests such as a paper test, flashlight test, or smoke test to identify exactly where air is leaking so you can choose the right fix.
Evidence & further reading
Sources & references
Primary and authoritative references used to support or contextualize this article. Links open the original source.
- 1Home Upgrades
U.S. Department of Energy · Accessed Aug 10, 2026
Supports DOE guidance that exterior doors can leak air and waste energy, and that air sealing and insulation materials can reduce leaks.
- 2Seal and Insulate with ENERGY STAR
ENERGY STAR · Accessed Aug 10, 2026
Supports general energy and comfort benefits of air sealing and weatherstripping doors.
- 3What to Look For: DIY Checks and Inspections
ENERGY STAR · Accessed Aug 10, 2026
Supports the flashlight, paper, and smoke tests to identify door and window leaks.
- 4Sealing Behind Window & Door Trim Project
ENERGY STAR · Accessed Aug 10, 2026
Supports sealing behind interior trim using low-expansion foam, fiberglass, backer rod, and caulk, while avoiding frame distortion.
- 5Air Sealing Doors Adjacent to Unconditioned Space
Building America Solution Center · Accessed Aug 10, 2026
Supports use of tight-fitting weatherstripping, a tight-fitting door sweep, and proper air sealing around the rough opening.
- 6Rough Opening Flashing: Air Sealing
Building Science Education · Accessed Aug 10, 2026
Supports the use of low-expansion foam around doors and windows and warns against relying on fibrous insulation alone for air sealing.

About the author
Maya Chen
Maya covers residential energy, HVAC controls, and practical home automation, translating technical systems into useful decisions for homeowners and renters.
More from Maya →Make your home smarter without buying every gadget.
One useful idea, one product worth knowing, and one energy-saving action—delivered weekly.
No spam. Unsubscribe anytime.
Semantic recommendations
Related reading
Selected from topic cluster, entities, tags, search intent, and editorial relationships.
Baseboard Heater Smart Switches: Cut Costs on Older Heating Systems
Smart controls can make old electric baseboard heating cheaper to run by scheduling setbacks and controlling rooms independently—but only with the right line-voltage hardware.
Is Solar Attic Fan Installation Worth It for Summer Cooling?
Solar attic fans can lower attic temperatures, but the cooling-bill payoff is often smaller than expected. Here is when they help, when they can backfire, and what to fix first.

5 Smart Thermostat Placement Mistakes That Can Waste Hundreds on HVAC Bills
Wrong thermostat placement can distort temperature readings, increase HVAC runtime, and quietly undermine both comfort and energy savings.
Are Smart Vent Covers Worth It? (HVAC Airflow Test & Energy Savings)
Smart vent covers can improve room-by-room comfort, but their energy savings are less certain than many homeowners expect. Here is how to judge whether they are worth buying.